


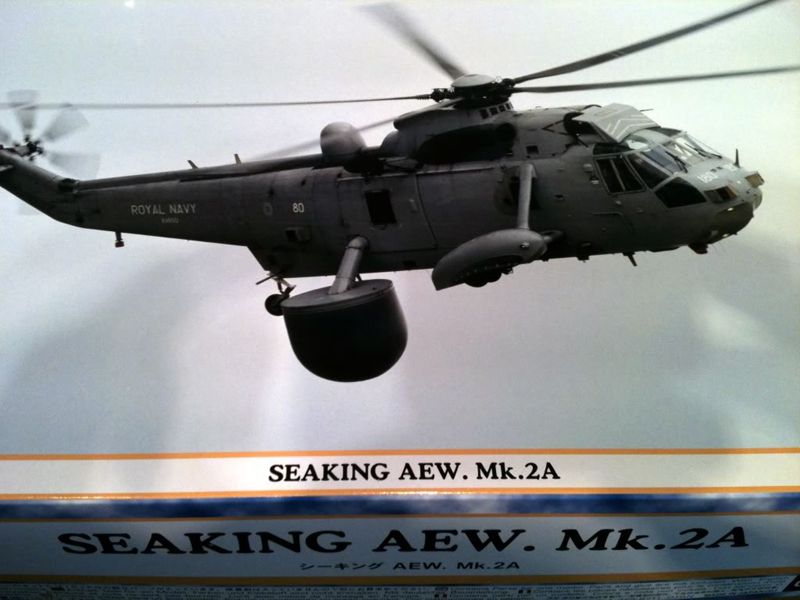
1:48 Hasegawa Sea King
AEW Mk.2A
By Richard Nellyer
- Manufacturer:- Hasegawa
- Kit:- 09863 Sea King AEW Mk.2A
- Scale:- 1:48
- Extra's:- Eduard 4948 Big ED, Rotor Craft resin deflated radome
- Paint:- Tamiya, Vallejo Model Air, Citadel Metallics.
Hello again everybody! In recent months I feel I have been a bit slack in my model builds and my build threads so it's time to redress this! So here we go with the Hasegawa 1/48 Sea King AEW Mk.2A (finally at a sensible price, thank you Hannants!!).
I have have always had an interest in this aircraft. My childhood was filled with the sound of Sea Kings from nearby RNAS Culdrose. When I was at school we had one land on the rugby pitch at St Ives school where the pilots and crew gave a talk about what they do. The Sea Kings of 771sqn have rescued my friends at sea and in the surf and one even put down after an oil pressure loss on The Island in St Ives (it's not really an island just the headland, Cornish logic for you!). A second Sea King HAS 5 came to it's aid and landed on the hump of the field next to it's stricken mate and promptly smashed all it's aerial on the underside! Embarassed looks all round and now my dad (the local police officer at the time) had 2 Sea Kings to look after!
At the age of 15 for my work experience I chose to work on airframes and engines with 820sqn at RNAS Culdrose and spent a fantastic week installing radar sets and poking around in gearboxes (not sure I'd want to fly in one after that!!) and the 2 icings on the cake were a day spent with 771sqn and 3hrs flying the simulator with a Norwegian crew. I took the controls for an hour and did very well, all things considering until a night landing on the Argus in Mounts Bay in a heavy swell........yep I came down as the ship came up and promptly rolled it into the sea!
So here's some history on the Sea King AEW.
With the decomissioning of the last of the Fleet Carriers, HMS Ark Royal, in 1978 the Royal Navy lost it's Airbourne Early Warning capability which until then was provided by it's fleet of ageing (albeit wonderful) Gannet AEW 3s. This role was fulfilled by the RAF's Shackleton AEW Mk 2 but the Falklands conflict was beyond the range of the old 4 engined aircraft and the Royal Navy went without carrier based Airbourne Early Warning capability. This proved very costly with the loss of a number of ships and many crew to low level Argentine attack aircraft fitted with the Exocet missile. Realising this the Royal Navy hastily developed the Sea King HAS 2 (AEW) with the retro-fitting of the Thorn-EMI ARI 5930/3 Searchwater radar on a swivel arm from the rear cabin door and covered by an inflatable radome to 2 Sea King HAS 2s. This allowed the necessary ground clearance when landing and allowed the radar to be deployed below the mass of the helicopter thus giving it an unrestricted view of the area. These were flying in only 11 weeks and saw service in the Falklands with 824sqn aboard HMS Illustrious after the end of the conflict. A further 7 Sea Kings were converted and the type was designated Sea King AEW Mk.2 and were in service from 1985 with 849sqn, the traditional home of AEW in the Fleet Air Arm.
An upgrade package, Project Cerberus, was comissioned in 2003 replacing the existing radar and associated systems with the Thales 2000AEW radar system and these were designated Sea King ASaC.7 (Airbourne Surveillance and Control). This extended the capability of the aircraft significantly with the ability track 400 targets over the originals 250. This variant has been serving with British forces in Afghanistan.
The type is to be replaced in the future with either an AEW variant of the Merlin or a fixed wing alternative (if we get a carrier to put one on that is!!).
The Sea King has been the work horse of the FAA for many years.
The ASW variant has now been replaced by the Merlin HM 1, but the Sea King AEW (now ASaC.7) and the rescue variant with 771sqn continue to be operational.
The kit itself.
Hasegawa's Sea King has been about for a good while with the original moulding in Sikorsky SH-3H form first going into production in 1995. Since then they have produced a few different variants with the Westland Sea King making an appearence in 2009 with this the AEW Mk.2A and later the RAF HAR.3. These kits were victims of Hasegawa's horrendous pricing with the AEW going for around £50 - £55 and the HAR.3 for a whopping £70!!! Silly money for a 1/48 scale kit and that put me off initially. Even with Flightpath's excellent conversion kits and the cheaper SH-3H it was still a £70+ model. Finally though Hannants have the AEW for £29.99, and well I couldn't resist!
So let's have a look at what you get in the box.
The box itself is typical Hasegawa and of sturdy nature with fantastic box art.
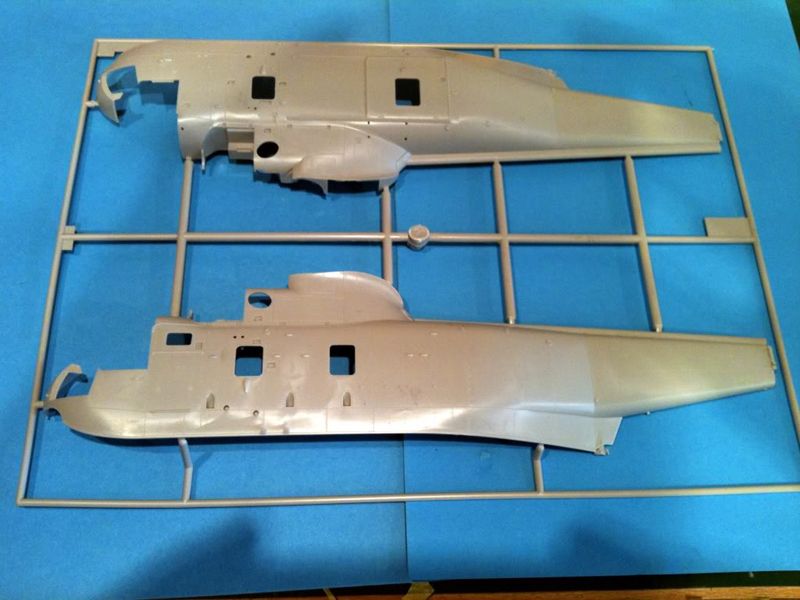
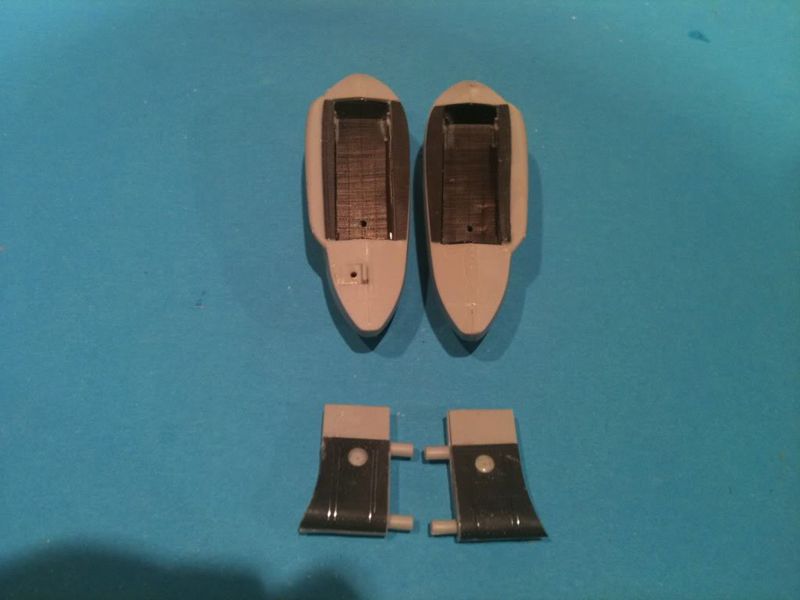
The first of many sprues contains the 2 fuselage halves. Detailing is crisp with a mix of raised and engraved detail and very subtle riveting. Good work Hasegawa!

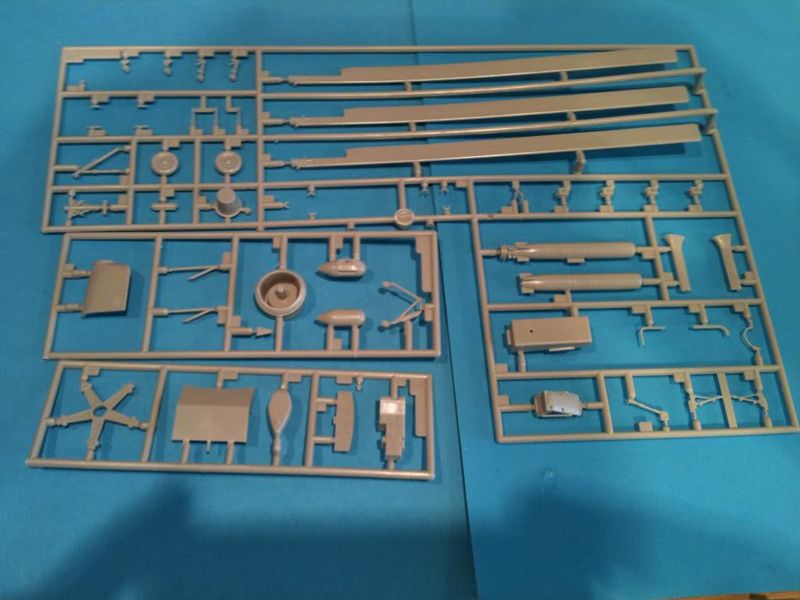

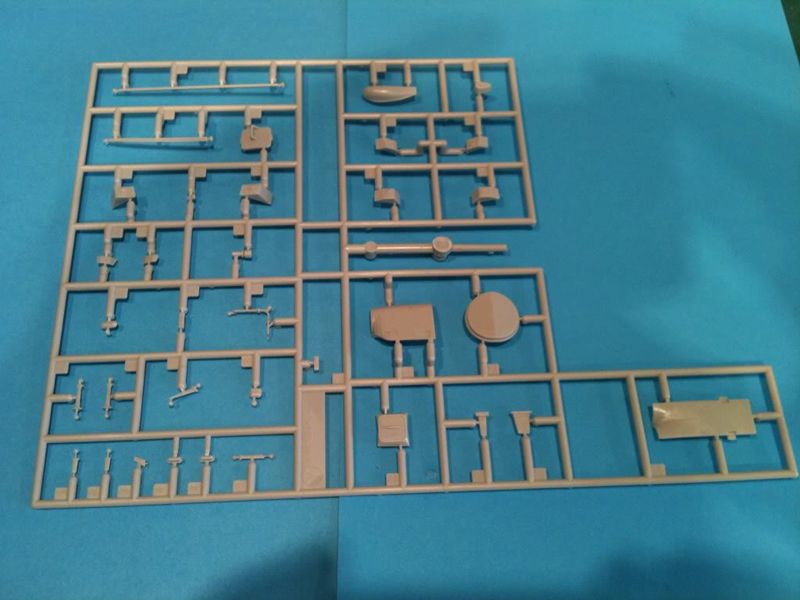
The rest of the sprues are all well laid out. It's a shame that they haven't included all the original sprues for the SH-3H so you can only make a Westland Sea King with this boxing. Included are the short sponsons and the 6 bladed tail rotor. 2 more disappointments are the lack of a deflated radome and the lack of the composite rotor blades that all Sea Kings have been fitted with in recent years. Overall though the level of detail is excellent and is up to the usual crisp standards we've come to expect from Hasegawa (can they just reduce the RRP.......please!!)

Clear parts are crystal clear and well detailed and the kit contains a small PE fret as well. In this variant though you only use 2 tiny pieces from this fret.

Decals are standard Hasegawa fair, in perfect register but the carrier film is very thick. I've had trouble before with the way Hasegawa decals react to Micro Set and Sol so I hope these are different!! Markings are for 2 variants one from 849sqn from 1988 and one from 824sqn circa 1982.
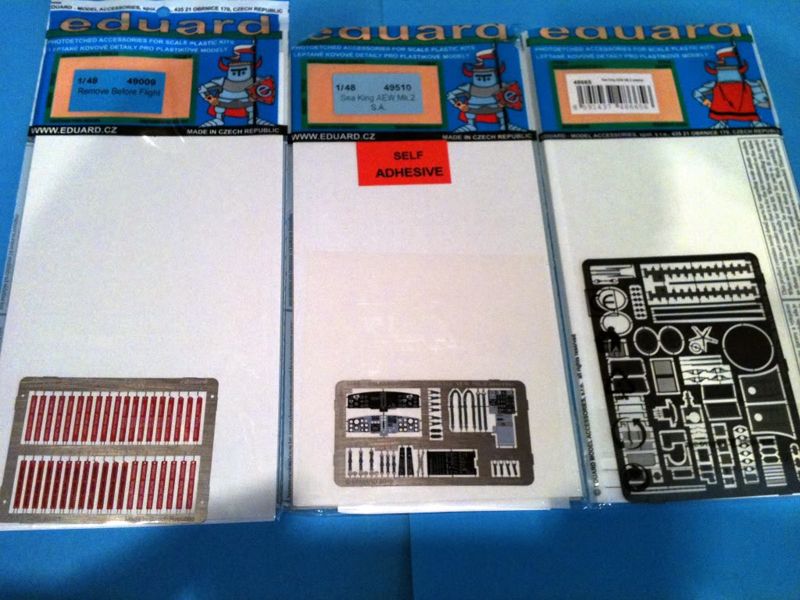
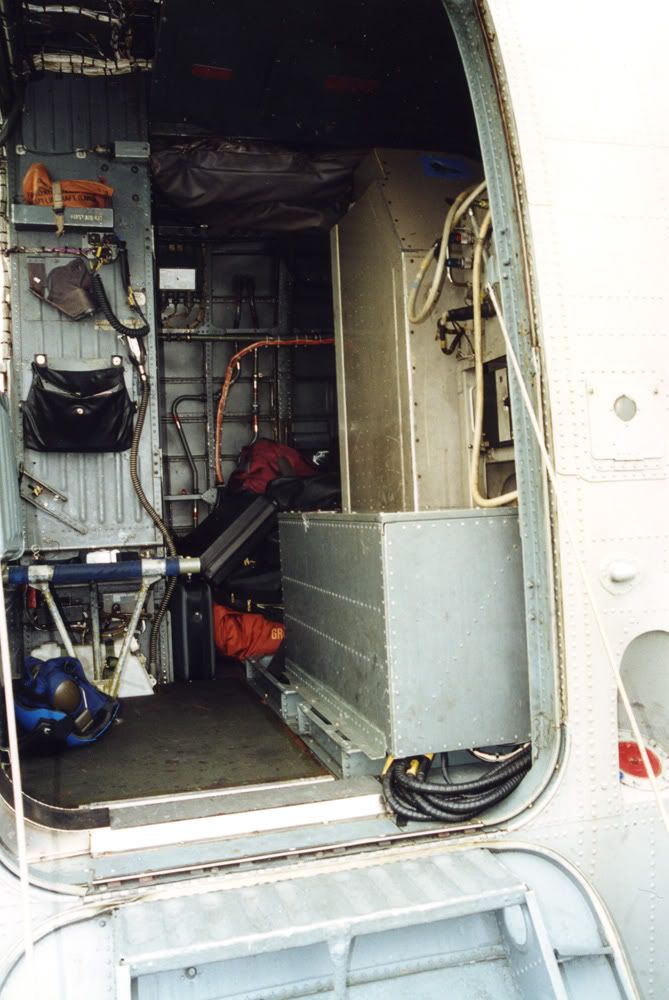
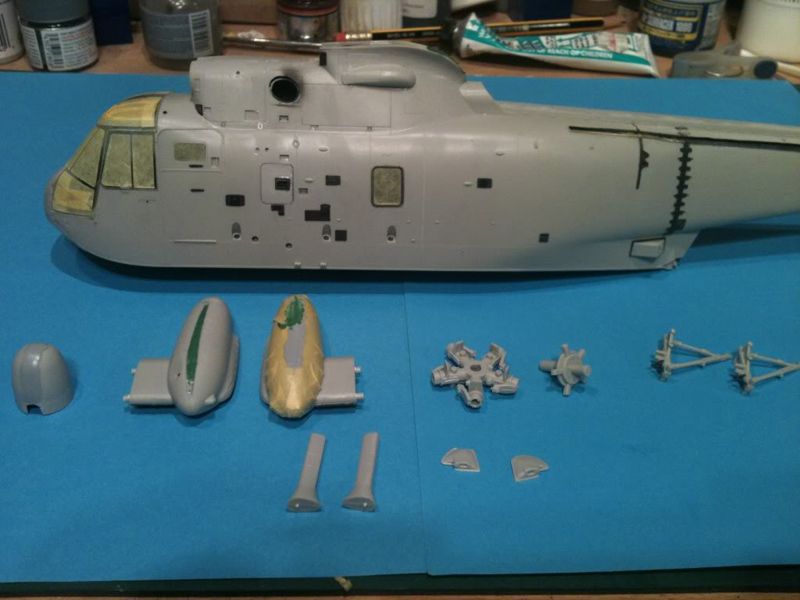
I decided to add some extra detailing and went for the Eduard BIG Ed set (4948) for this kit to add some extra detail. The lack of decent references for the cabin means I'm unsure about super detailing the interior. If anyone can point me in the right direction or if they have any shots of the AEW Mk.2 interior that'd be much appreciated. The BIG Ed set contains colour, self-adhesive PE for the cockpit. The coulour doesn't look quite right, a tad too blue for my liking but otherwise the quality is spot on. Also included is the exterior set which contains a smorgasbord of lumps, bumps, panels and grills. This should really make this model "pop".

A nice inclusion is the "remove before flight" tags and the Eduard mask set. I've never used these masking sets before so this should be a treat!
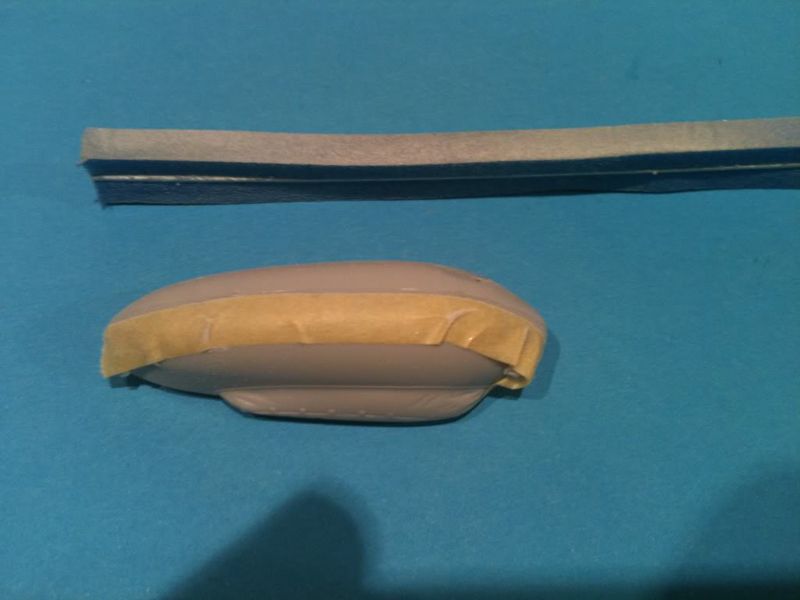
I also have the Rotor Craft resin, deflated radome on order from A2Zee models.
Now onwards to construction.
I started by first removing all the cockpit components from the sprue and cleaned them up. The Eduard PE means that you have to remove the lovely (if slightly inaccurate!) detailing from many of the consoles and the removal of the molded on seatbelts from the seats.
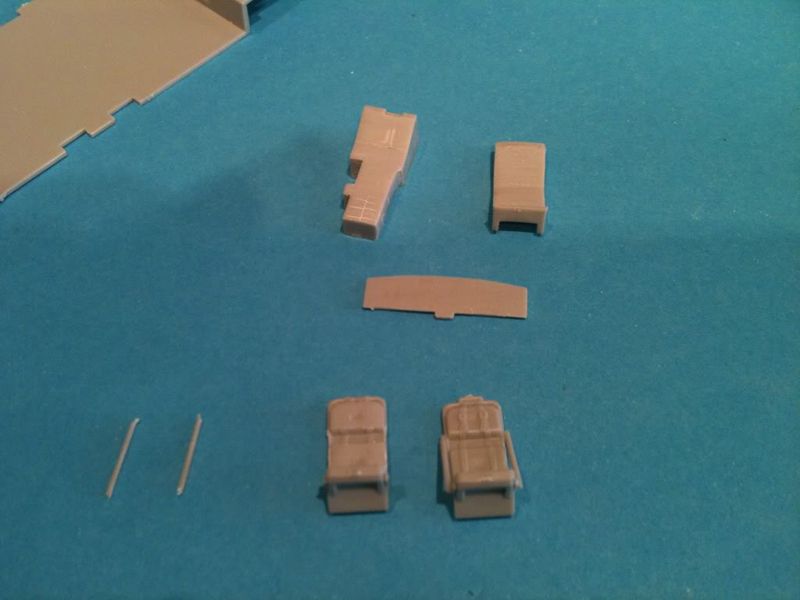

One thing I did to aid the sanding process was to remove the side struts from the seats. These will be glued back on later.

I really struggled to colour match with the Eduard set so I primed with some Tamiya XF-82 and then made a custom mix to match my reference photo's.

This little PE box on the back of the left hand seat is (apparently) the sea anchor stowage.

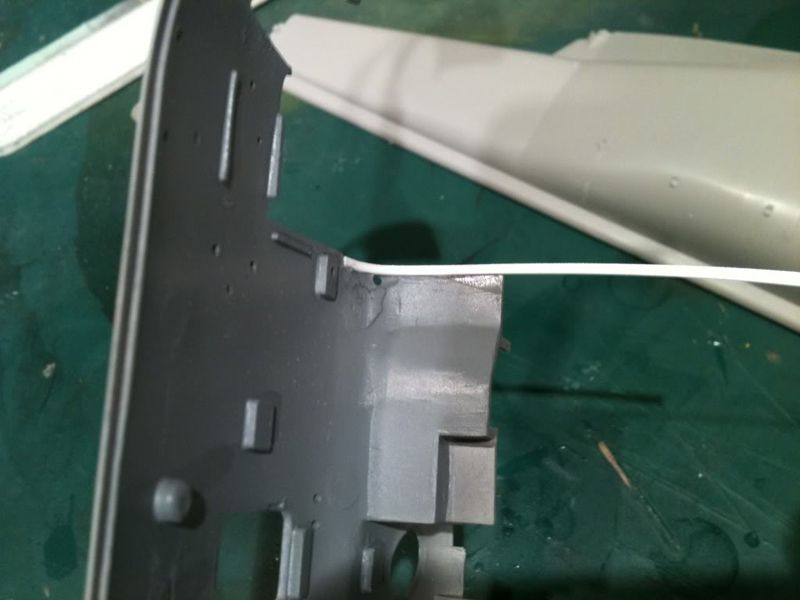
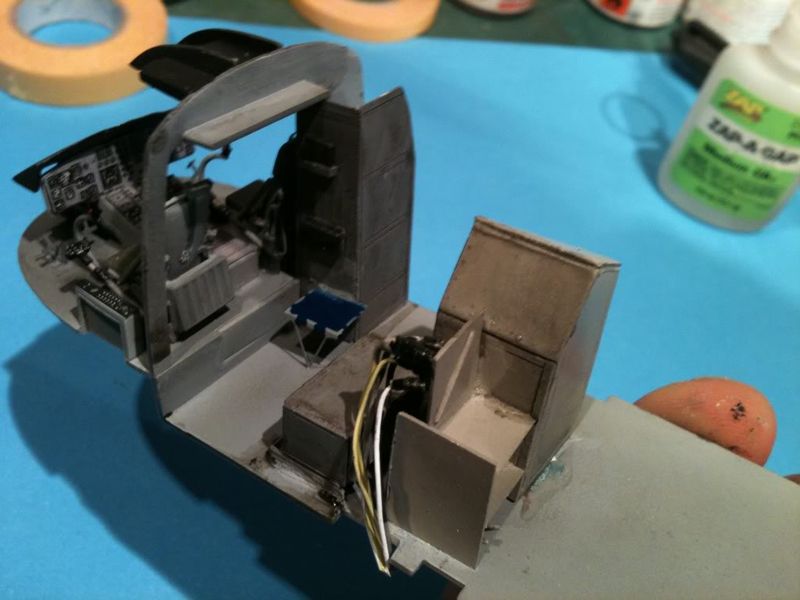
Here's another lovely piece of PE. This details up the blank area between the Cockpit and cabin.
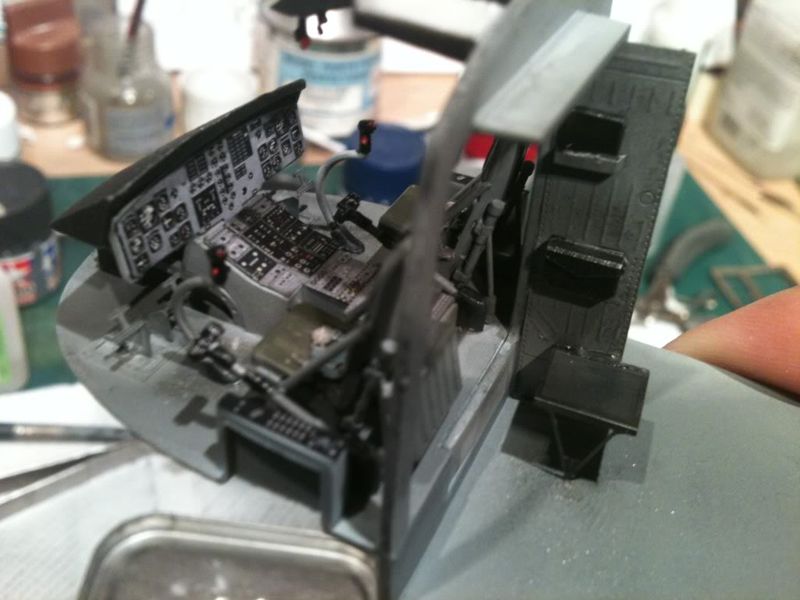
Onwards I went getting the pit together which was all very straight forward with a fold and a bend here, a bit of glue there and only a small amount of swearing!
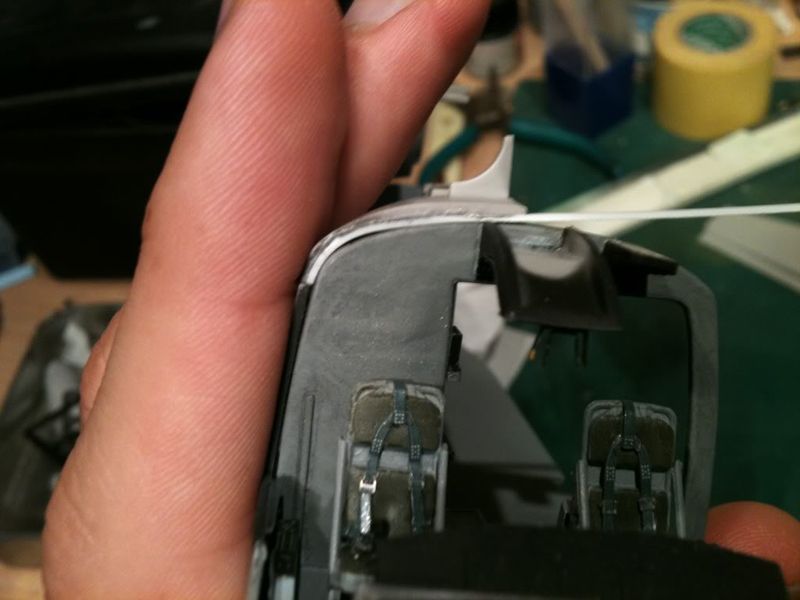
Next up was to weather the cockpit. I did this using a dirty thinners mix and overcoated the lot, including the colour PE to tone everything down and highlight the details. A bit of dry brushing with Tamiya X-10 Gun Metal to scuff the floor and edges and pop the raised detail and I'm happy with the results. I like the addition of the panel in the companionway between the cockpit and cabin and the condition levers and rotor brake in the cockpit roof.

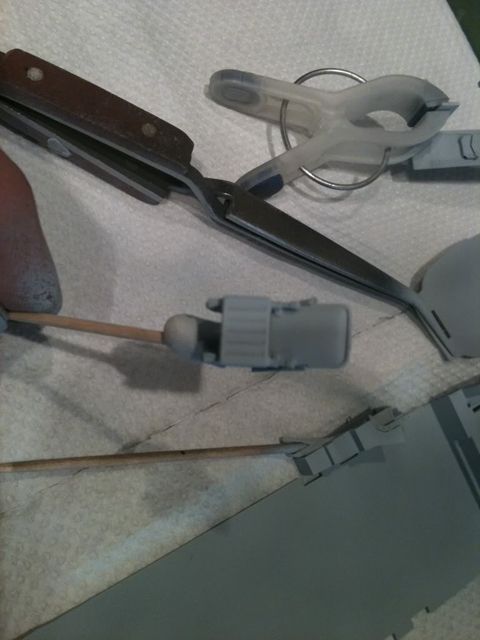
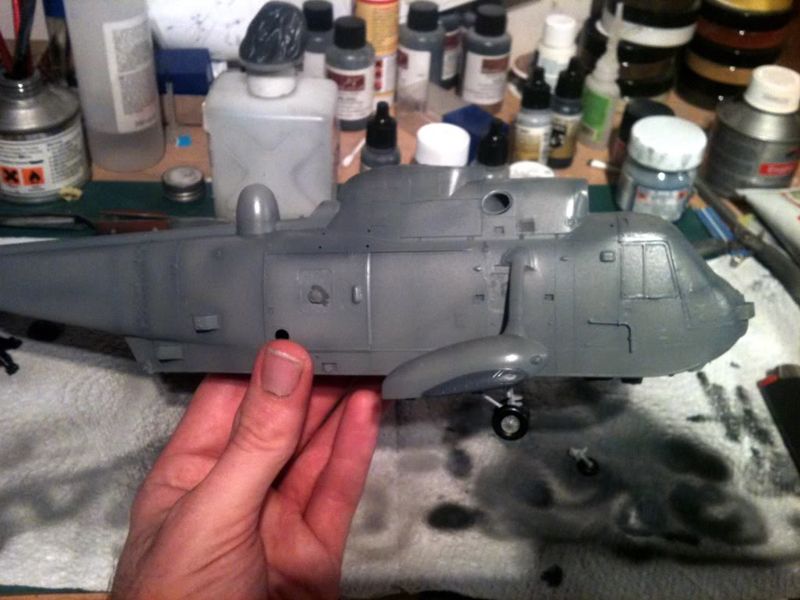
So that's the cockpit done. Onwards to removing the extrenuous lumps, bumps and aerials from the fuselage. Hasegawa provide good and clear details on what to remove in the instructions. Phils skinny sticks and polishers were a god send in this process. This is the final lump to go just below the window.

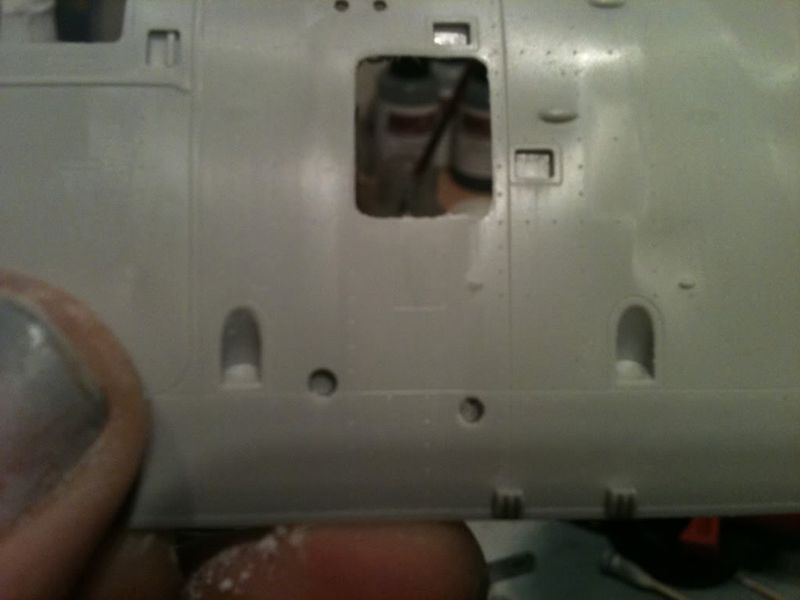
And it's gone. Just a quick polish up, pop back in any detail that was removed with a pin and a scriber and it'll look the business.
Second day of the build
While trawling for reference pics this morning I got together some of the sub assemblies with their associated PE.

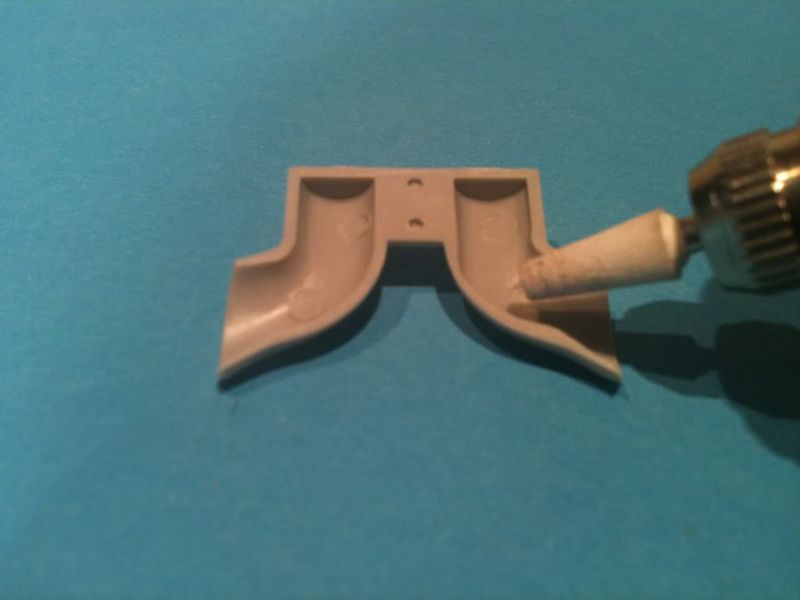
First up were the sponsons. The PE part adds some lovely rivet detail to the interior of these.

The sponsons and their attachments went together very well. I used Gator glue to attach the PE shown here.
This one had a small seam that needed to be taken care of and not wanting to lose detail I decided on doing this.
I masked the detail with 6mm tape and using a skinny sponge lightly sanded the seam until it was gone. It might need a bit of Mr Surfacer to get it totally smooth but we shall see.
Got the rest of the PE installed using CA glue and it really makes a difference to the kit sponsons.
Next up was to take care of the insides of the fuselage halves.

There's a few nasty ejector pin marks that will need sorting before I think about detailing in here. So it's out with the trusty Squadron Green putty.

With them filled, i left for a good couple of hours to dry.
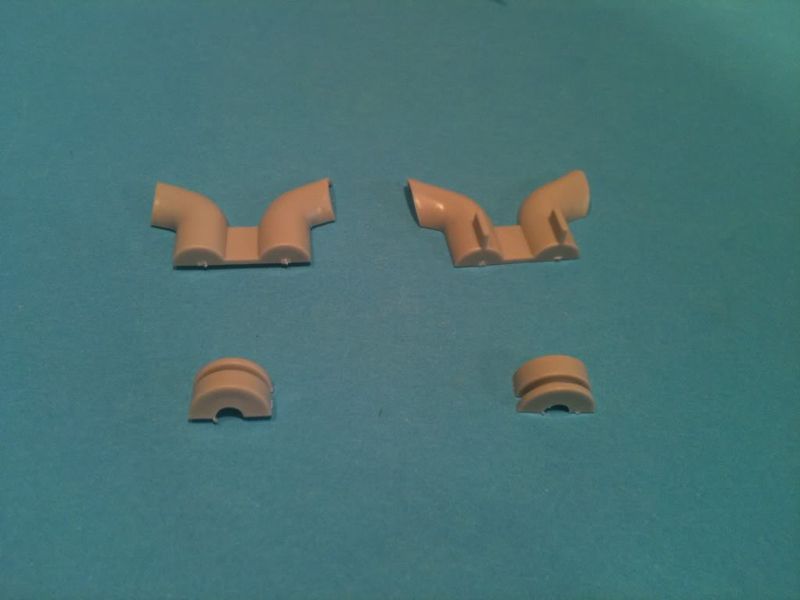
While the filler dried I took a look at the exhausts for the Rolls Royce Gnome engines and the beginnings of the rotor head.
More horrid pin marks and these look tricky to get at so time for the mini drill.
That cleaned them up a treat but perhaps a waste of time as I'm probably gonna put exhaust blanks on them anyway!
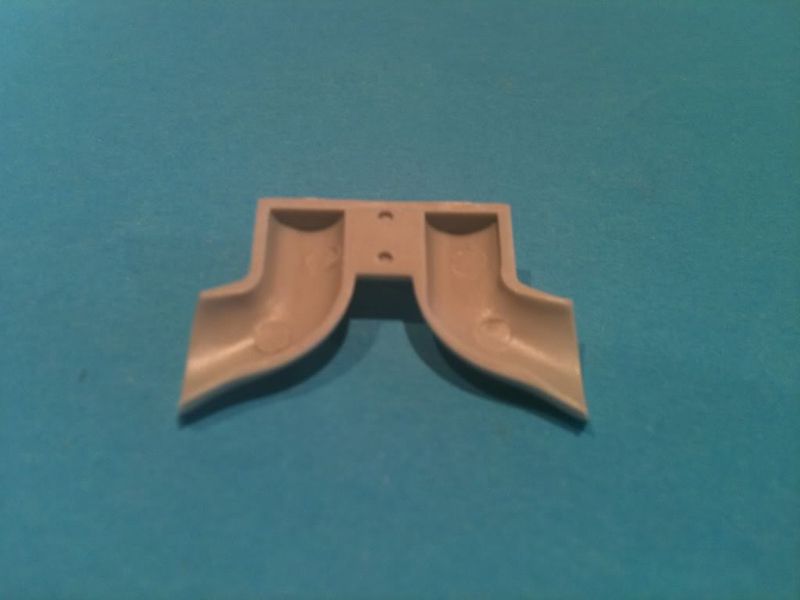
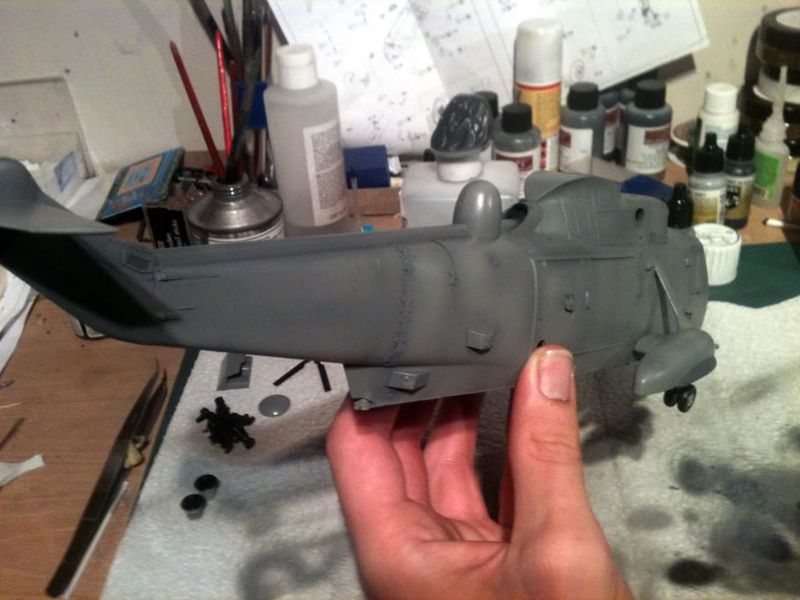
Next up was the tail assembly.

More lovely detail on the kit part but I think we can improve this with some PE vents around the tail rotor gearbox.

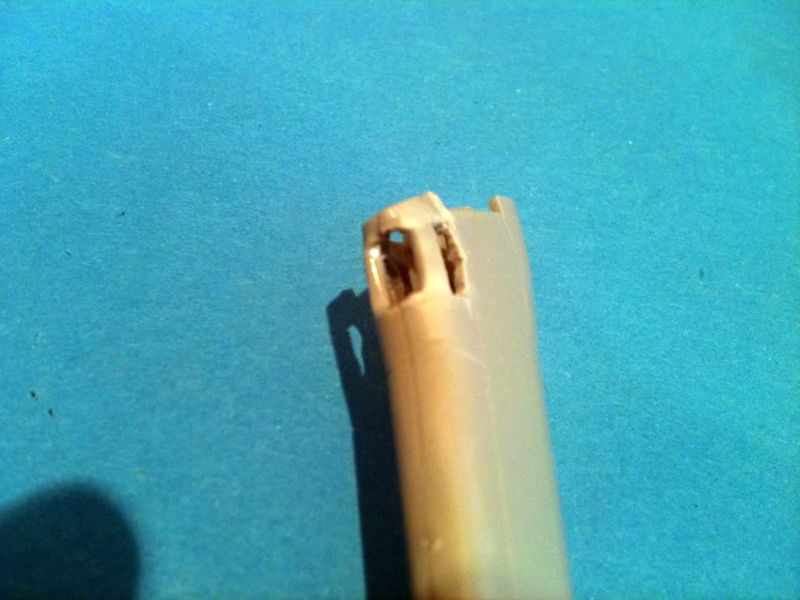
I cut out the vents (a fraught task as the plastic is super thin here and I almost shattered it!) Really hard to find a sanding stick to fit in here so I cleaned it up the best I could with an Exacto blade.
Then I popped a 1mm drill bit into my pin vice and drilled out these 2 holes ready for another PE grill.

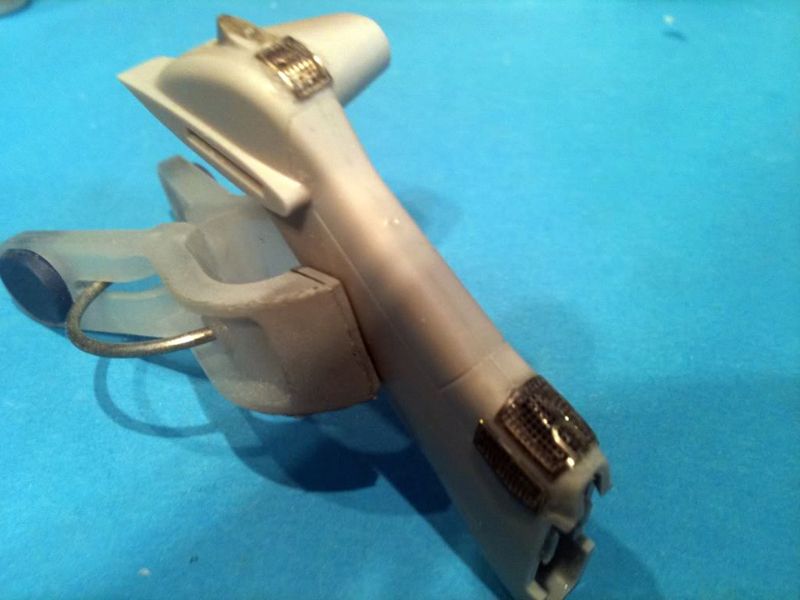
The only trouble at this point was that now you could see straight through the grills.......not very realistic so despite the fact that no one would ever see it I scratch built a tail rotor gear box.
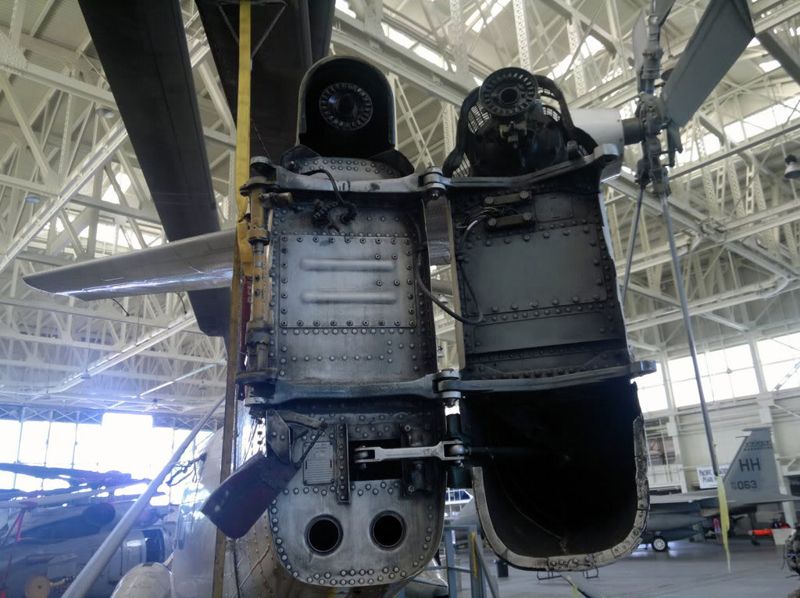
First up a reference pic.
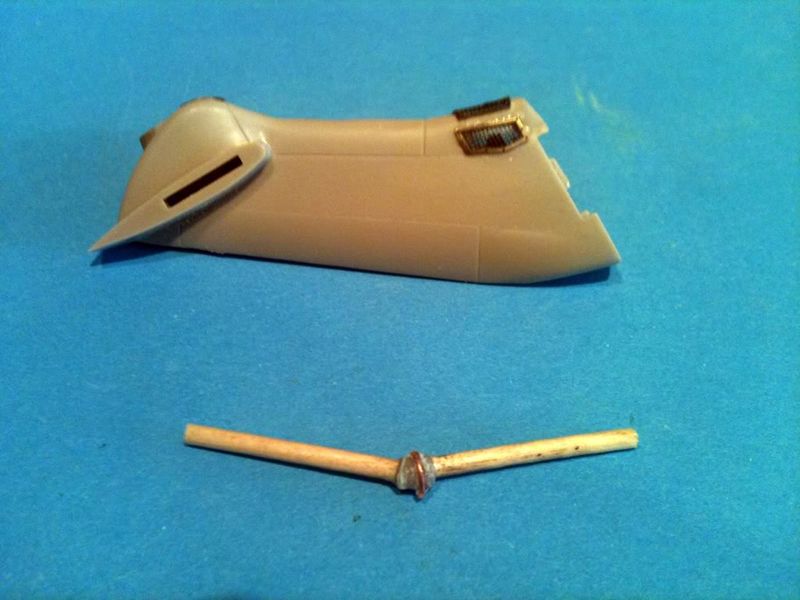
This was made from some copper wire wrapped round some sprue, CA'd into place then cut to the correct size and rounded off with a skinny stick. To this I attack a cocktail stick cut in half. Not totally accurate but it saves the gaping hole in the tail!

This was then sprayed in flat black and dry brushed with gun metal. The inside of the area was also sprayed in as well. I will mount this later with some CA.
Back to the fuselage. I had sanded flush all the filler and primed the 2 halves. While there I thought I'd double check the cockpit fit.
Oh dear!I hadn't noticed this before but that gap is horrendous. Better sort that out.
I cut a strip of 0.5mm styrene and then heated it with a candle to get the curve. This was then glued with Extra Thin in place and the process repeated on the other side. Once together a drop of glue should weld this up nicely.
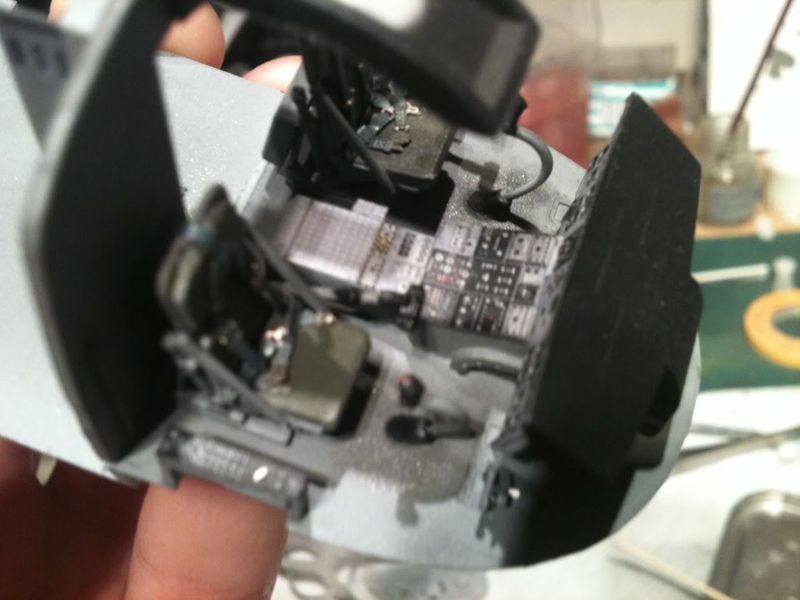
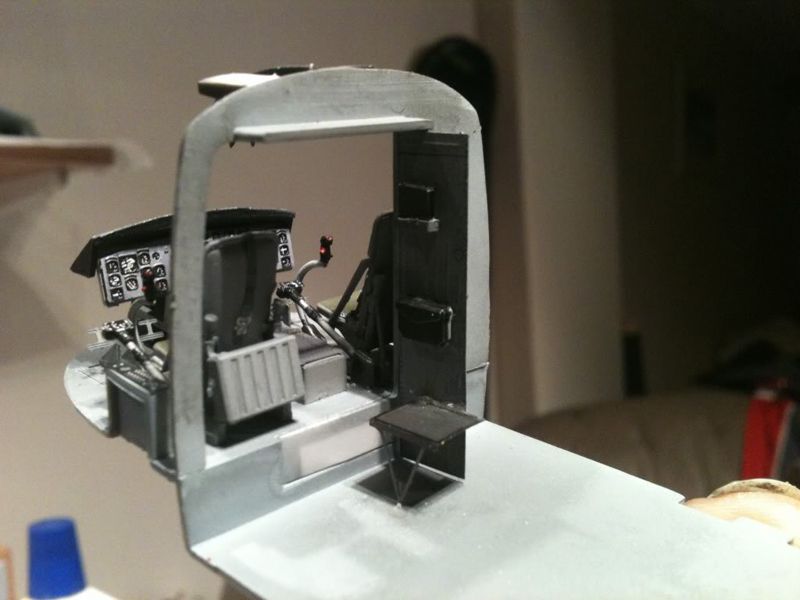
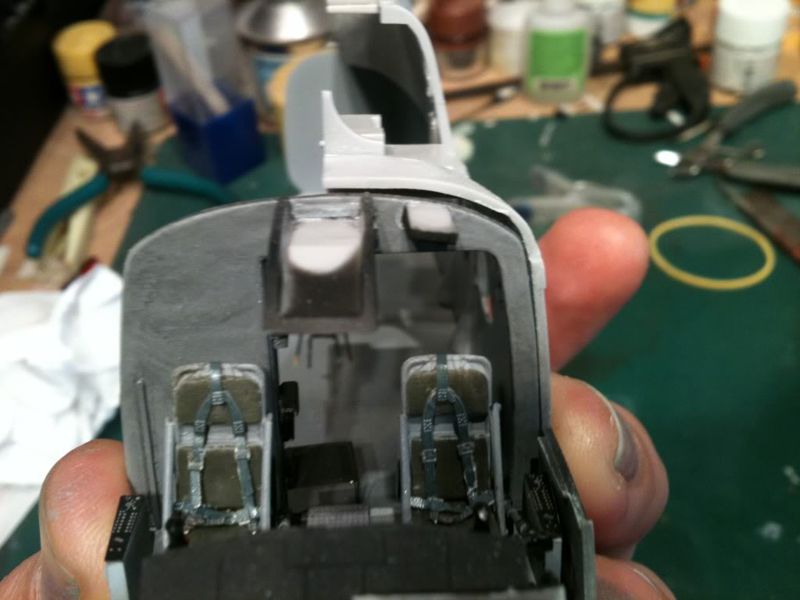
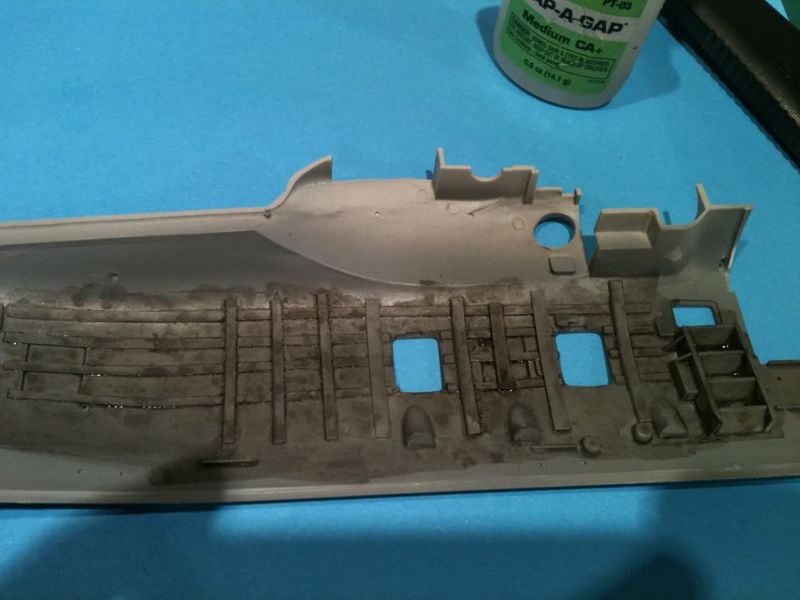
One thing that was really bugging me was that looking into the cockpit from the front all you can see is this huge cavern of emptiness in the cabin. So while I had the styrene to hand.............

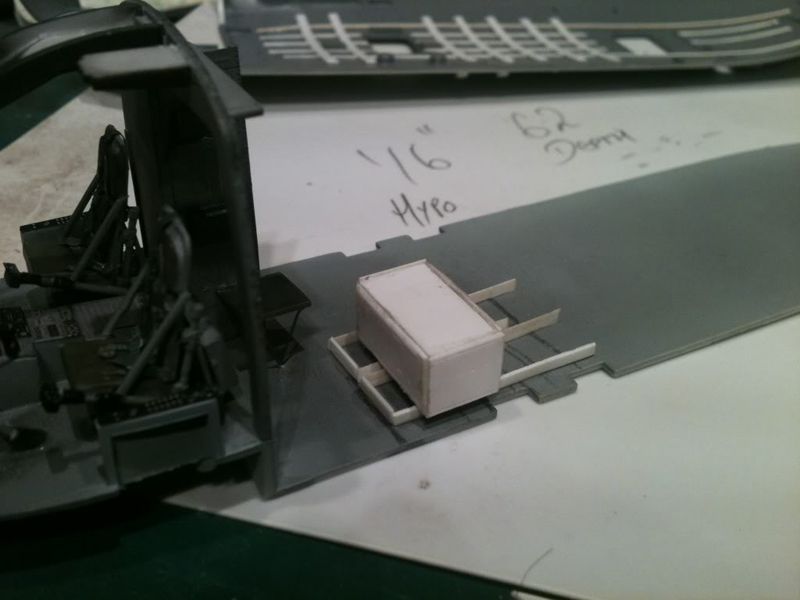
The ribbing was made from 1mm and 1.5mm strips of styrene and although not totally accurate in he spacing it helps to busy up the interior as the windows are quite large. As you can see I've started to detail the area that will be visible from the cockpit with a couple of boxes and there is more being constructed at the mo. Hopefully it will come out looking something like this ............
Continued with the scratch building and have come up with this so far. Just got knock together a few avionics boxes and add some wiring. Then it's paint and detailing.
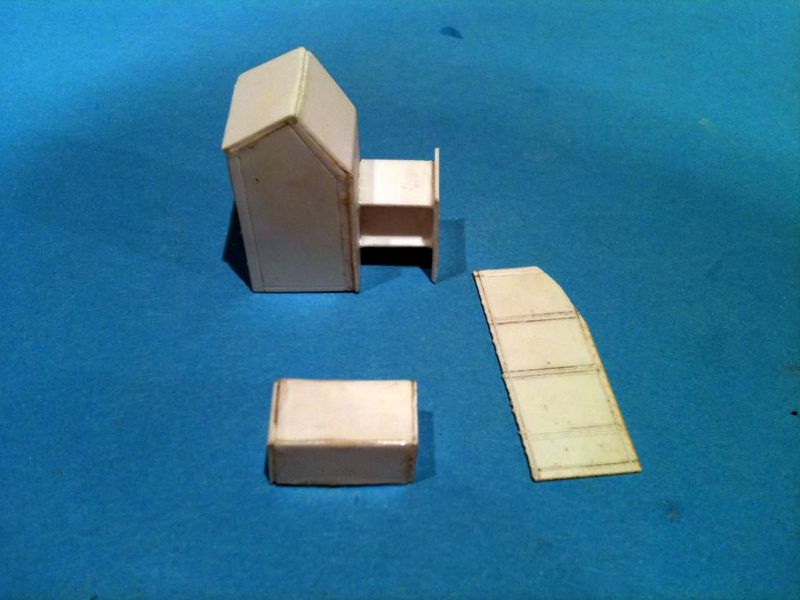
Yes I know it looks like a shed with a shelving unit grafted on.............


Day 3 of the build - Photo Etch day
Hello again everyone.
First up I had this arrive in the post this morning.
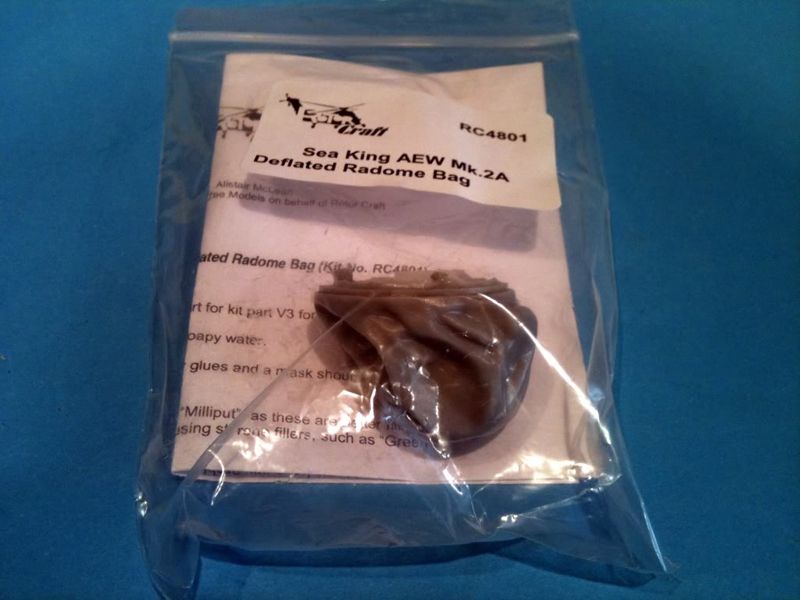

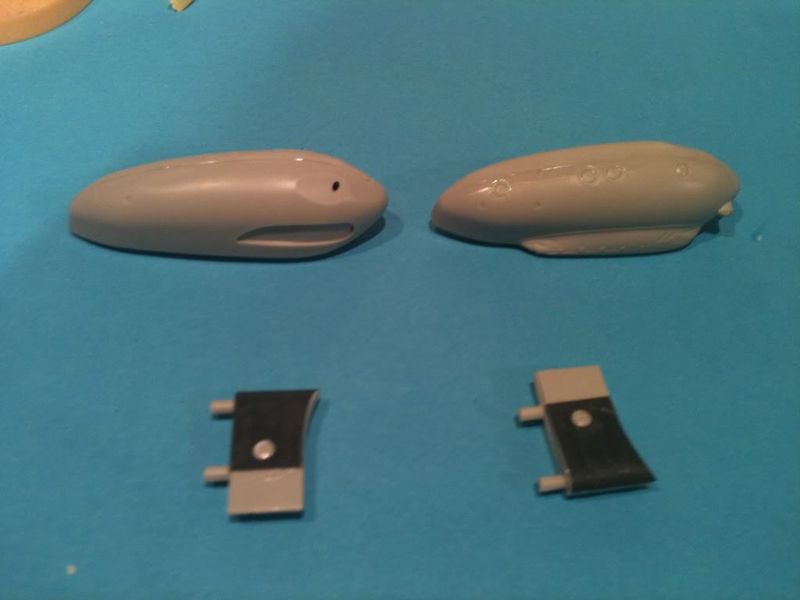
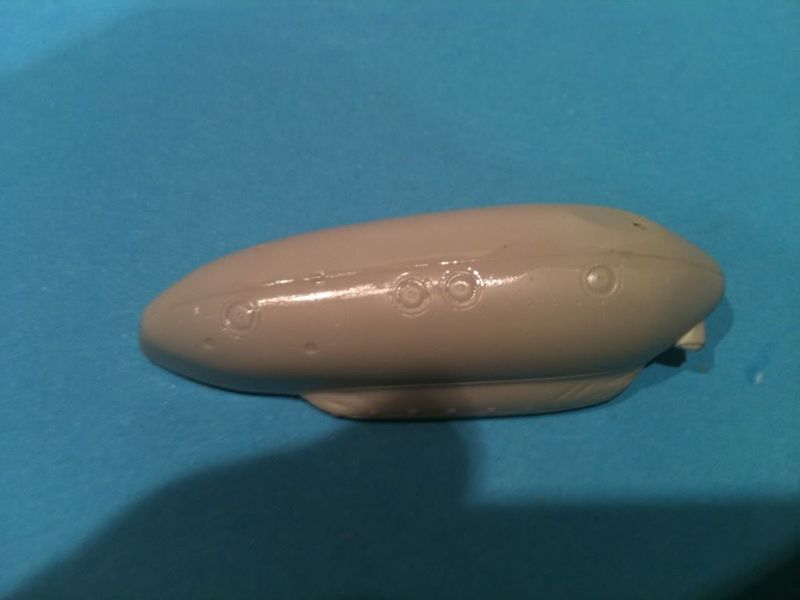
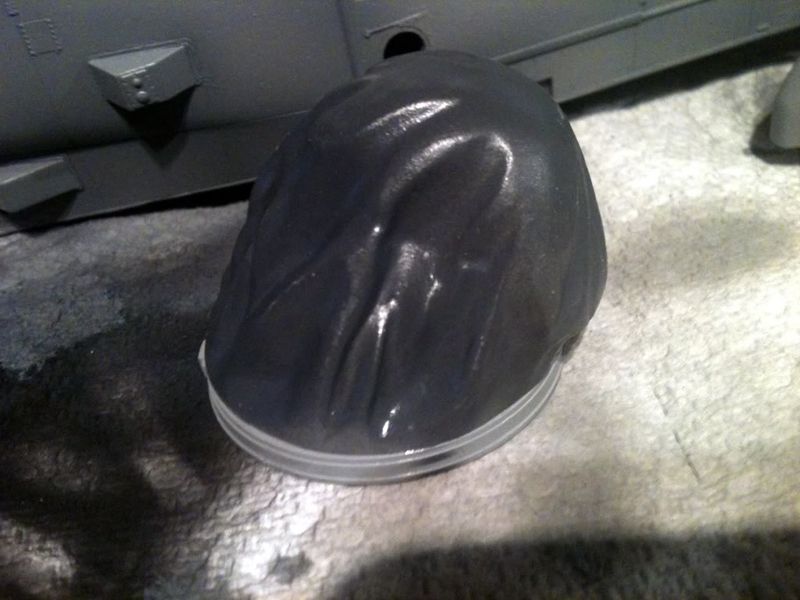
This is Rotor Craft's deflated radome cast in dark grey resin. Absolutely lovely molding but what did they use as a template?
There was just a small of amount of casting block to sand off and then I dry fitted and it popped straight in with no dramas at all. I'll leave this off til the model is finished as it's painted a darker colour to the aircraft.
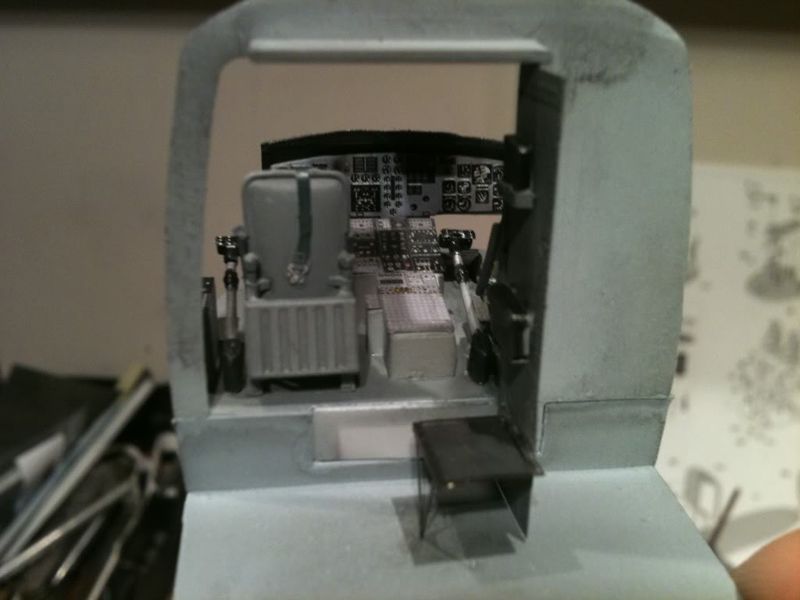
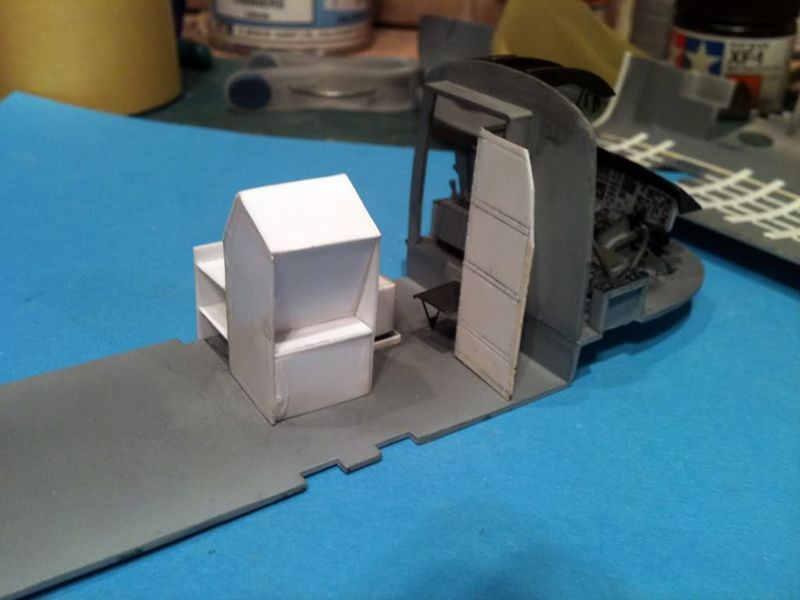
In the meantime I finished off detailing a bit of the interior.


That's sorted out that blank space behind the cockpit. This was sprayed with some custom mixes of grey of various hues to try and get the worn look I could see in the reference photos. A few passes with some dirty thinners and a bit of Phil's dark dirt wash and it's looking pretty good.
I then dry brushed the edges with flat aluminium to show scuffs and scrapes.

The wiring was made from a mix of solder wire and copper wire and the connectors were made by cutting strips of tamiya 6mm tape into thinner strips and winding them around the ends. These were hand painted in flat black and the cabling painted in XF-4 yellow, XF-2 White and XF-1 Flat Black. The lower avionics box was made from a few spares I had loafing about . Wiring was added and painted as above (although it's almost impossible to see!)

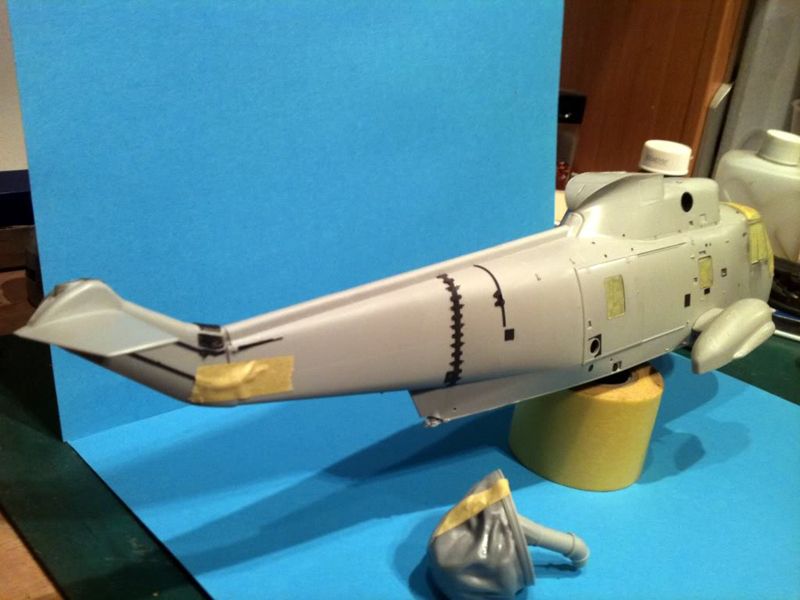
Next up I weathered the fuselage halves, again with Phil's wash.
I rubbed back what I could with a damp cotton bud but I think it's still a tad too strong. I think a light misting of very thinned grey should help this out a bit.
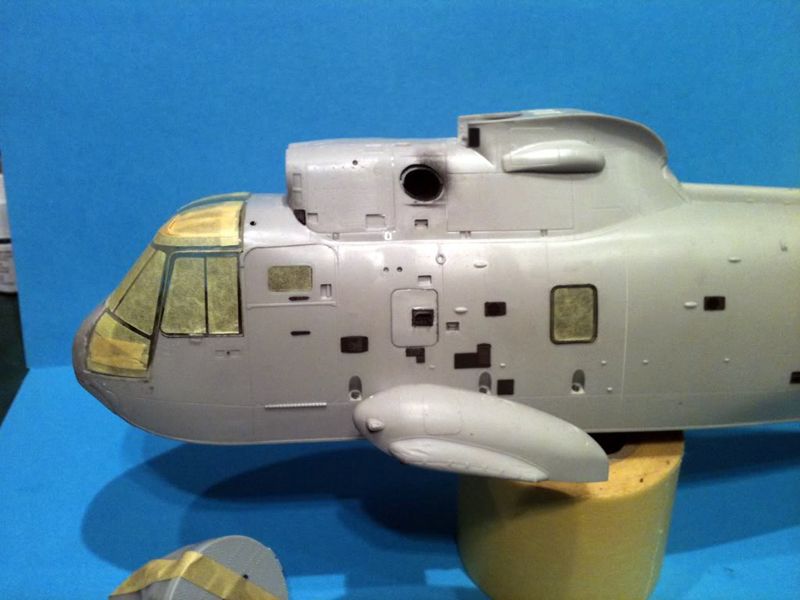
Next up was the mammoth task of fitting all the PE to the exterior.

First of all apologies for the rubbish photo but my camera refused to focus at this point!. There is loads of tiny panels like this and yes those black dots towards the bottom of the pic are PE filler caps.
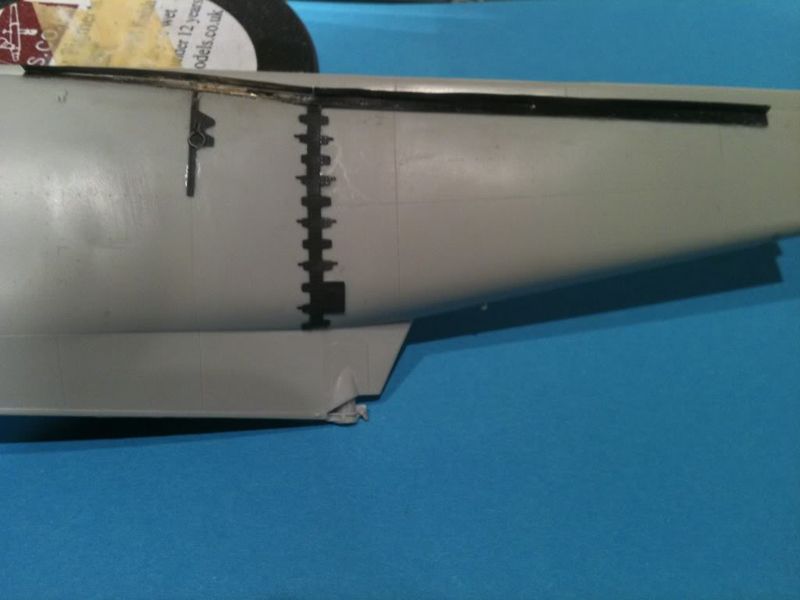
This area proved to be quite tricky. It was difficult to get the PE to conform to the contours of the fuselage. The strake running along the tail boom is in 2 parts with the rear part being a simple bend and glue affair but the the front section is 2 separate pieces. This was very tricky to line properly and I'm not sure how well the glue will hold over time. The paint and Klear coats should help this though.
Here's a reference shot of what we're looking at here.

And some more PE detalling.
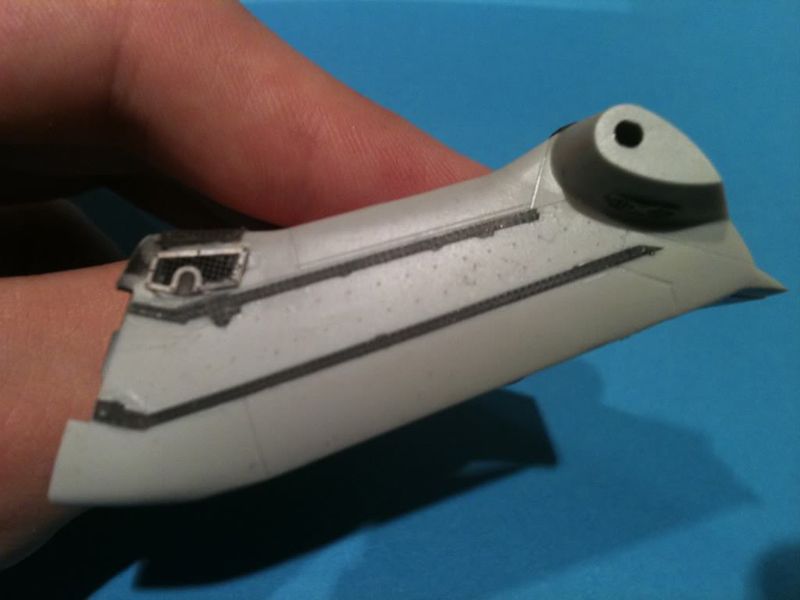
This time on the tail. And that's it for today. Really loving this build. All the tiny PE is frustrating but I know that the end result will be worth it.
The pigment pot gives some idea of the size of this thing. Rotors folded I think! Tomorrows update will be..........more PE!!
Day 4 - more PE!
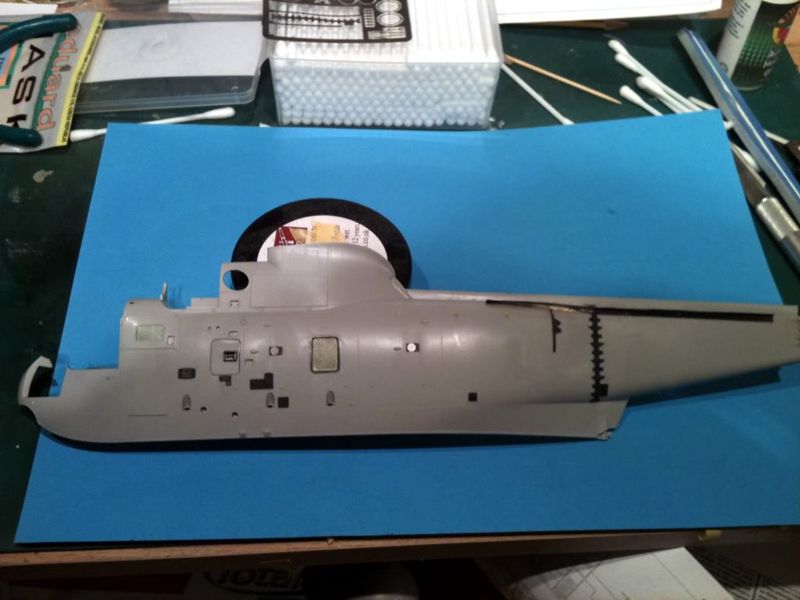
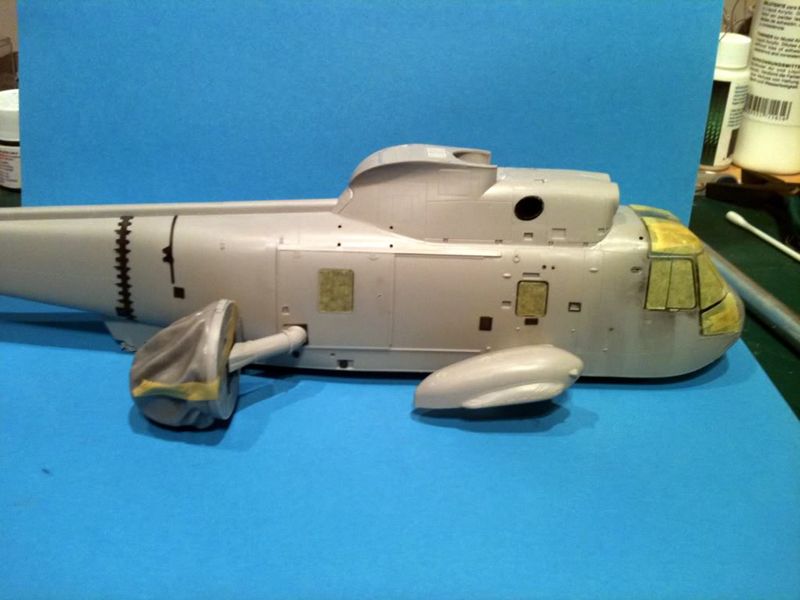
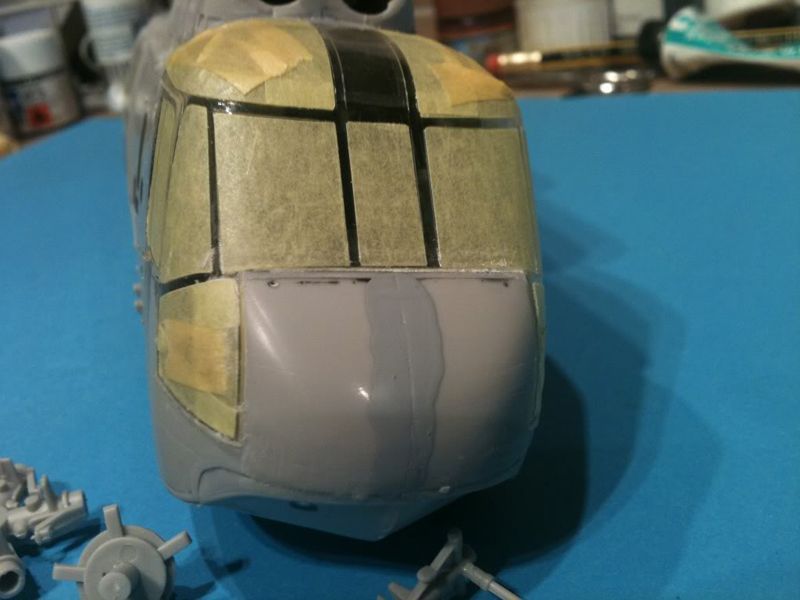
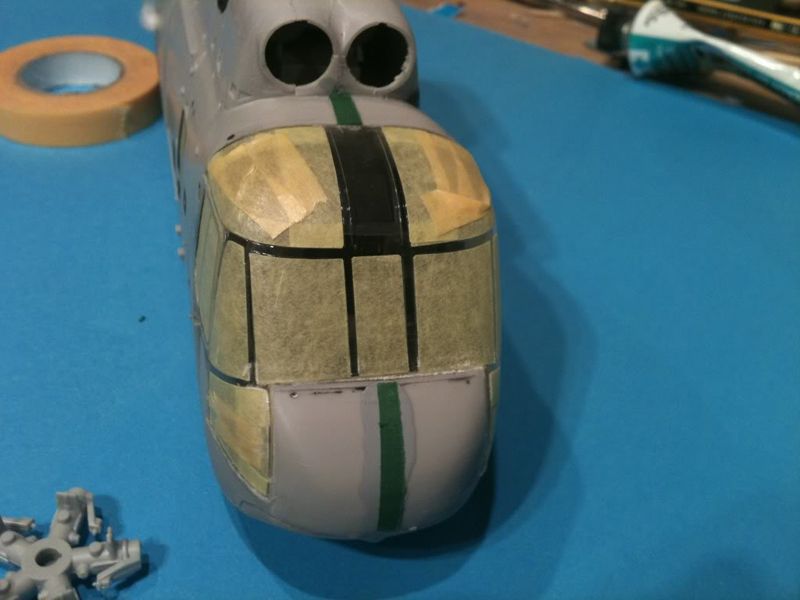
Really got the build moving along today. I got the fuselage hlaves together and that went without any real dramas. Seam lines were minimal and required only light sanding and no filler as of yet. The main glazing on the other hand was a tricky fit. First up I attached the bottom of the "boat hull" This was a lovely (if very tight!) fit. To eliminate seam lines I had left the the front of the fuselage unbonded and attached this one side at a time to the bottom piece. Then I ran a small amount of extra thin along the centre seam line. The glazing was then all masked up using the Eduard mask in the BIG Ed set. I attempted to attach the glass work with Gator glue but the part was slightly warped and refused to sit properly. In the end I took a risk and used a very small amount of CA to tack it into place. There were a couple of gaps to take care of and these were filled with gator glue.
All the PE on the starboard side was then attached again with no issues to report. At this point I couldn't resist dry fitting all the main parts to see what it'll look like. And here we are.


This was one tricky seam and I'm gonna give it a coat of Mr Surfacer before priming. The thin white line between the glazing and fuselage is where I had to fill with CA.

This area above the tail boom is the only place I'm gonna need a bit of filler.
A few more sub assemblies and the undercarriage, a heap more PE and then it'll be primer time!
Sorting out the seams on the sponsons without obliterating the detail so it was out with the masking tape, Squadron Green and Mr Surfacer.

These were left to dry for 24hrs before a gentle sanding with 300 grit skinny sticks and good polish and buffing until smooth.
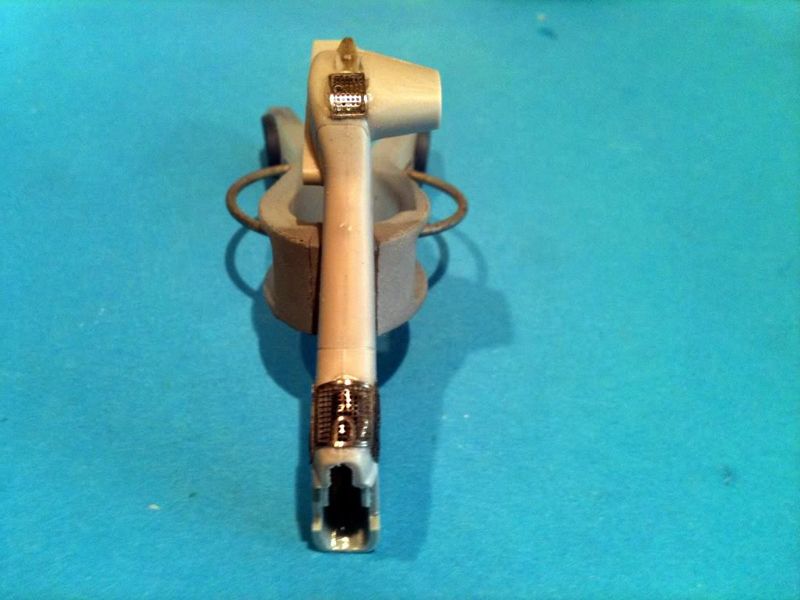
While that was drying time to get the undercarriage together.

The photo-etch parts induced a small amount of blue air to the room!!
Here's a raft of the sub assemblies put together and cleaned up. Almost time for some paint I think
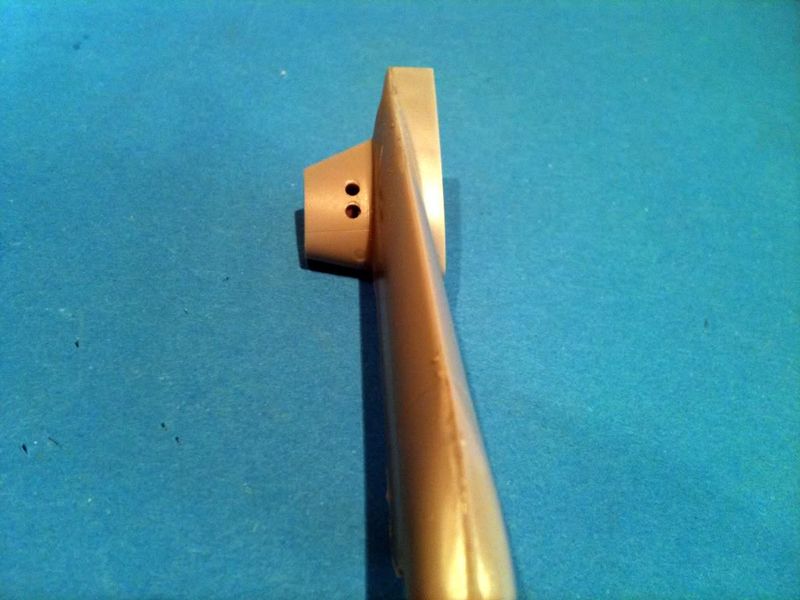
And that nasty seam at the back of the engine nacelle all fillered up.
And the same on the nose.
As I mentioned before I made a bit of a mess with the sponsons. Unfortunately I have lost the photos that I took of how I fixed it so here's a little description. Where the locating tabs were I used a 1.5mm drill bit in a pin vice and drilled out the holes. Not having any plastic rod to it was out with the cocktail sticks! I cut them down to size and then i needed to hide the wood grain. The plastic stalk of a cotton bud fitted perfectly over the cocktail stick! So this is what I did.
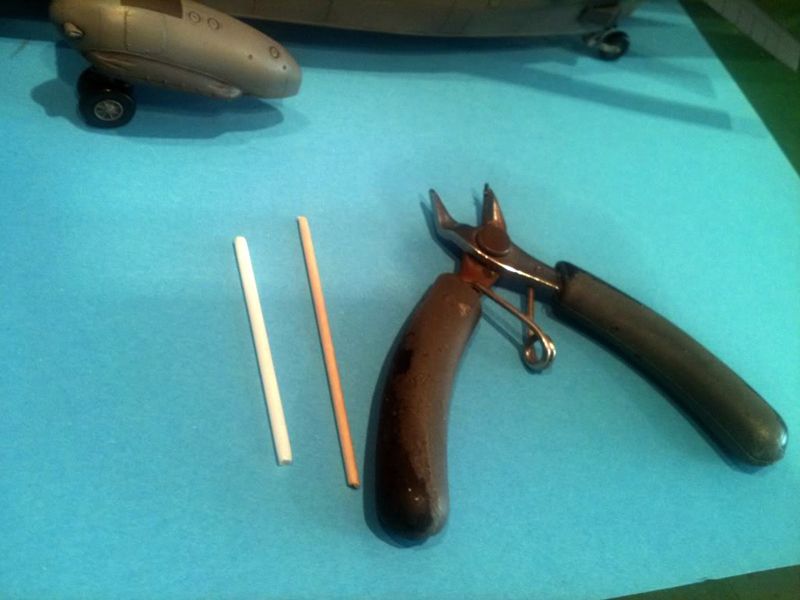
I took the cotton bud stalk and cut a slice about 2-3mm thick off of it and then fitted this over the end of the cocktail stick.
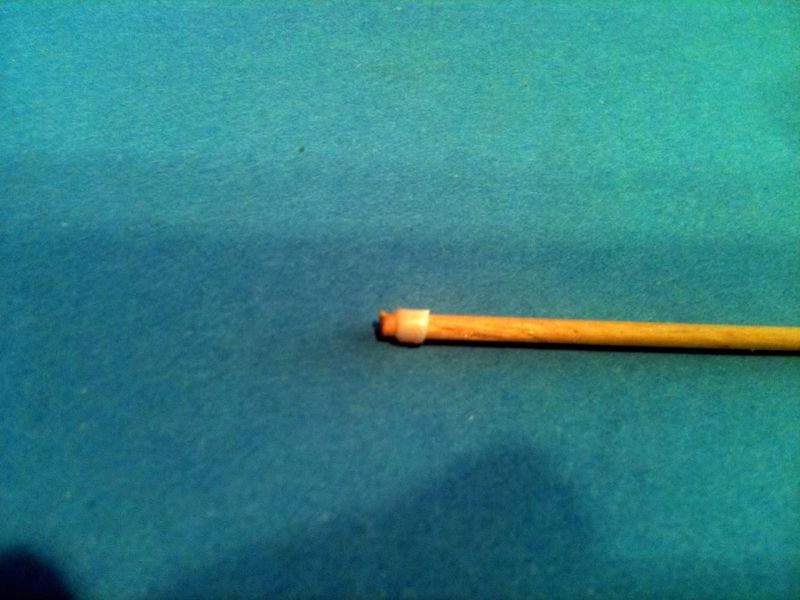
And there you go. Just repeated this 4 times then cut them to the correct length and here's the results.

Onwards to the paint booth......and beyond!!
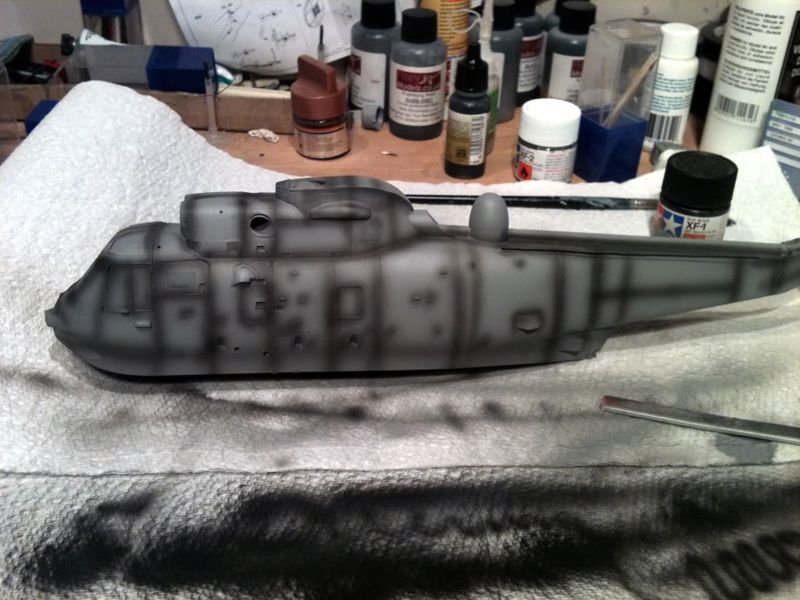
Primed her up with Tamiya XF-83 (just had a few pots kicking about) and then preshaded with Vallejo flat black. This is my first time using vallejo paints and I have to say I'm mighty impressed. Very smooth flow through the airbrush. Looking forward to the final results!
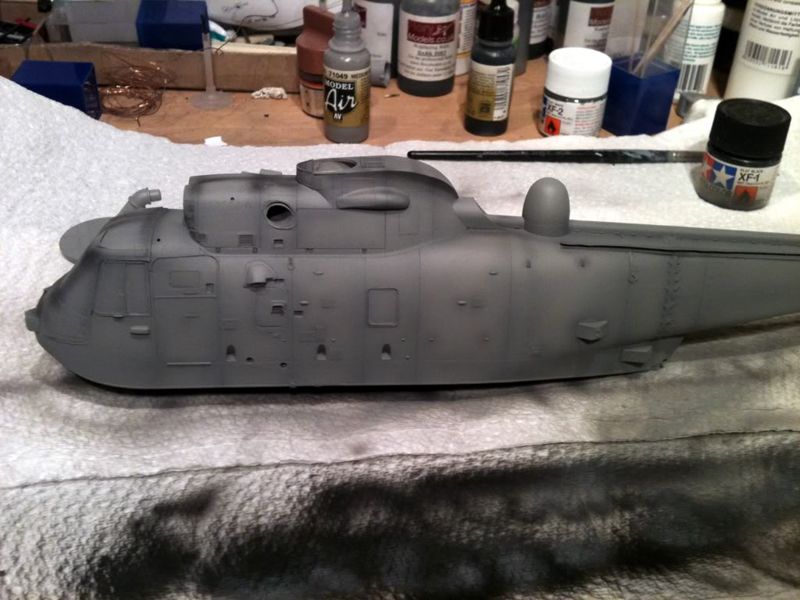
First coat of Vallejo Medium Sea Grey. I thought it looked a bit dark but this will be faded back later anyway.
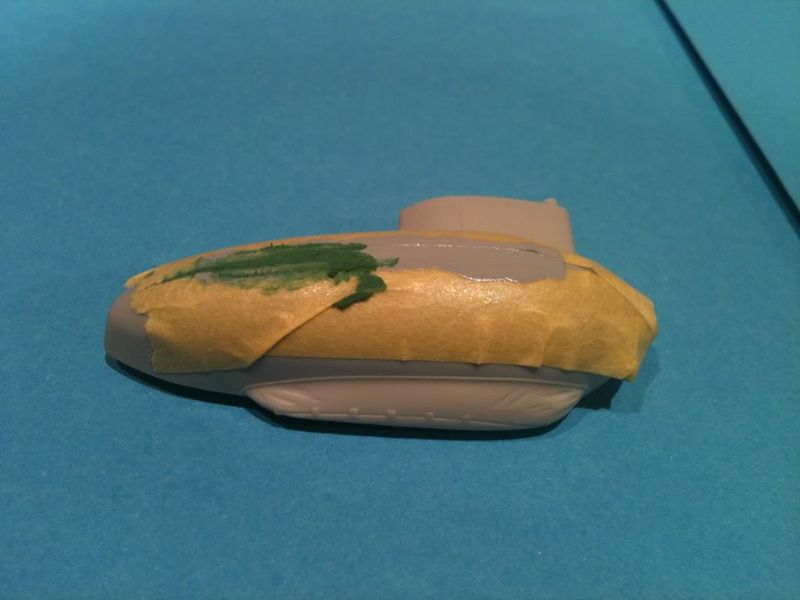
I masked off the flotation gear on the sponsons and then sprayed this and the resin radome with Vallejo Exterior Dark Sea Grey. All parts have had a coat of future or 2 ready for decaling and weathering.
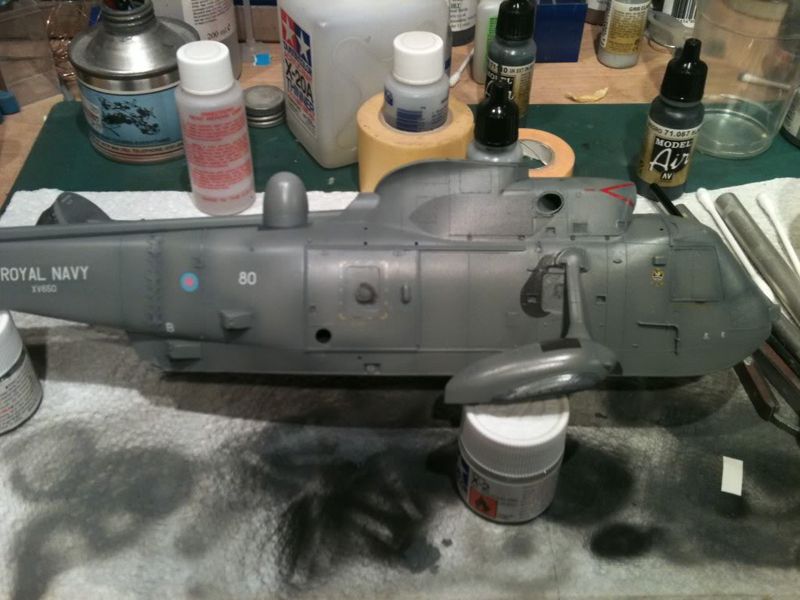

Decals are on and just a word about them. Normally Hasegawa decals are ridiculously thick and you have to use about a gallon of set and sol to bed them down properly but not with this one. In fact the opposite. These were incredibly thin and most didn't want to lie properly and just wanted curl up! They took a lot of coaxing into position and I wouldn't recommend putting micro set down first as as soon as they touch it they don't want to move and become very soft, so damaging them is very easy!
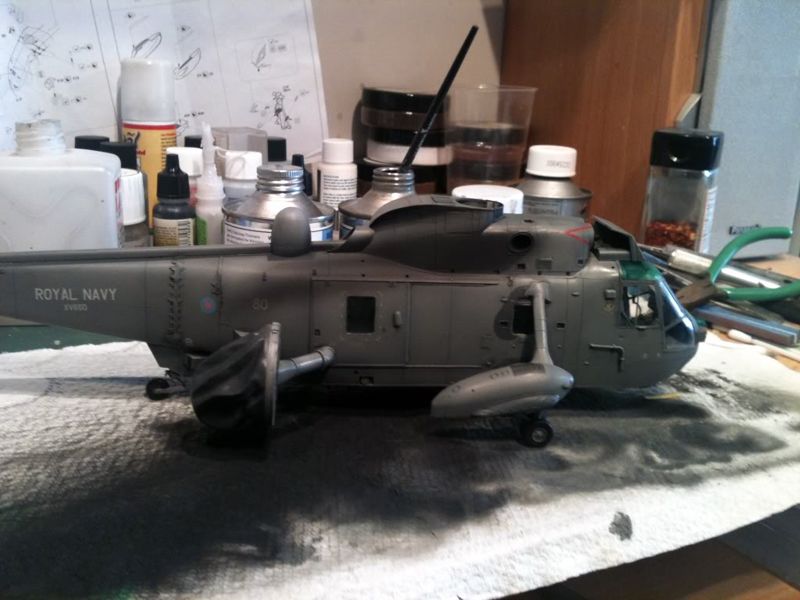
She's now had a full wash with Flory Models Dark Dirt wash and it's been taken off again and weathering applied with airbrush (dirty thinners) and pigments. Plenty still to go in the weathering department. I think some light chipping as well to the paintwork around the panel lines will be done.


I fitted the rotor head and tail rotor just as loose fits to get a look at the thing. Some how reminds me of sonic the hedgehog!!
Some serious 'bench chaos' going on here as well. Time for a tidy me thinks!

And there we go that brings us up to date on a build that I'm loving to bits. Got all the ancilliary bits (winch, lights, wipers etc) and some PE exhaust covers to add and she'll be done.
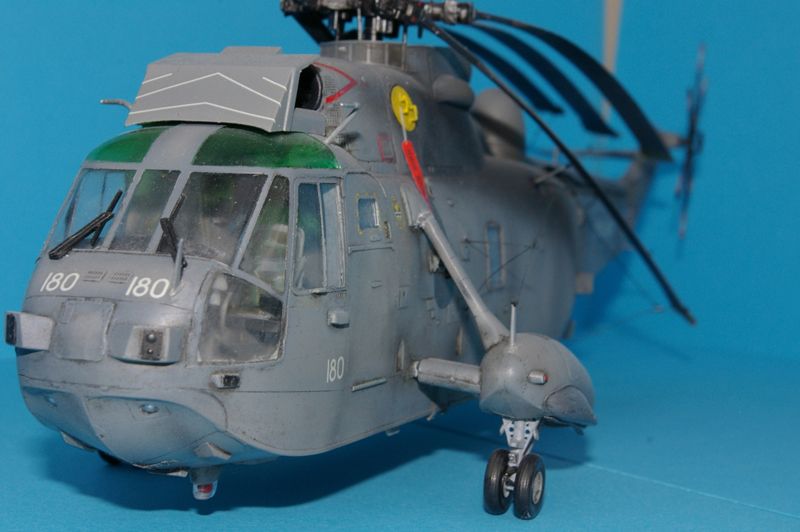
Hello again everyone. I haven't had much time recently for modelling but I have managed to finish my Sea King. I had a couple of disasters since the last update. I hadn't put enough glue on one of the side windows and while holding the model to add other parts I pushed it through into the fuselage. A nightmare to get back into place but did it eventually. Then there was the HF aerial and the tie downs for the rotor blades. Much stretching of sprue, swearing, super glue, jiggling, cursing and painted masking tape and she was ready for the photo bay. Then unfortunately she took a little tumble and the starboard sponson came off  . Unfortunately it doesn't seem seem to want to return to it's original position so if it looks a tad wonky that's why. Barely noticeable though. While fixing it I added the exhaust blanks and remove before flight tags.
I've just realised that the aerial under the tail boom must've got knocked off so I'll pop that back on (once it's been wrestled from the carpet monster!) in a bit.
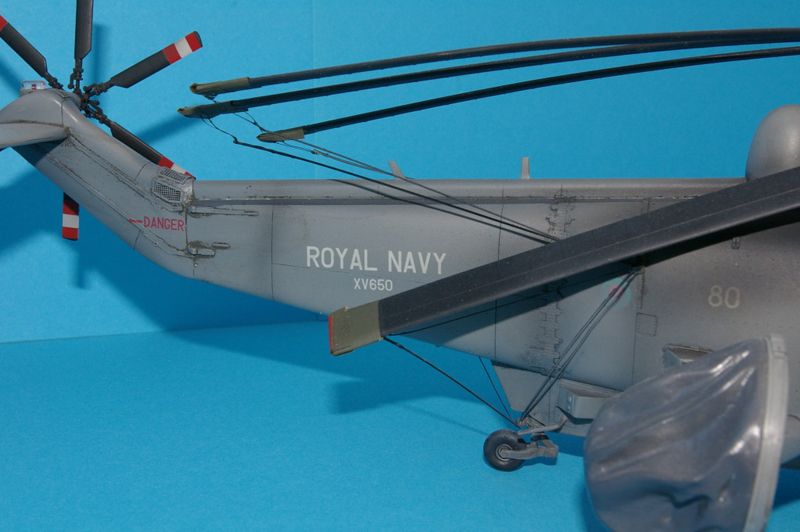
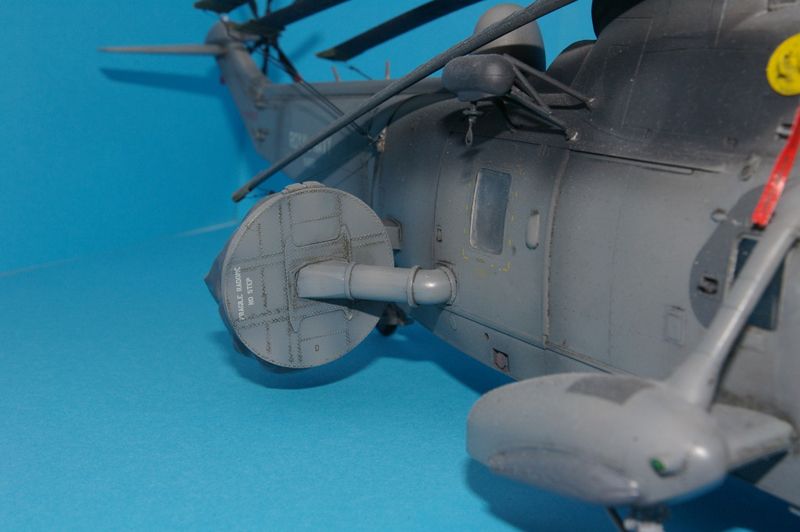
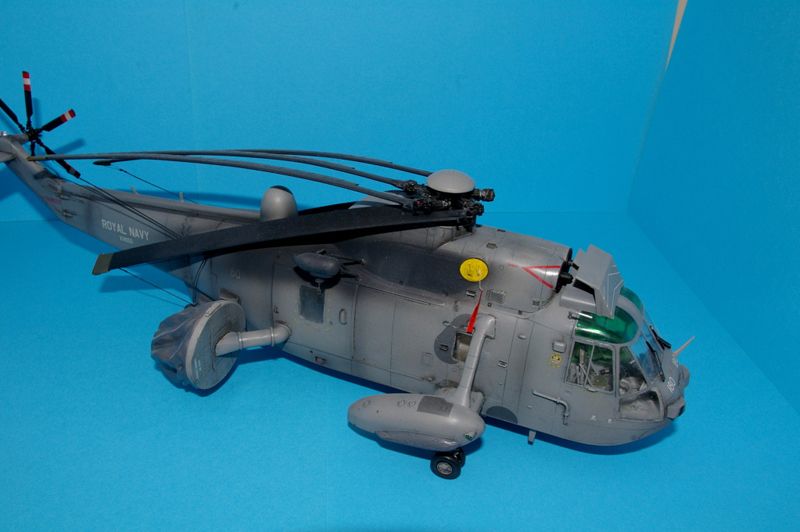
All in all it's been a cracking build and I've thoroughly enjoyed it. It's nice to model something you see on a weekly basis buzzing about over St Ives bay.
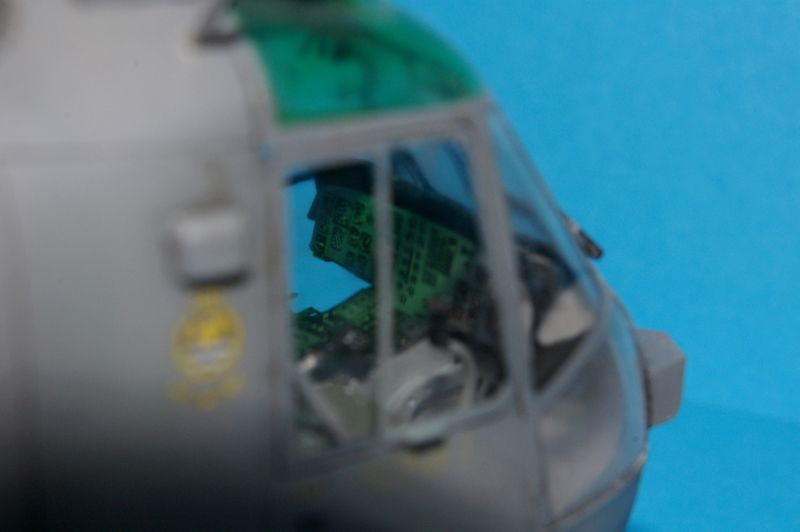
To all those who picked this one up from Hannants at the reduced price I cannot recommend enough spending the money you've saved on the Big Ed set for this. It makes a massive difference to the model and the mask set makes the complex glazing a joy to paint.
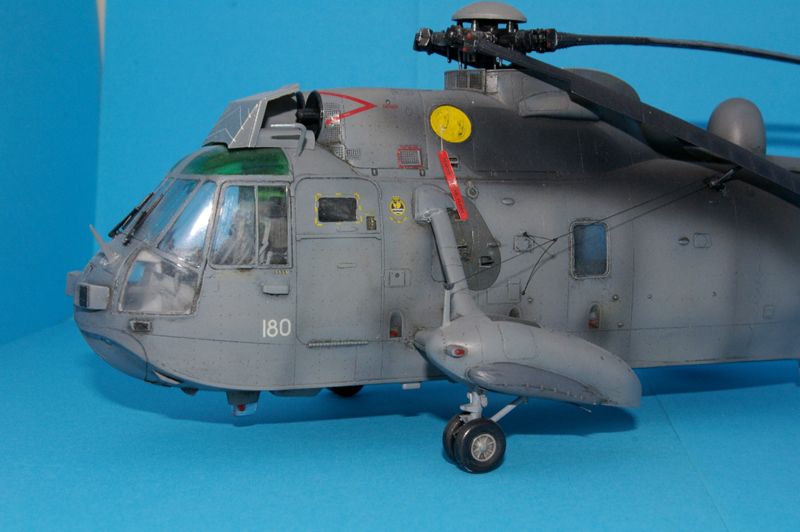
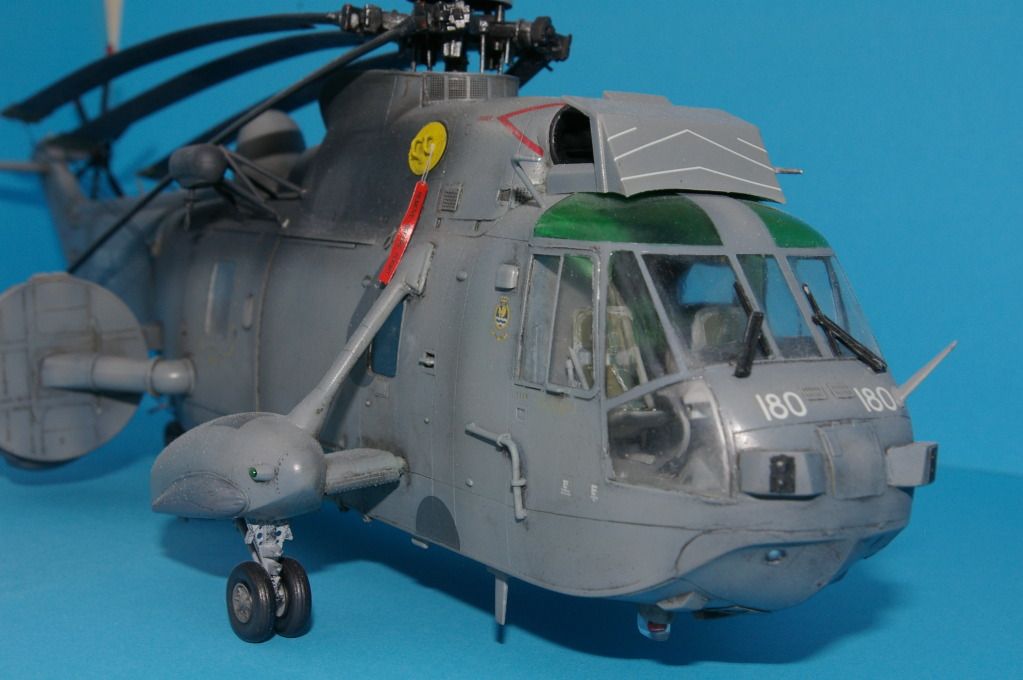
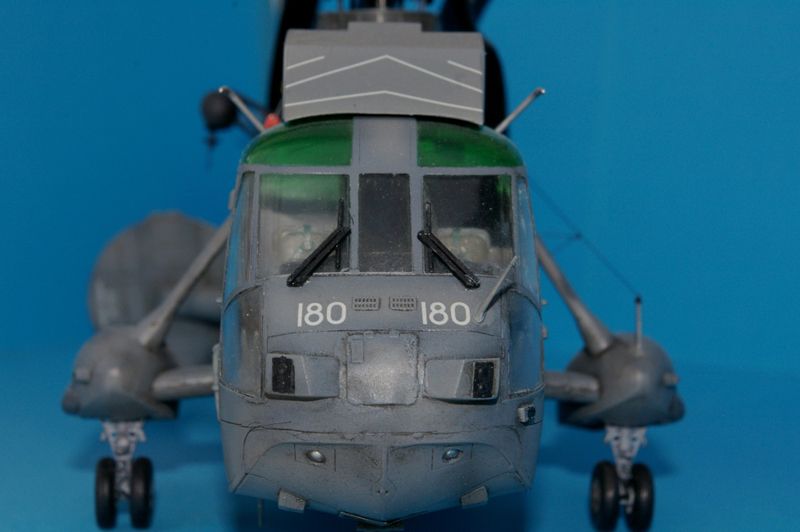
Here's some shots of her finished.


Richard 