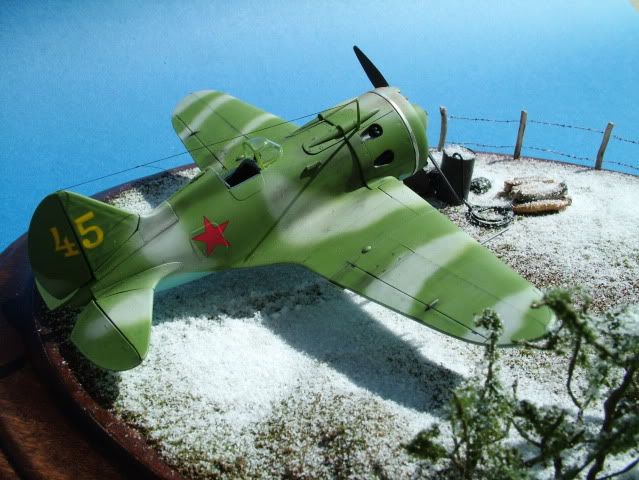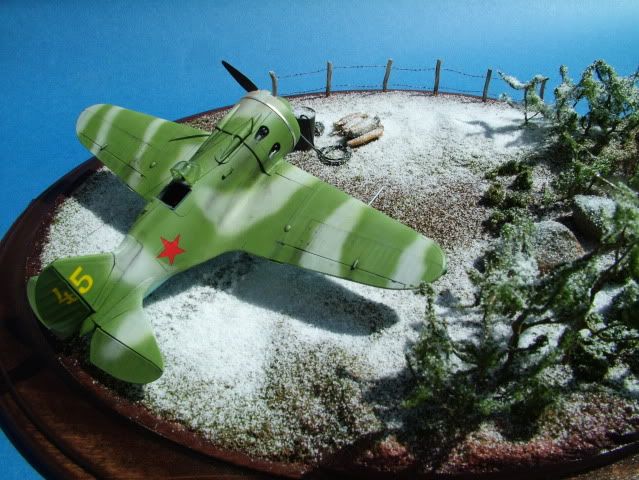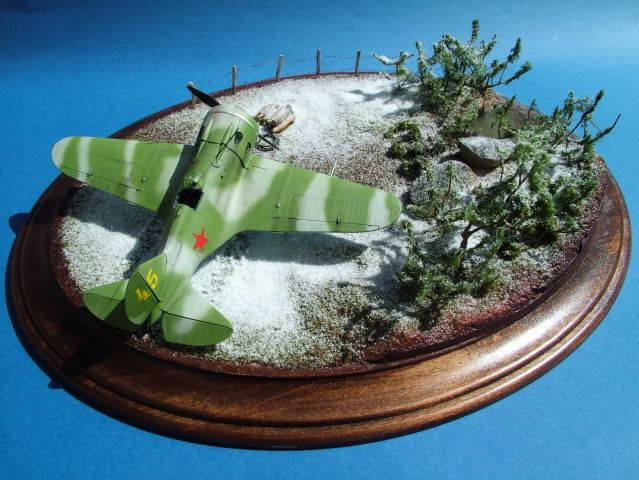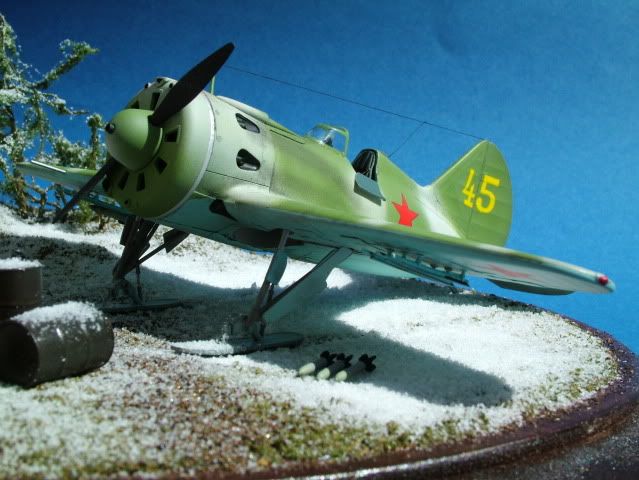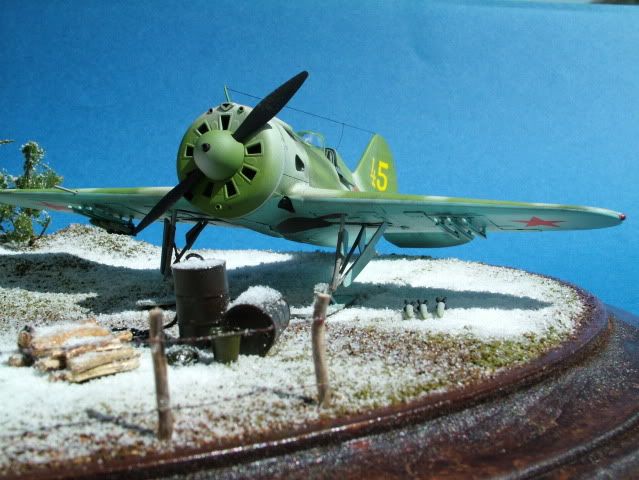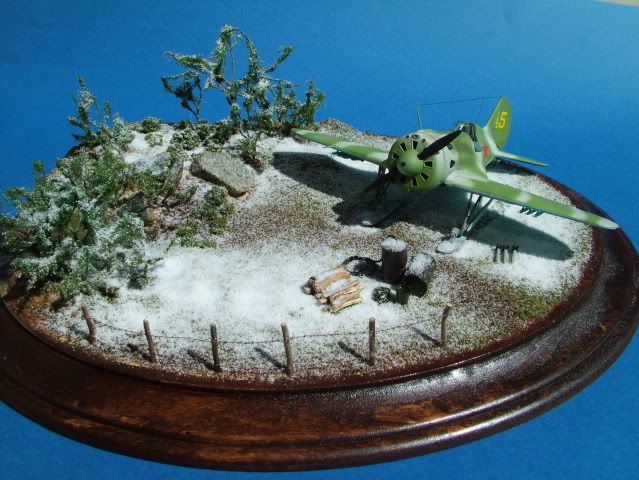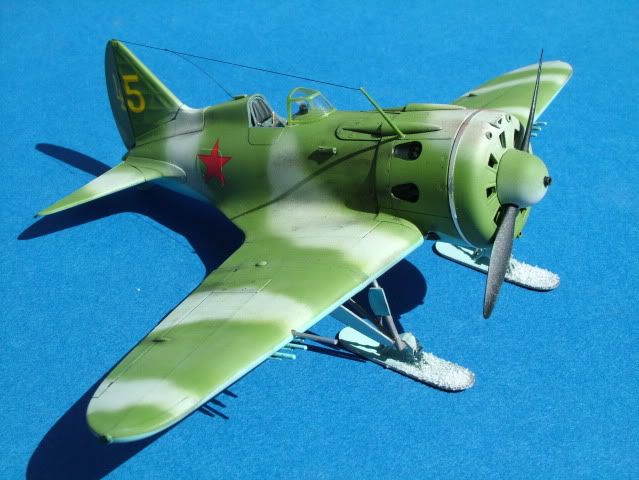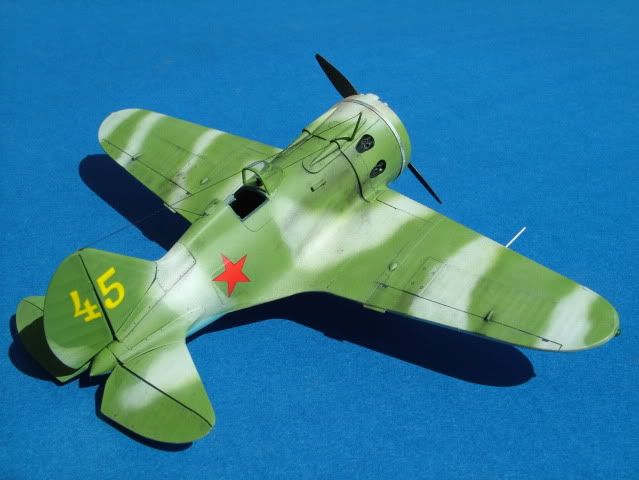


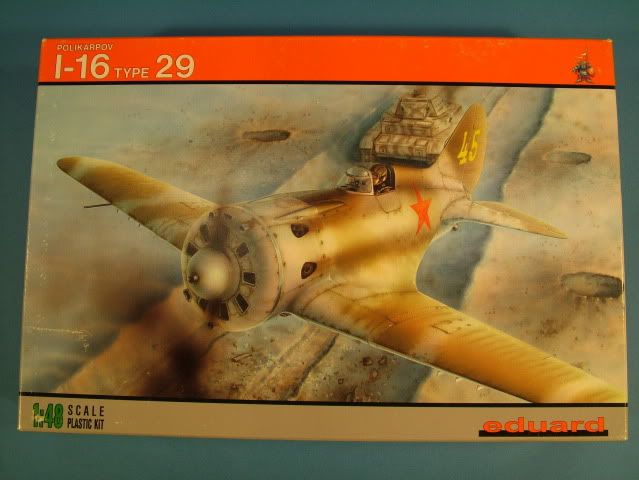
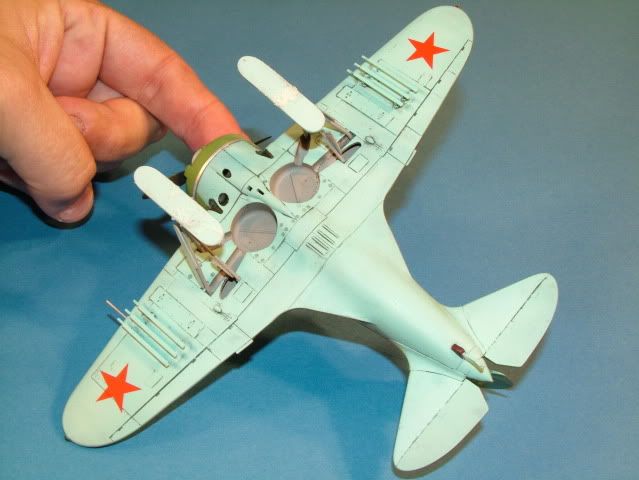
Polykarpov I-16 Type 29 on skis
Yellow 45 - 156 IAP (Fighter Air Regiment) winter of 1941
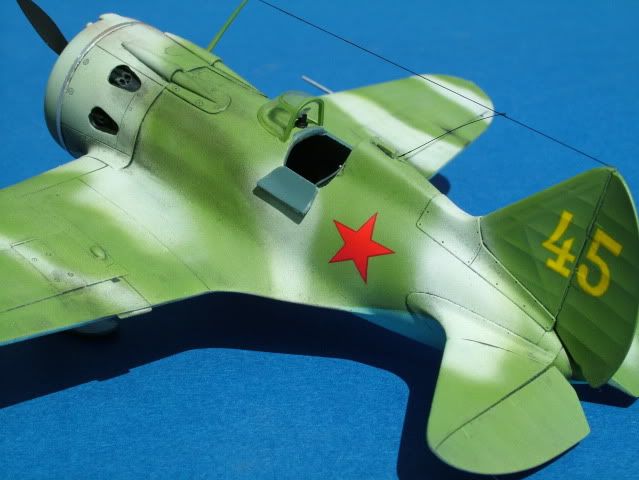
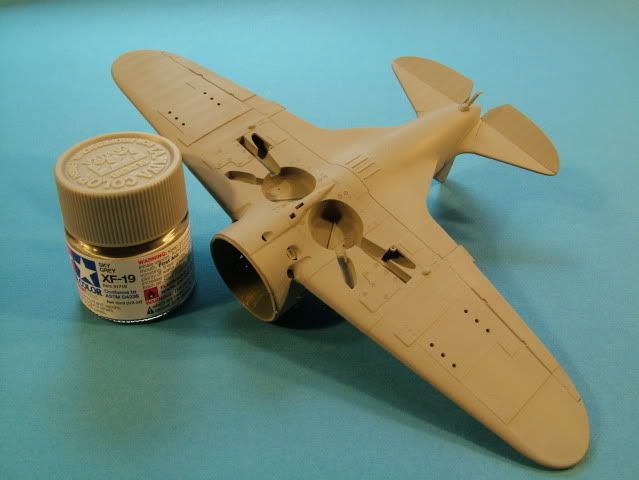
1:48 scale release from Eduard Models of a Polikarpov I-16 Type 29, kit number 8152.I will be modeling the scheme of “Yellow 45” of the 156th IAP, which is included on the kit decal sheet. The original Light Green and Light Blue standard camouflage for this particular aircraft was hastily over sprayed with a field applied winter wash of MK07 white dispersion paint.
Red National Stars without white borders are on the bottom surfaces and side fuse surfaces only. A large yellow 45 in Cyrillic script is on the tail. This particular fighter was equipped with a radio, a rarity at the time.
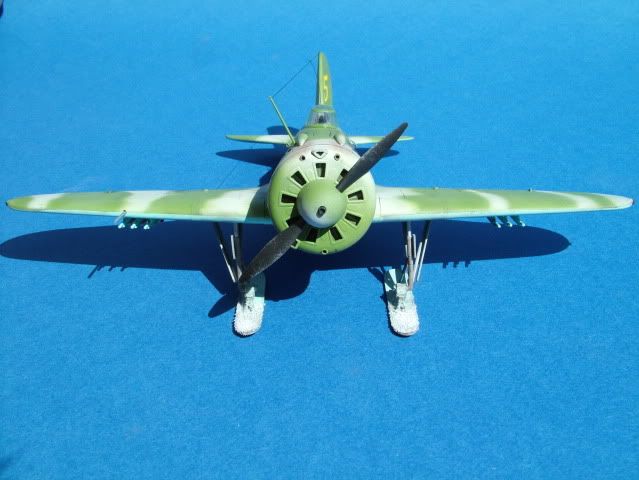
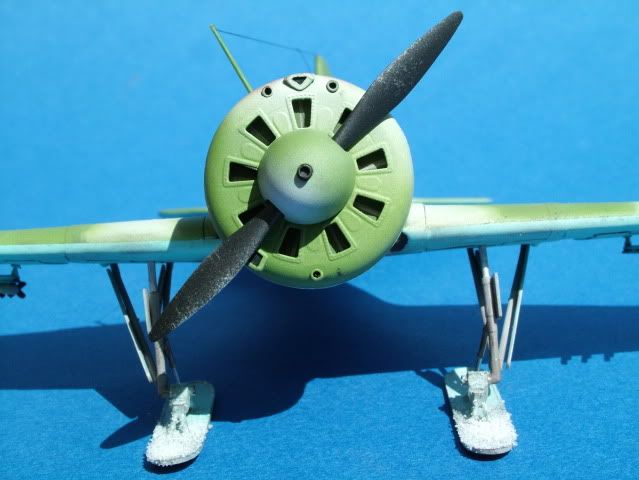
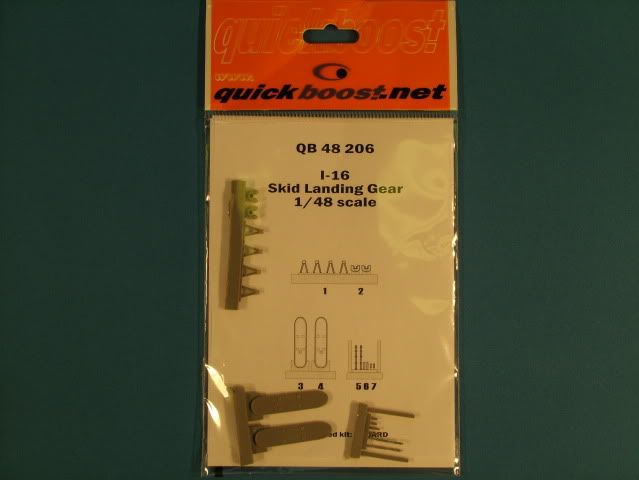
I will be replacing the normal landing gear with some resin skis from Quickboost.
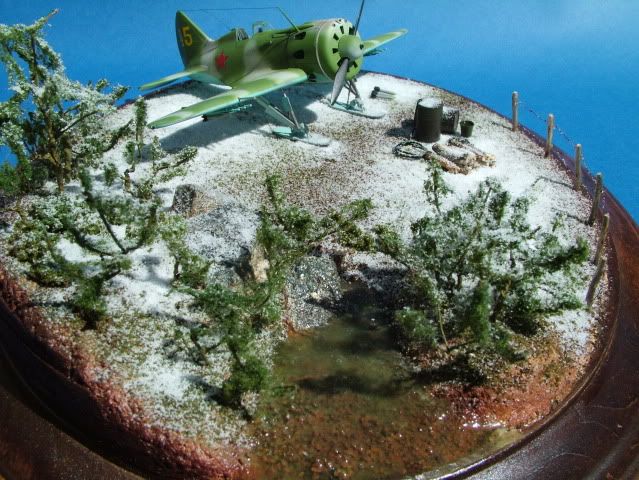
A small diorama is planned with a snow covered grass field. I will be applying the winter wash as well, although still working out the final techniques. Perhaps a little caked / wet mud using Mig Pigments on the top of the skis might be in order too.

Short History:
The Polikarpov I-16 prototype flew for the first time on New Year’s Eve day, 1933. There were only a small number of the original I-16's built, five of which participated in the 1935 May Day fly-past over Red Square in Moscow. These were the first low-wing, single seat fighters with retractable landing gear, to enter into service anywhere in the world. Originally, the aircraft were built with American Wright Cyclone engines, but they were soon substituted with Russian engines built under license. Because of the new style of this plane, many pilots initially found it difficult to fly.
This distinct fat little fighter (officialy named "ISHAK") was extremely maneuverable as evidenced in my included movie further down on my references links. It received many nicknames such as the “Rata” or Rat, or Mosca (Flea); the Finns called it the Flying Squirrel.
Comments about the planned build:
Pre-shading to be performed utilizing Tamiya Sky Gray primer coat and a Tamiya Flat Black over the various panels. As this fighter was build out of a wood structure for much of the fuse not too many panels will be visible. The camouflage scheme consists of VVS A-II Green and VVS A-II Sky Blue for upper & lower surfaces. Interior wheel wells are AMT 11 Light Grey, the cockpit interior was most likely VVS AMT-12 Dark Grey (Erik Pilawskii). She will be loaded out with 6 under wing Rockets (included in the kit)
Bits of worn surfaces to be picked out with a silver artist pencil, some boot scuffs on the walk ways to the cockpit will be simulated with a black artist pastel stick, fuel stains on wings will be simulated with weathering powders from bragdonent. A clear gloss coat of Testors Model Masters will be applied in preparation for the decals and snuggled down with solve- a-set if need be. Once the clear coat has dried, another layer of Model Master Gloss clear will be applied to seal all details and decals in.
The next step will be to apply ProModeller clay based washes (Dark Dirt) to accentuate the various panel lines and general weathering of the A-II Green and the weathered white winter camouflage.
Some additional dirt streaking effects will be applied over the airframe utilizing bragadoon.net weathering powders for exhaust staining. A final flat coat will be applied overall to finish out the build.
Kit used:
- Eduard kit number 8152
Paint Used:
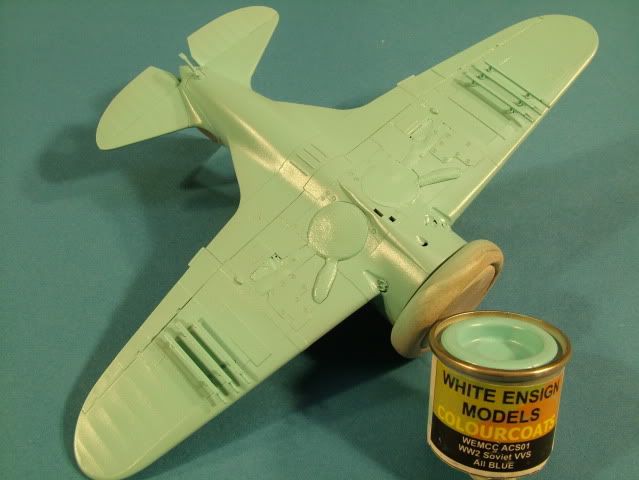
- Tamiya acrylic, Alclad II and White Ensign VVS color range
References & aftermarket products used:
- Original Kit review: Kit Review
- Quickboost Skis #48206
- Weathering Powders by: bragdonent
- Photo Walk Around: Polikarpov I-16 Walk Around (note that the interior color is wrong in this restored example)
- Squadron Signal Polikarpov Fighters in Action Pt 2 #162
- Colors of the VVS – Soviet Air Force Fighter Colors 1941-1945: Color Guide
- The RS 82 Rocket in Detail - RS - 82
- Polikarpov Movie: Movie
A special thank you to Mike Smith & Fred at Colpar Hobbies for their kind and endless support.
Tools used:
- Dental Tools for scribing panel lines , P Cutter & Scalemodelsport Scriber
- Scribing Templates
- JLC Razor Saw
- RB Productions Riviting Tool
- Xuron Sprue Cutter
- Small curved scissors
- X-Acto Scalpel blade(s)
- The “Bug” PE bender
- Pin Vise
- Pin drill bitts
- Cocktail sticks
- Tamiya Masking Tape various sizes
- Various sanding sponges from MDC & ProModeller.com
Glues & Putties used:
- Zap Super Glue
- Zap Super Glue Kicker
- Tamiya Extra Thin and Thick Cement
- Gator Glue
- Mr. Surfacer 500 and 1000
- Polly Scale – Plastic Prep
Paints Used:
- Tamiya XA-20 Thinners
- Tamiya XF-1 Flat Black
- Tamiya X-1 Gloss Black
- Tamiya XF-2 Flat White
- Tamiya XF-3 Flat Yellow
- Tamiya XF-7 Flat Red
- Tamiya XF7 – Gloss Red
- Tamiya XF-10 Flat Brown
- Tamiya XF-19 Flat Light Grey
- Tamiya X-19 Smoke
- Tamiya X-23 Clear Blue
- Tamiya X-27 Clear Red
- Tamiya XF-53 Neutral Grey
- Tamiya XF-69 NATO Black
- White Ensign A-II Light Green
- White Ensign A-II Light Blue
- White Ensign AMT-12 Dark Grey
- White Ensign AMT-11 Blue Grey
- Alcad II Aircraft Aluminum
- Alclad II Aircraft Steel
- Model Master Gloss Lacquer
- Model Master Flat Lacquer
- Micro Sol & Set decal solutions
- Future - for cockpit glass and instrument gauges
Final detailing:
- Promodellers Dark Dirt Weathering Wash
- Bragdonent weathering powders
- Gallery “artists” soft Pastels
- Invisaline for the radio wires
Box Art:
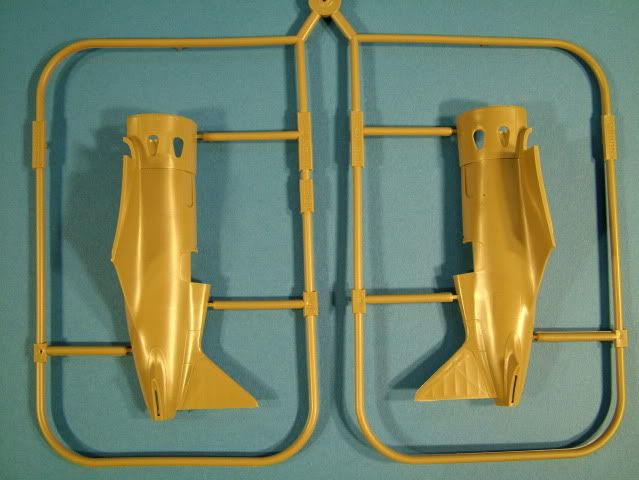
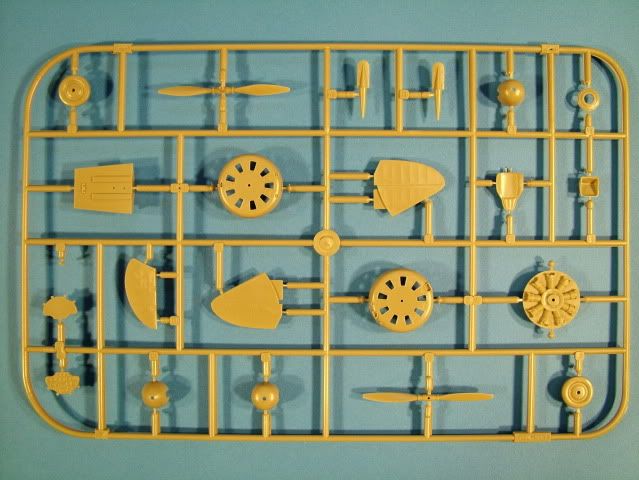
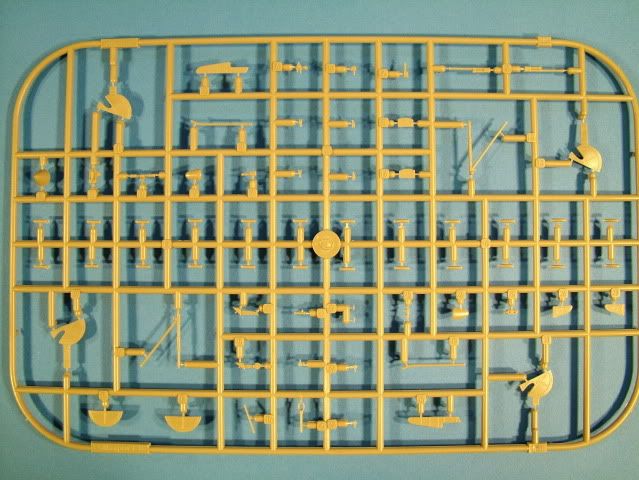
Sprue Shots:

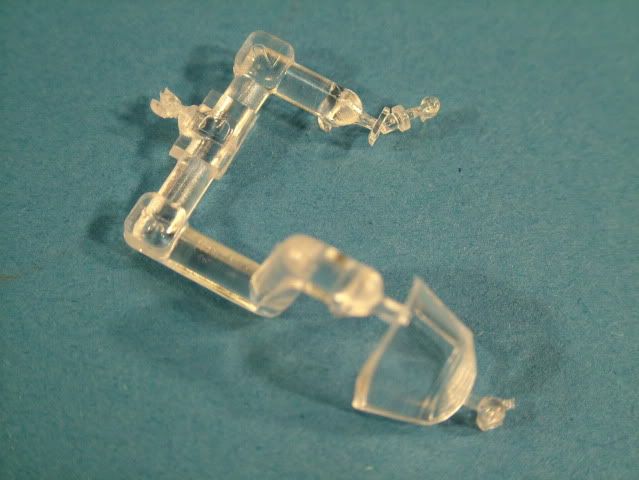
Clear Sprue:
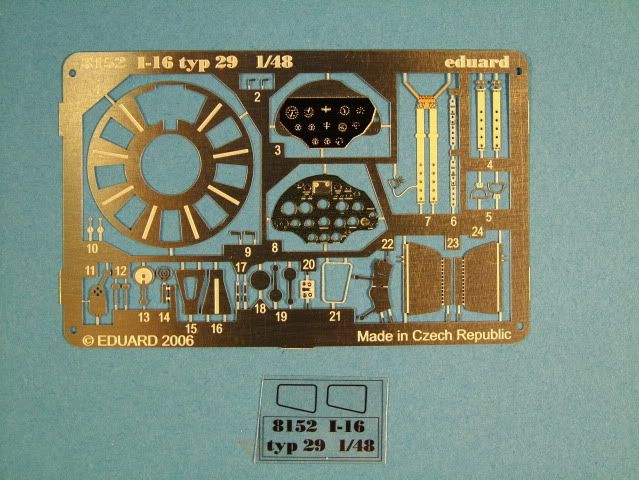
PE parts:
Decal Sheet:

Eduard Color Schematic:

Quickboost resin Ski Set:

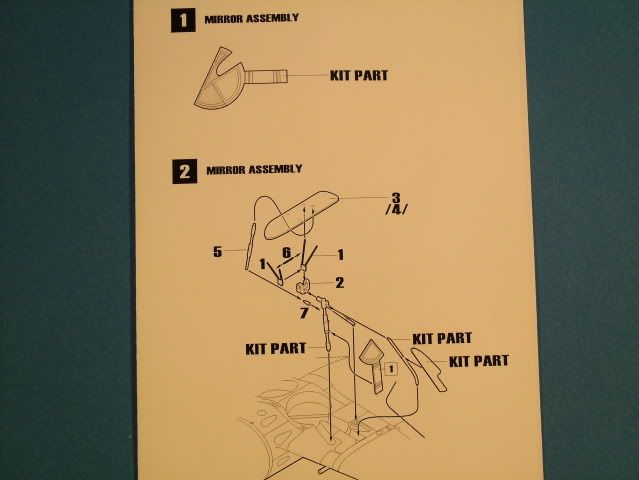
Instructions:
Reference Material:
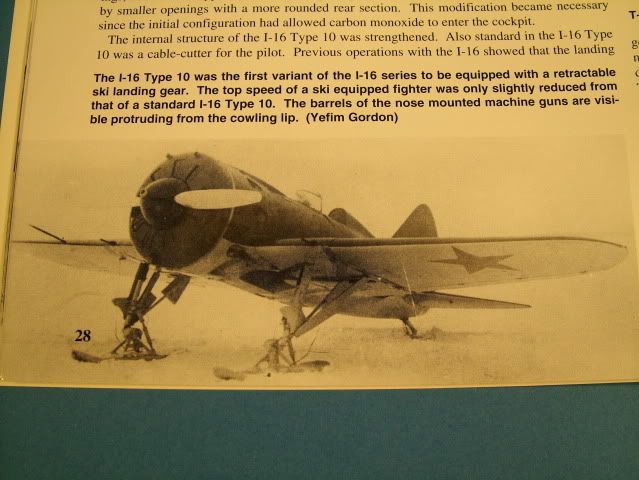
Reference Picture, albeit a Type 10 in this case
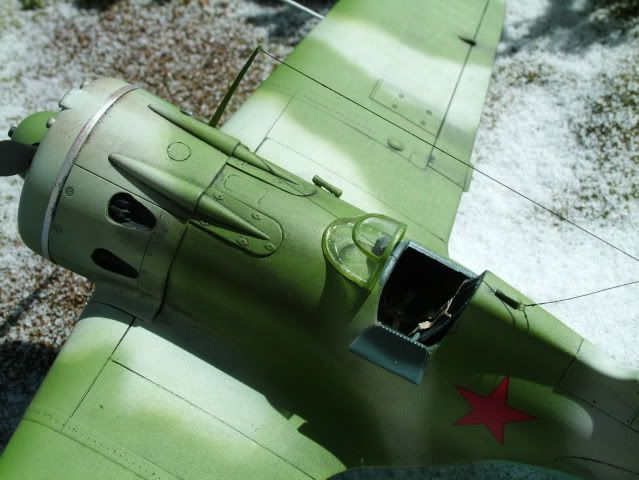
First order of business is to cut out the side door. The JLC Saw makes quick
work of this otherwise laborious task. The plastic molded closed door will be
replaced with the included PE door.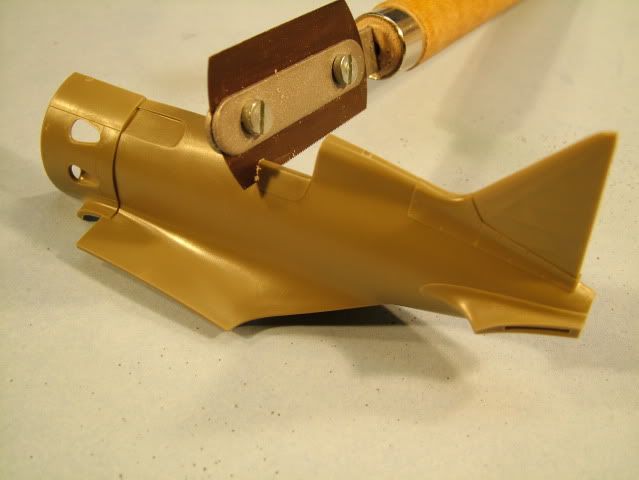
And all cleaned up with a little sanding and polishing.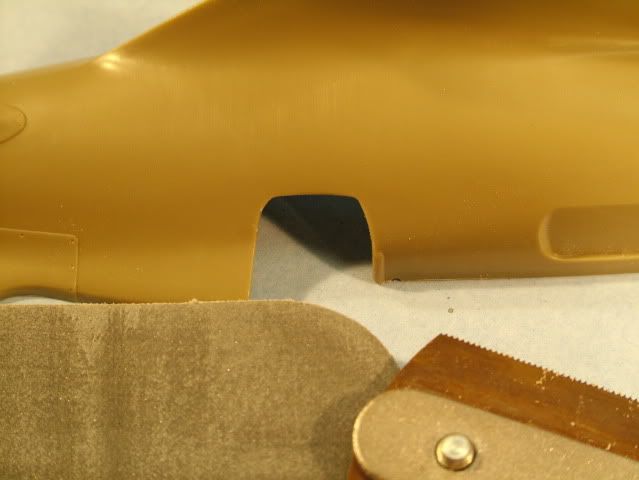
As a bit of introducing a build challenge I decided to display the elevators
with it's characteristic droop.
Utilizing a scriber from Scalemodelsport a quick couple of light swipes are
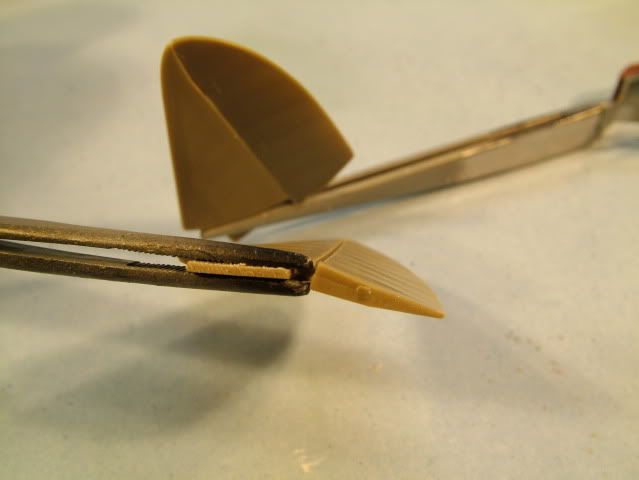
employed following the contours of the elevator.
Then carefully bend them into a dropped position. A few drops of Tamiya Overall "wetness / dampness" of the melting snow was conveyd by liberal applications of Gloss Varnish randomly sprayed. Barbed Wire Fence was made from small twigs I found in the yard, cut to appropriate length, the wire is razor wire made by Eduard PE. A couple of "logs" are twigs again from the yard in a 2 different diameters, the Gas Drums are from Tamiya, the bucket and bag are from Tamiya. The gas hose was fashioned from soft Lead Wire bent into shape and then painted Black. The "water" in the bucket is a dollup of gloss varnish. Snow melt was made with Zap 30 Minute Epoxy thinned with lacquer thinner, then lightly over sprayed with some semi gloss to convey a sense of "ice".
thin glue applied to run down the seam to weld it all back and solid.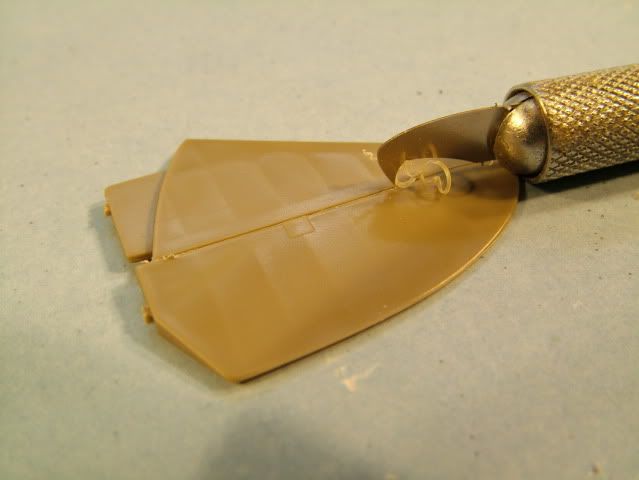
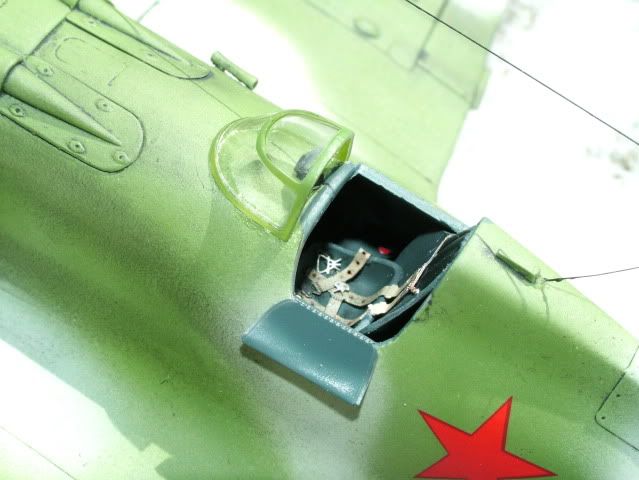
Build up of the interior, I pushed the control stick slightly forward as required
for the elevators to be drooped by their respective weight pressure.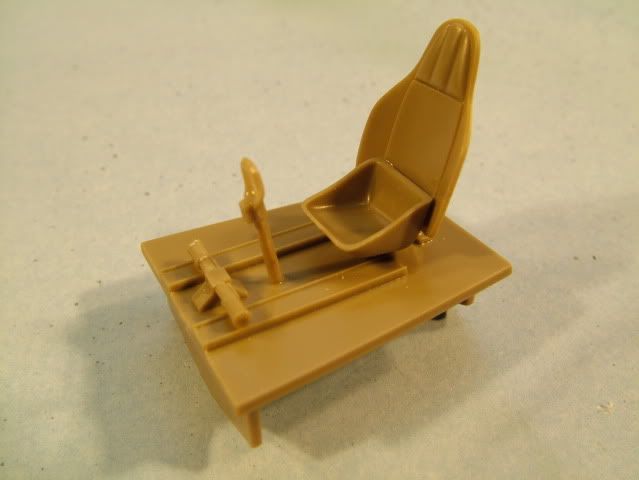
The interior is now painted with White Ensign Paints AMT-12 Dark Grey
(looks like it has a slight blueish tint to it) at 60/40 thinner to paint ratio
at 10 psi max.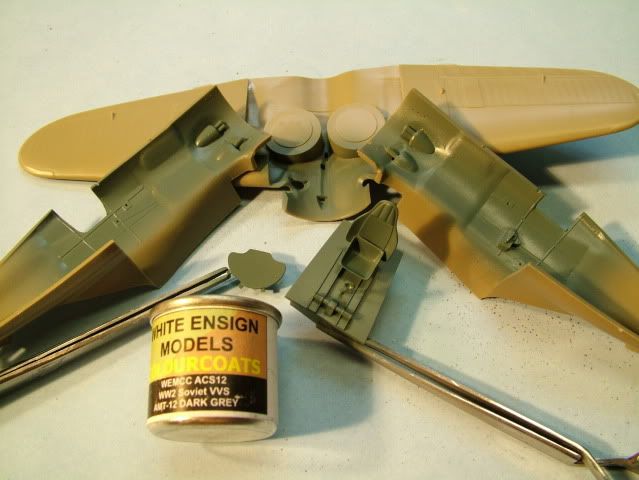
Drilled out the three canon barrels protruding through the cowl with
a pin vise.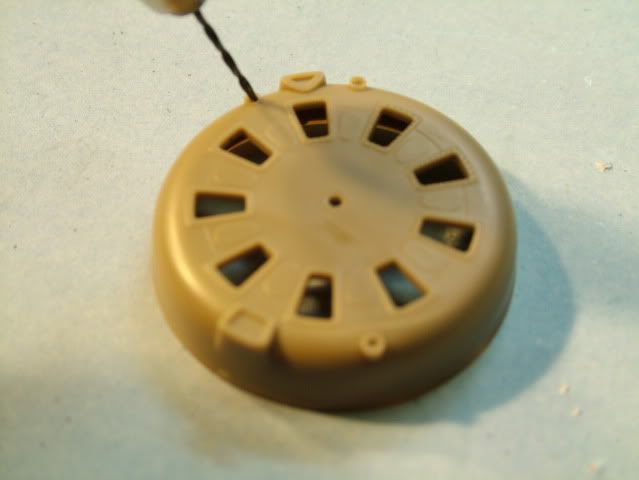
The rest of the afternoon was spent cleaning up mold seams from the small
RS-82 rockets and building up the fins, cleaned up the landing gear and
removed the casting blocks from the skis, build up the knuckle for the ski
attachment. Painted up the Prop with Tamiya Flat Black XF-1 and
oversprayed with some Model Master dark Anodized Grey to give it a metallic
sheen and then sealed in with a thin semi gloss coat of Model Master clear.
Painted up the spinner the characteristic light Green.
Cleaned up the six rocket rails, and build up the PE instrument panel. The dials will be given three applications of drops of Future by progressively building up the "round" glass faces.
The interior of the front cowl was painted VVS AMT-11 Gloss Light Grey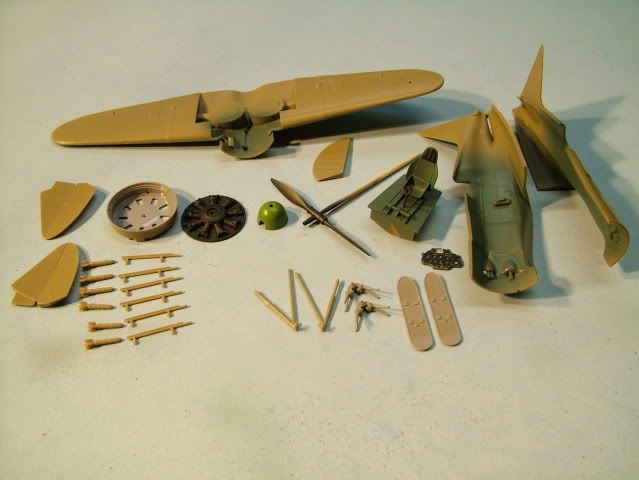
Installed all the PE on the side panels, then applied a wash of Oil Paints (Lamp Black) with some orderless turpentine (95 thinner).
Finished out the cockpit area, painted up the Stick Grip with some "leather" Tamiya Flat Brown, the column stick is Flat Black, some washes, and some scruffs with Model Master metalizer so some wear and tear is visible (a little tricky to see in the picture).
Installed the PE Seat belts and the PE rudder pedals.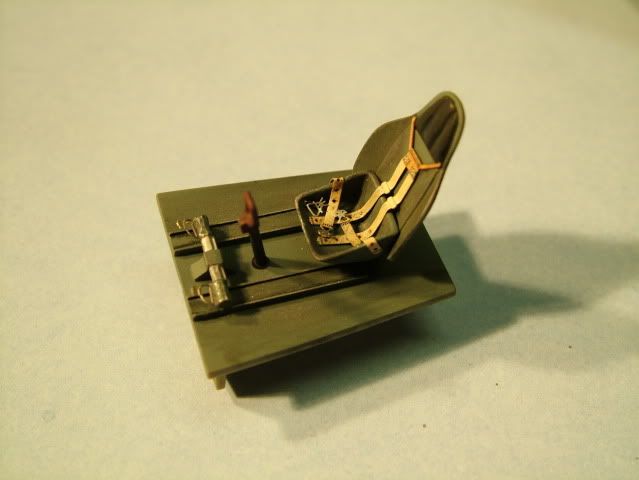
Finished of the instruments with more drops of Future to build up the "bubble
look" of the glass and installed the PE switches, then painted them up with
little drops of Red Green and Yellow.
Fuse together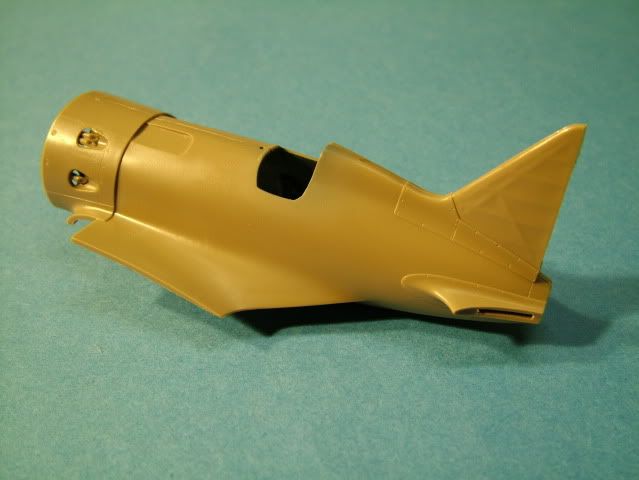
Installed the horizontal flying surfaces and checked for appropriate droop of
the elevators. Adjusted a little by re-applying some Tamiya thin cement and
letting the plastic soften up a little.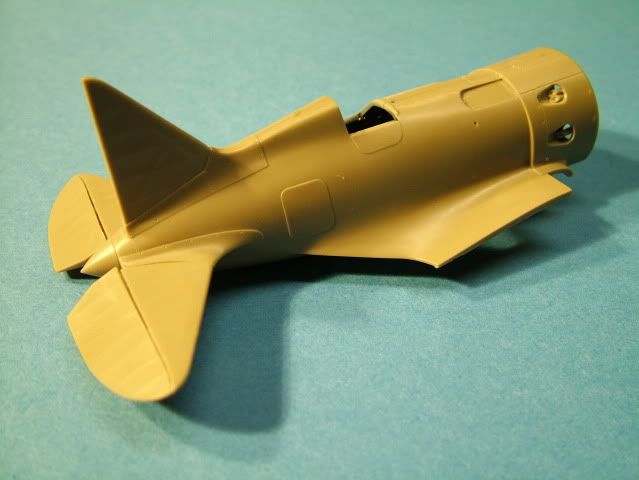
Slightly adjusted the Rudder surface too and placed it in a "relaxed" state.
There was a fairly large gap at the bottom where the wing mates to the
fuse. I filled it with some thick super glue and then polished it up. (in the
picture it still looks like there is a gap), but it is completely filled with Super
Glue that now is shiny from all the polishing.
There was a small gap where the top wing matches up to the front straight
edged area. That was cordoned off with some masking tape and then filled with Mr Surfacer 500. Just apply, let dry for about 5 minutes then a quick
swipe with a cotton bud soaked in IPA removed all but the filled area. No sanding required at all.
All the major seams were sanded down and then polished up with various
grits of sandpaper after the Tamiya Thin cement had a chance to harden
overnight.
A light dusty primer coat of Tamiya Sky Grey XF-19 was applied for a seam
check. A couple of newly scribed panel lines were applied as well.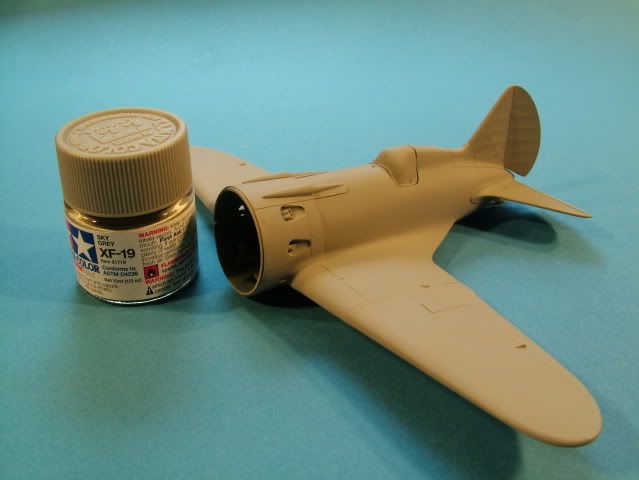
Bottom "seams" are all hidden well. Just need to re scribe the center one
back in, which is the natural line where the wing mates to the rear of the
fuse.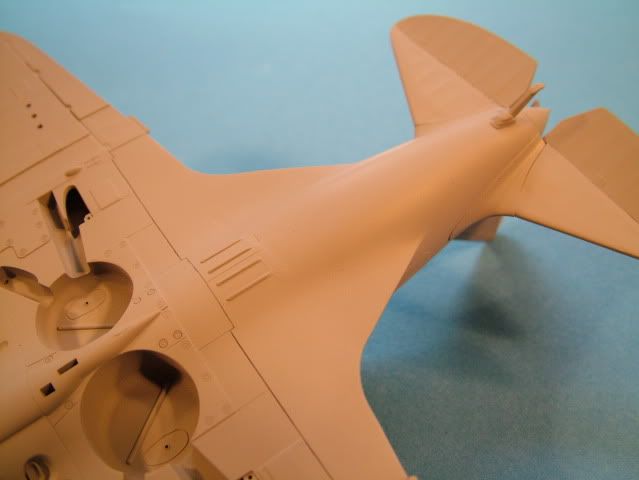
Top Seams are all looking great.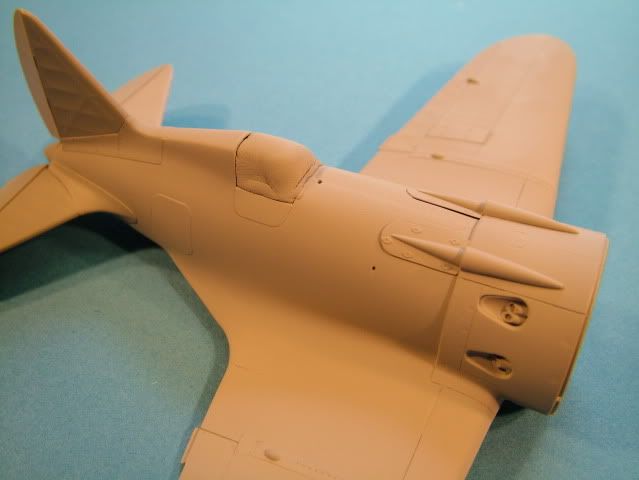
Built up the Engine and the PE "louvers". Painted with some interior Green,
then with a tooth pick scraped off the paint in between the "moving" parts.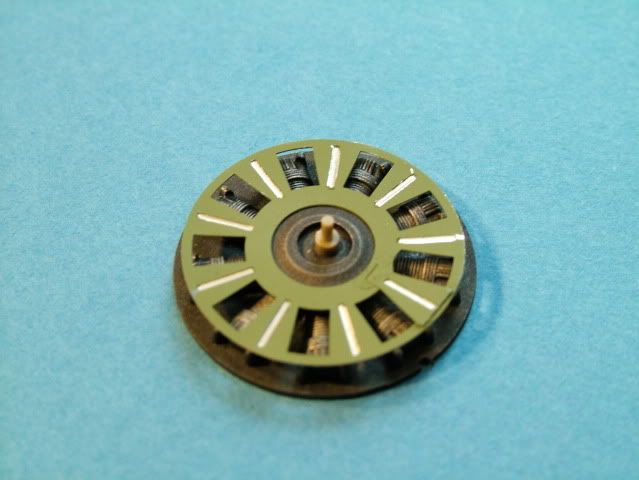
Painted the interior wheel wells with some VVS Light Grey and then plugged
them with some White Tack.
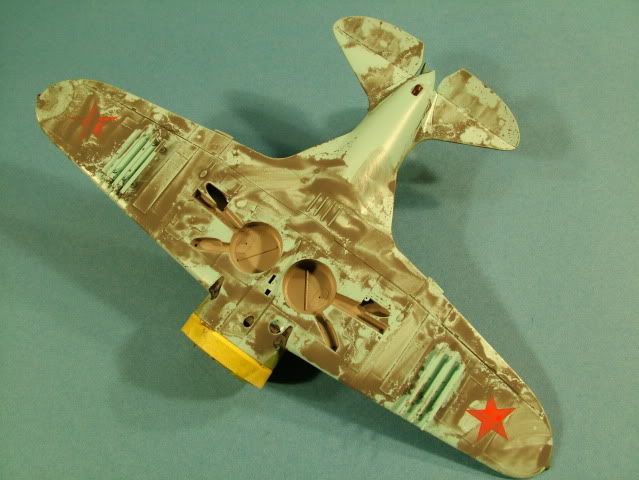
Installed the rocket rails, and painted the underside VVS AII Light Blue.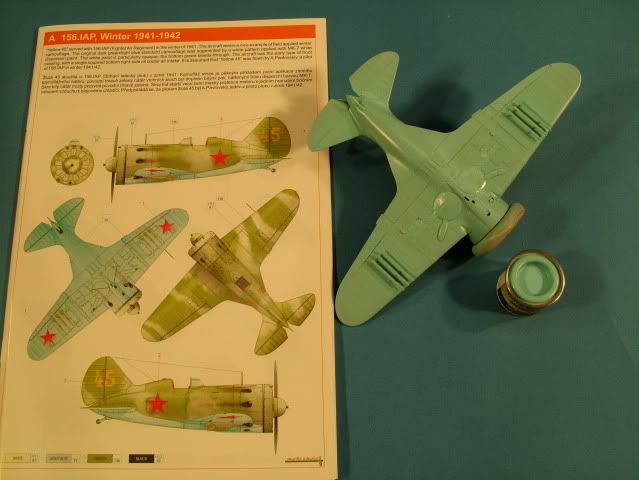
Pre-shade the top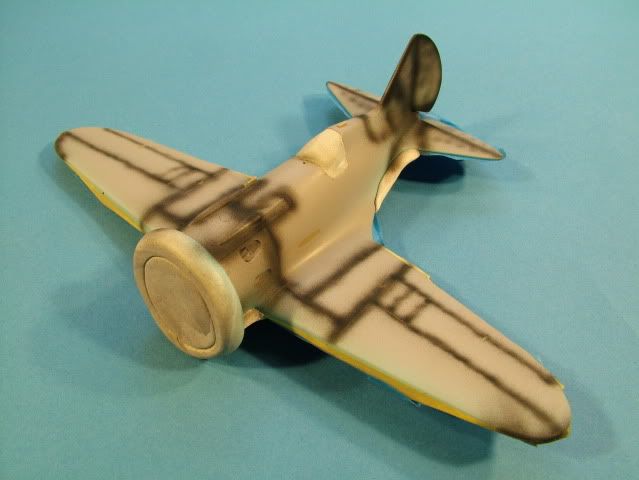
Then on to the base layer of the Light Green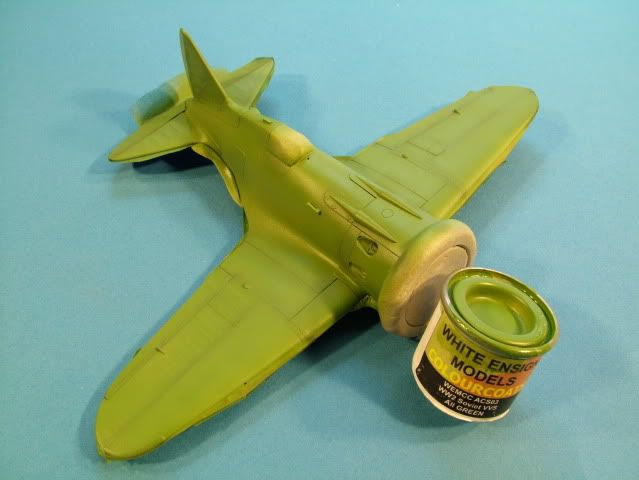

Masking off the "Green" with some White Tack and following as closely
as possible the reference material.
Airbrushed on a mixture of Tamiya Flat White with a few drops of Tamiya
Light Grey (XF-19) to dirty up the winter wash.
Once the first coat of White Wash was applied, removed the White Tack
and all the following steps are free handed..... went back and lightened up
some of the Green with a mixture of 80% Thinner and 15% Green, 5% White,
Speckled in some green on the White area's.
Then went back and sprayed in an overall Wash of "White" at 95%
Thinner, 5% pure Flat White.
Back again and refine the edges of the Green with 80% Thinner to 20%
Green paint. Airpressure on the freehanded steps were all at 8 PSI max.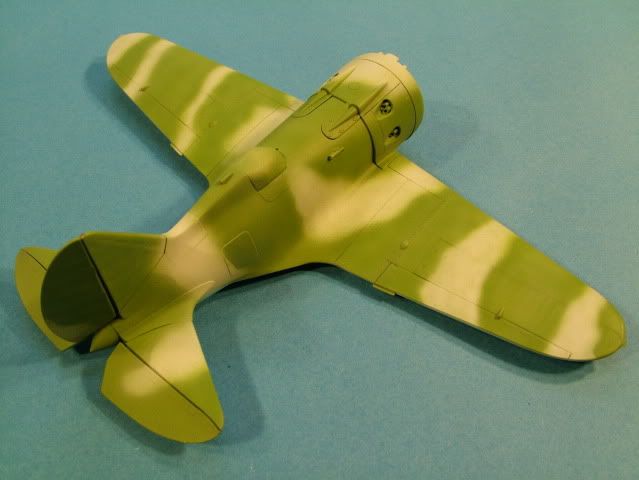
Pretty hard to tell in the pictures, but ended up with some cool effects of
"blotchyness" to the White, with some Green showing through and on the
Green some White showing through.
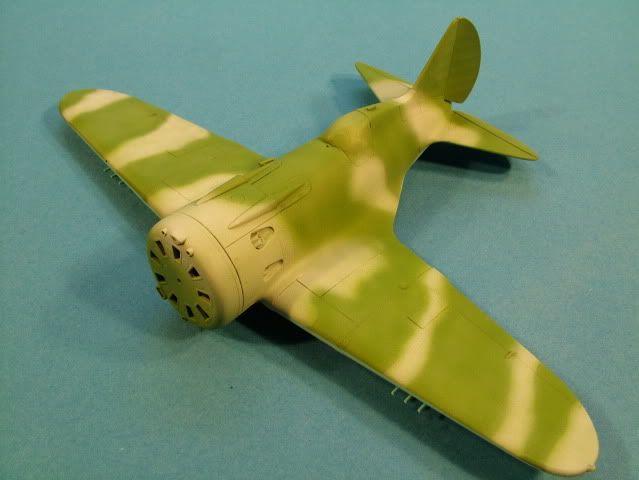

Placed a ring of Model Master Ultra Thin Chrome to simulate the Cowl Metal Fastener.
Painted up some flat Black inside the machine gun holes.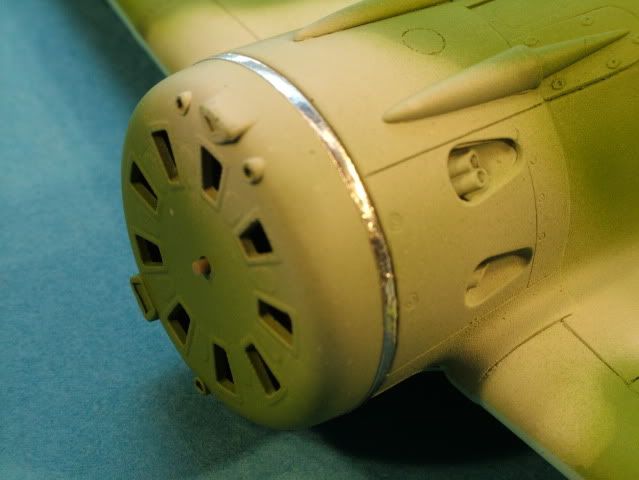
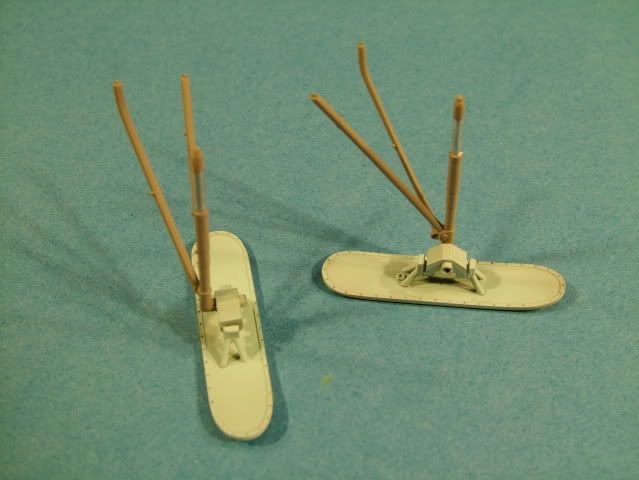
Cleaned up and glued the landing Gear and finished building the landing skis,
and painted up. Still needs some washes applied. Also the small gear doors
where painted Light Blue on the outside and Light Grey on the inside.
The oleo struts were painted up a gloss silver.
Added landing lights to the wings, then painted up with silver and a dollup
of Clear Tamiya Red and Green.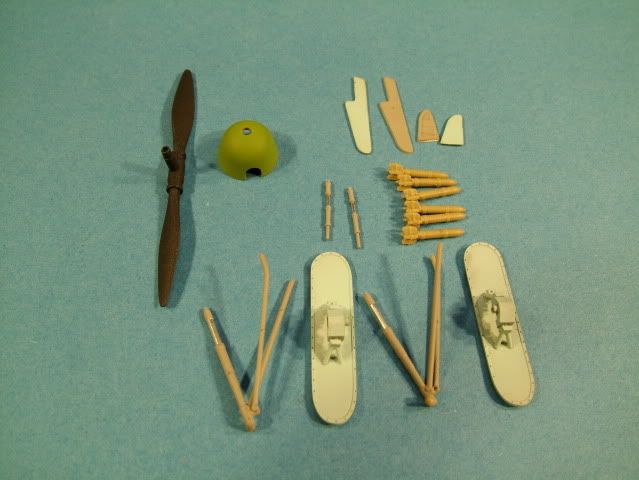
Applying the wash on and off. Decals were allowed to dry through the week
A second coat of Model Master Gloss Clear sealed them in nicely.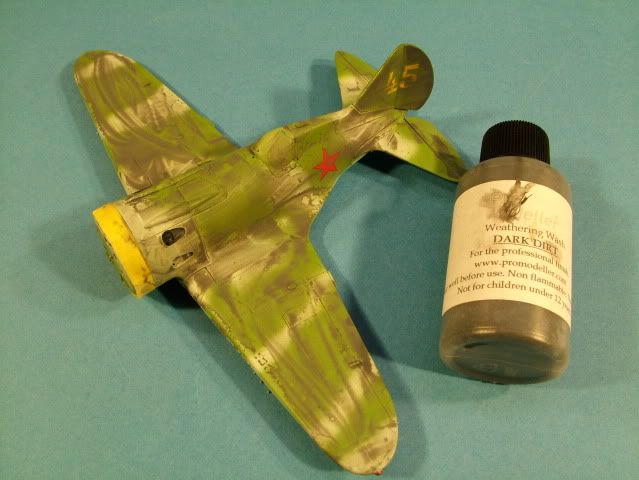
Once the wash was removed, a light layer of Model Master Flat Coat was sprayed on.
Work progresses on painting all the small details, picked out the exhaust
stacks, the rubber ice boot on the tail gear, small areas of wear and tear
with some model master dark anodonic metal on a small sponge dabbed here
and there.
Then with the Bragdonent.net weathering powders highlighted some more
dirtiness on the exhaust staining.
Glued on the antenna rigging, got the Skis all situated (quite fiddly) but
truly makes this one unique looking.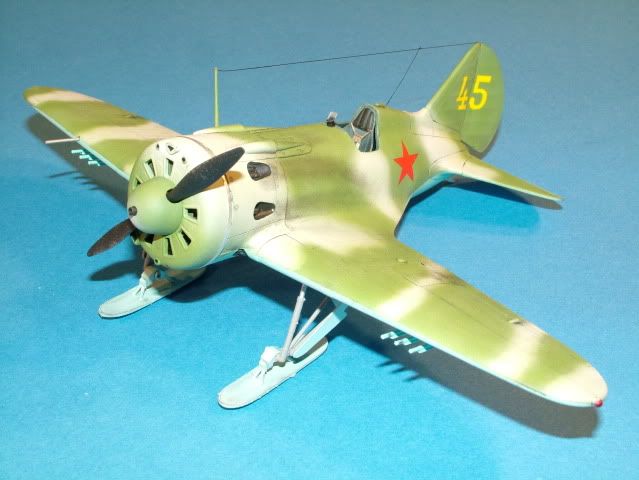
The diorama base
The wood base was stained during the week and coated with a several gloss
coats to protect the wood stain.
I then cut up some foam board, stacked it, to build some height differential
and give the base some eye appeal.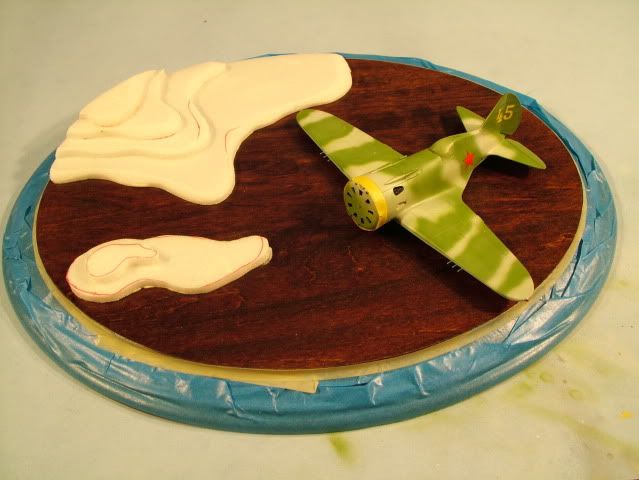
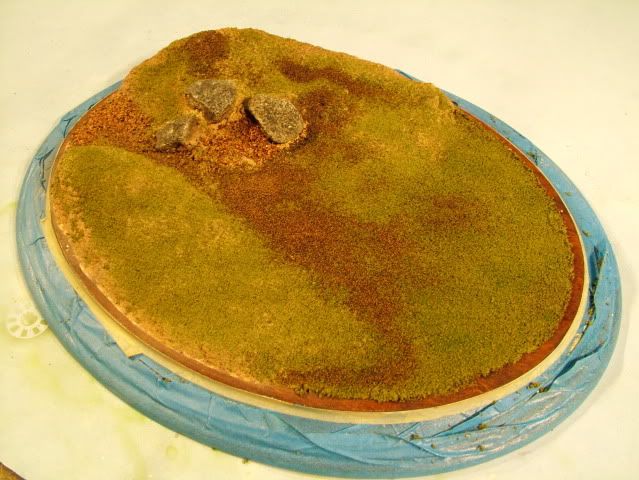
Followed with some modeling plaster and built up a soft rolling Hill and Valley.
A couple rocks from the back yard give some additional interest.
A little hard to discern but the plaster was over sprayed rather randomly with
four different earth tones from Tamiya to provide a start for the work to
come.
A layer of pebbles and gravel was applied over watered down yellow wood
glue.
Once that was dried another layer of very watered down wood glue was
sprayed on with a mister and some static grass of different colors was
applied.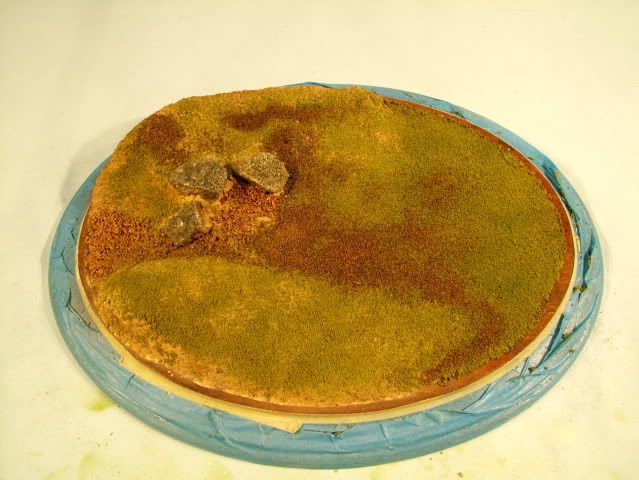
Placing little scrub brush twigs for some height variation and interest.
They are made out of fine metal wire twisted together.
Placed two "gas" drums" and build up a "sack" and a small water pale
(Still to be painted). Broke up a couple small dried out twigs found
in the back yard.
Some barbed wire fencing and figuring out on fashioning a gas hose drooping
from the Drum.
Once that is completed it is time for some light snow to fall gently on the
base