


1:48 Revell A-6E Intruder - VMA(AW)-224 Bengals - BuNo 155616 Cherry Point NC
This will be my first entry into the ProModeller Naval Group Build, and is Revell's excellent A-6E Intruder. The kit is has been around a fair while now, and is quite hard to come by but is still the best by far in 48th scale. For it's age the detail is superb, the cockpit being one area that can be built up and detailed to a high standard, the landing gear is also a work of art and represents the real items superbly.The only downside to it age is that the panel lines are raised, that being said they are very well moulded and are perfectly acceptable, i opted to re-scribe the kit but more of that later.
The build will also include some aftermarket parts, these include, wing folds from Paragon, ejector seats from True Details, Eduard photo-etch and decals from Impact. I'm also going to scratch build various areas of the model.
Build Info
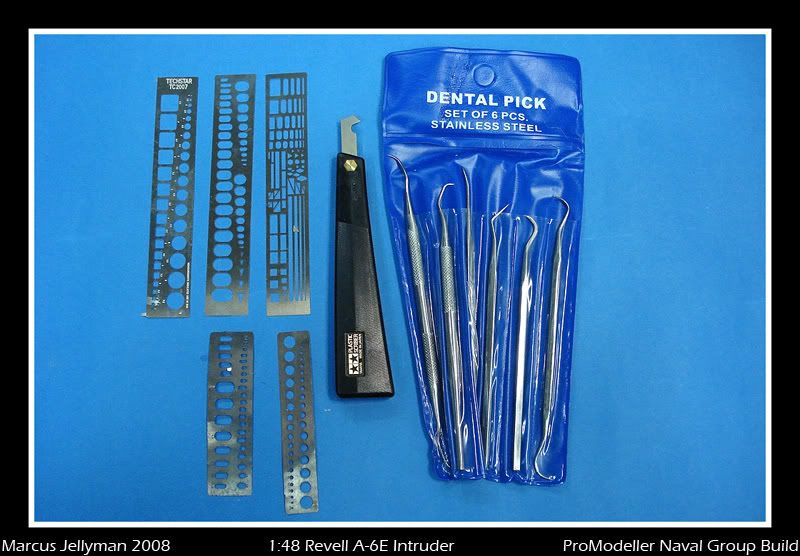
Tools & Sundries used
Loctite Super Glue 3 Gel Cyanoacrylate
Tamiya Extra Thin Cement
ZAP-O Odorless Cyanoacrylate
Milliput - Fine
Squadron Green Putty
Tamiya Masking Tape
Evergreen Sheet Styrene and Strip
0.2 & 0.5 Lead Wire
5 AMP Fuse Wire
1200 Grit Wet & Dry Paper
Dental Tools for scribing
Olfa-P Cutter
Micro Sol & Set decal solutions
Johnsons Klear
Bare Metal Foil - Chrome
Paints and Weathering
Halfords Grey Primer
Tamiya X-1 Black
Tamiya X-2 White
Tamiya XF-69 Nato Black (For Tyres)
Tamiya X-27 Clear Red
Tamiya X-25 Clear Green
Xtracrylic XA-1137 Light Gull Grey FS16440
Lifecolor LC-60 Gloss Dark Blue
Gunze Sangyo H-318 Radome
Gunze Sangyo H-76 Burnt Iron
ProModeller Dark Dirt & Black Washes
Tamiya Weathering Master Powders Set B
Inscride Soft Greystone Pastels
Aftermarket Parts
Eduard PE #48172 for the A-6E / EA-6A Intruder
True Details #48408 GRU-7 Ejector Seats
Impact Decals #48001 USMC Intruders PT1 VMA(AW)-224 Bengals
Paragon Designs #48067 A-6 Wing Fold Mechanism
Eduard PE #49009 Remove Before Flight Tags
The Revell box art

The extensive kit sprues, you also get many parts for the EA-6A too.


The Impact decla sheet.


The excellent Paragon wing fold set, a real work of art.

True Details resin seats.

Invaluable reference material

I decided to rescribe the entire kit, so this was the first job before anything was cemented together, doing this is far easier than when things are built up.
Scribing tools at the ready.
The mammoth task begins!!
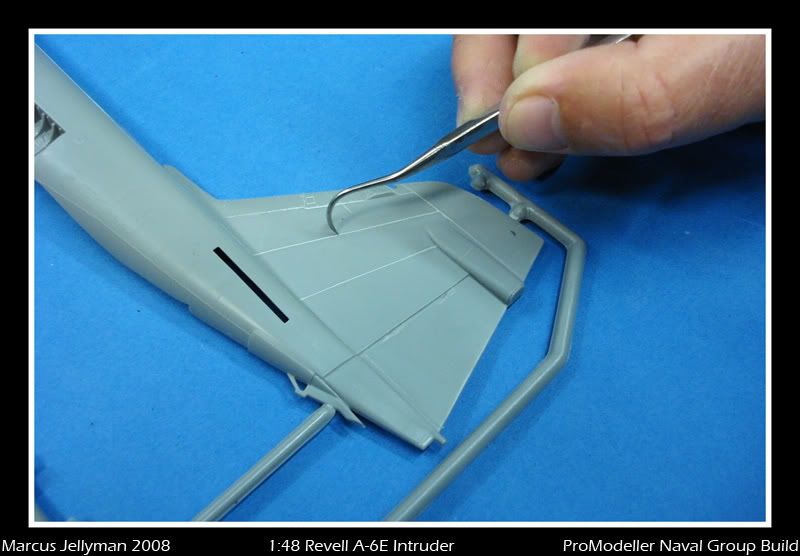
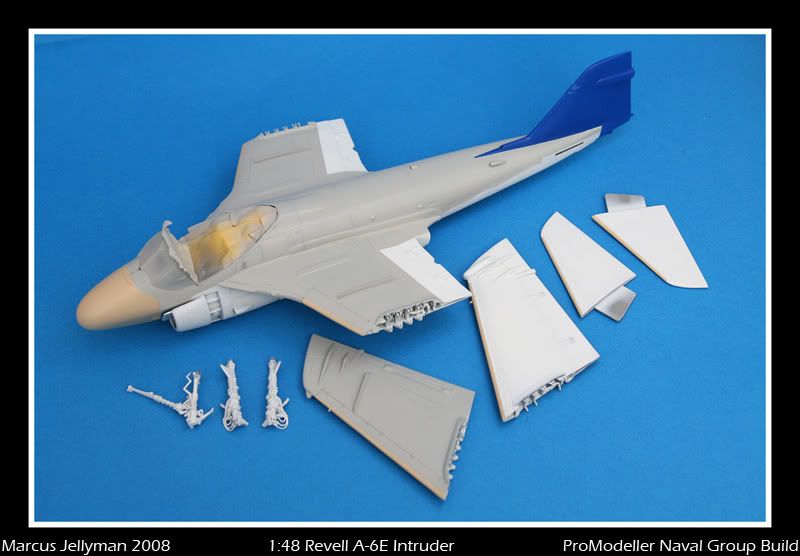
The fuselage and wings have now been scribed and smoothed ready for contruction.


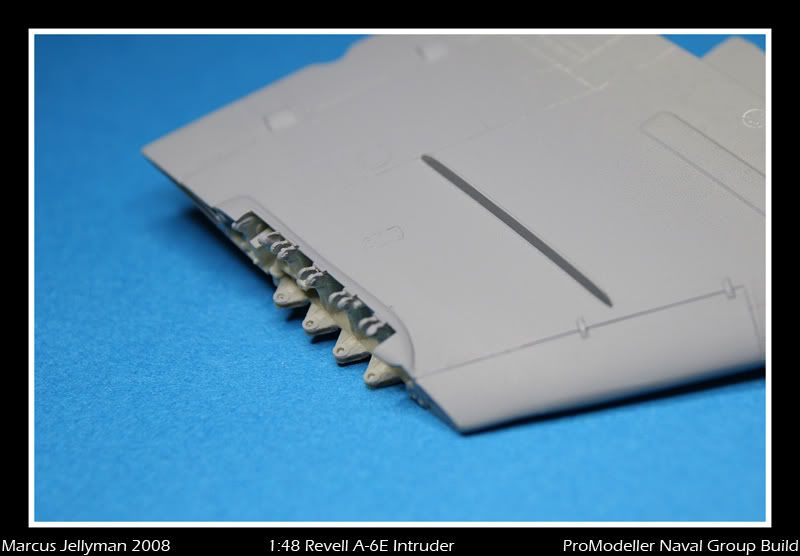
Up next was the resin wing folds, as soon as i decided to build the A-6 i wanted to add these, they are superbly detailed and very well made. The instuctions give you all the info you need to complete the job. Just a small ammount of filler and plasticard was needed but this was probably all of my own doing!!
Tools for the job.


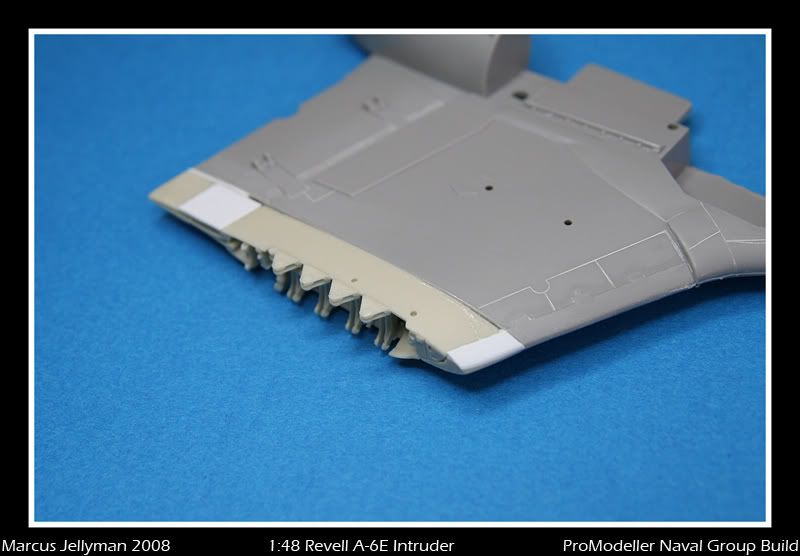


The wings were then primed with Halford grey primer to check for any imperfections.

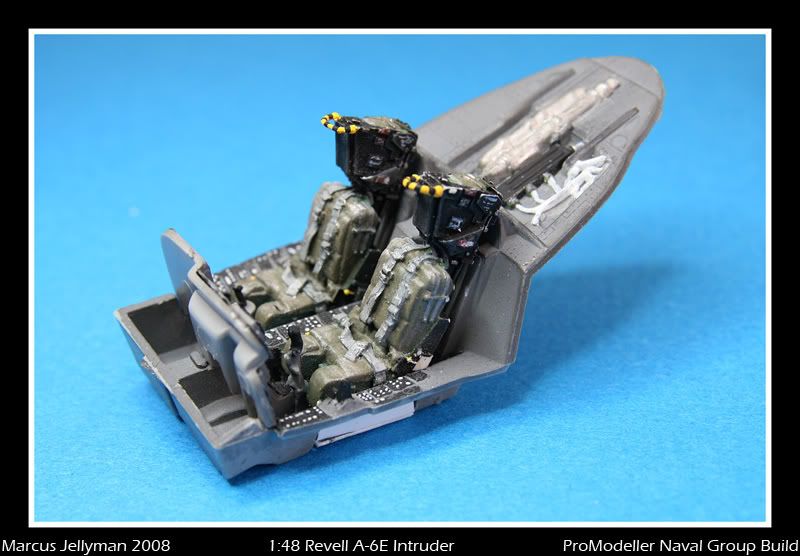
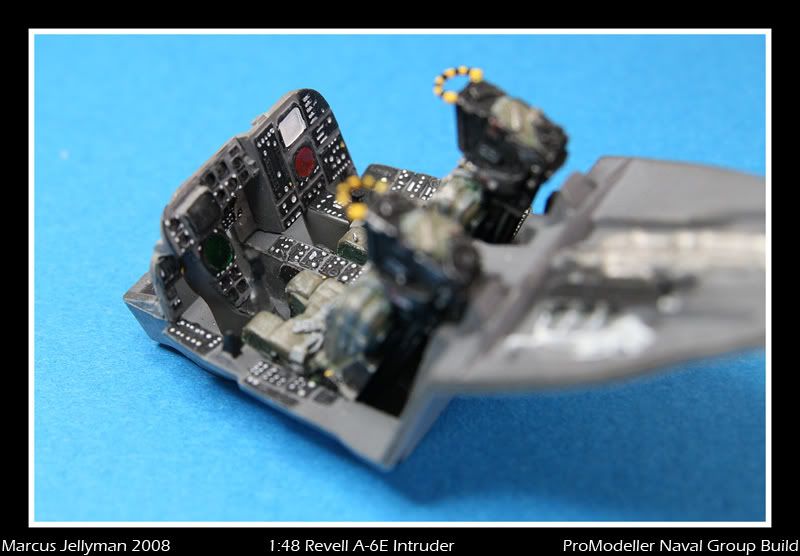
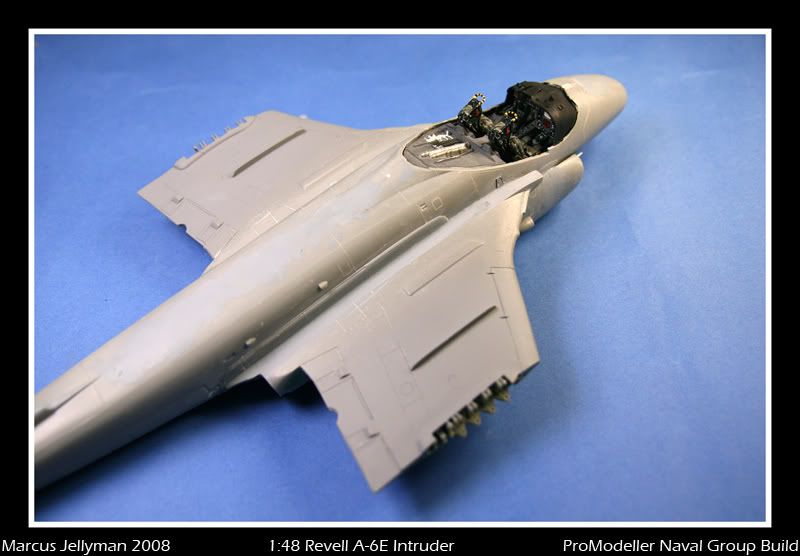
Next up, the excellent kit cockpit, i opted to just add resin ejector seat here.


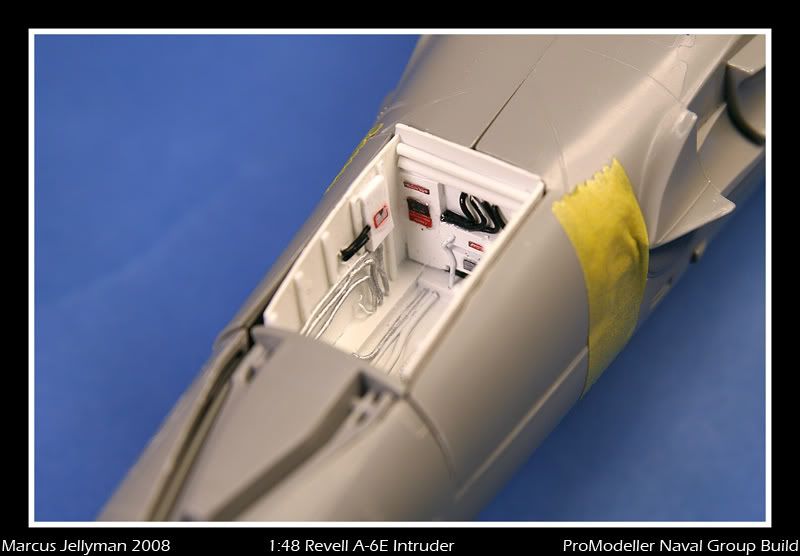
The Eduard photo etch set includes a detailed avionics bay that drops down form the rear of the fuselage when on maintenance. This was built up and painted, i also added extra placard's and wiring using lead wire.


Finally the bay wash given a wash Promodellers 'Dark' wash.


With the bay completed i turned my attention to the recess that the bay lifts into. This was built using various types of plasticard and stripes, wiring was added using lead wire.


The fuselage and wings have now been cemented together, and any area's that needed attention have been filled.


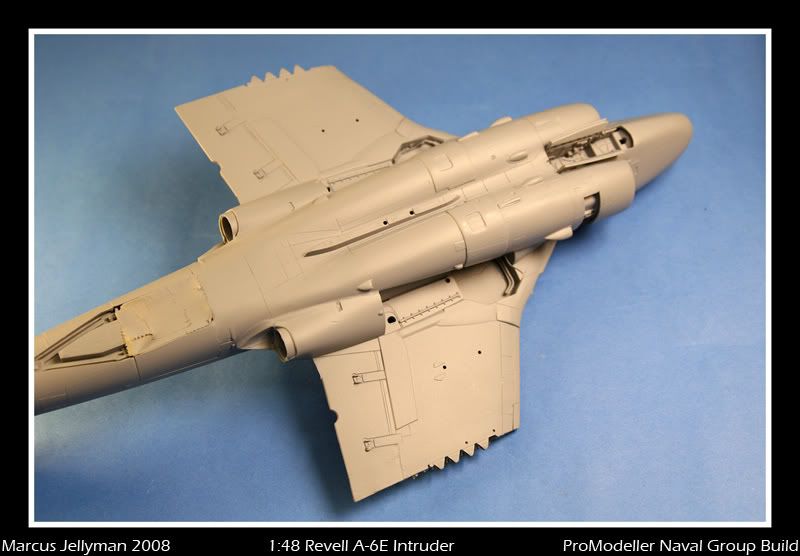
Other partsi wanted to detail were the wing pylons, these 'open up' on the real thing so ordnance can be raised or lower off the aircraft. From referencephotos asmall area was removed from each, i then added small details with wire and styrene.


Now primed and ready for paint.

I then pre-shaded with flat black.
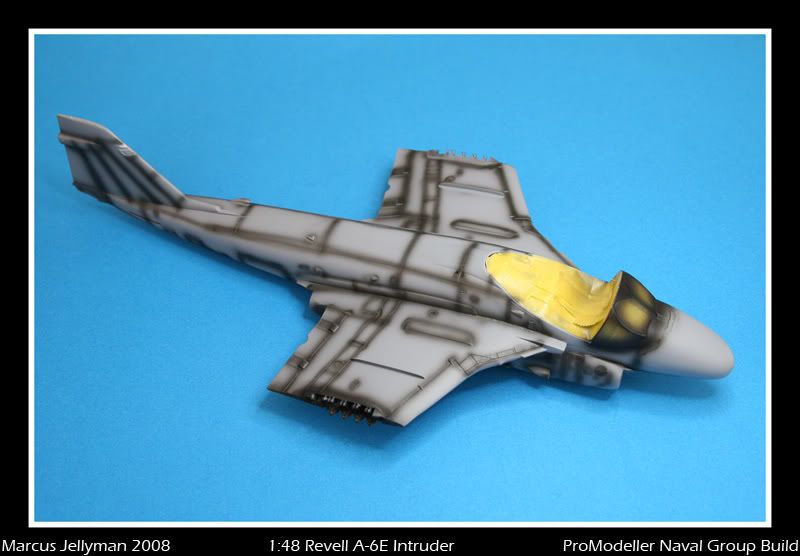


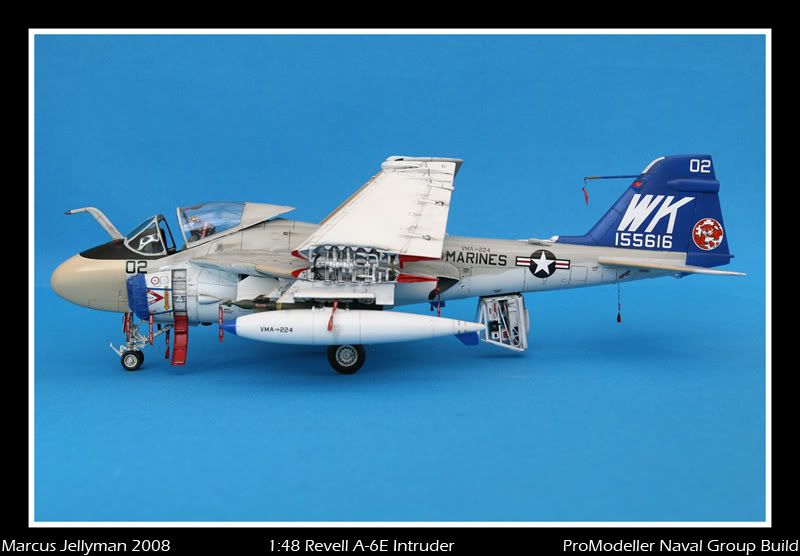
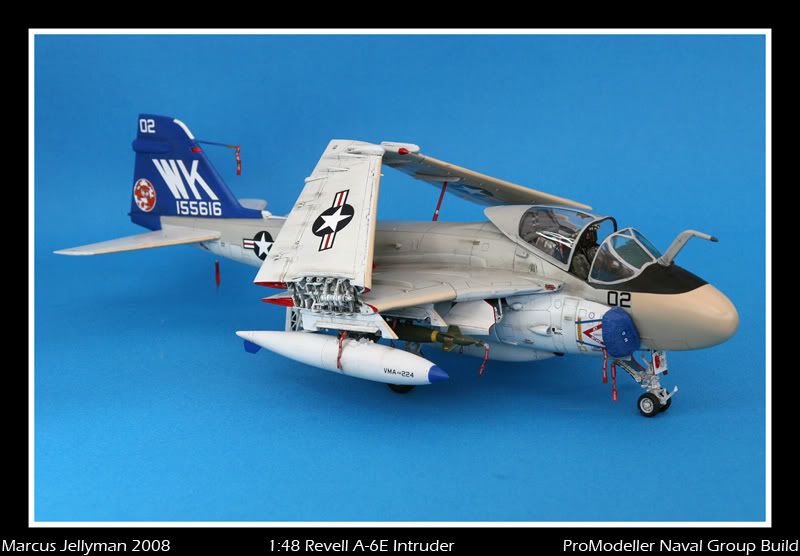
The painting is now completed, i used Tamiya white for the undersides, with Xtracrylic Light Gull Grey for the top. LifeColor Light Blue was airbrushed on the tail area and Gunze Radome on the nose.


The Impact decals have now been applied and a small amount of weathering added. The Impact decals settled down very well indeed with no silvering at all.


The Intruder is now finished, the wings were carefully glued on and small supports made to keep these steady. I also made intake covers out of foil, toilet paper and pva glue, once hardened these were painted and weathered.
Remove before flight tags are from Eduard and i think just add to the final finish. A final wash with ProModellers 'Black' wash was applied over the entire models, with final touches with pastels.
I'm very happy with the final result, and would love to build another (if i can find one that is!).


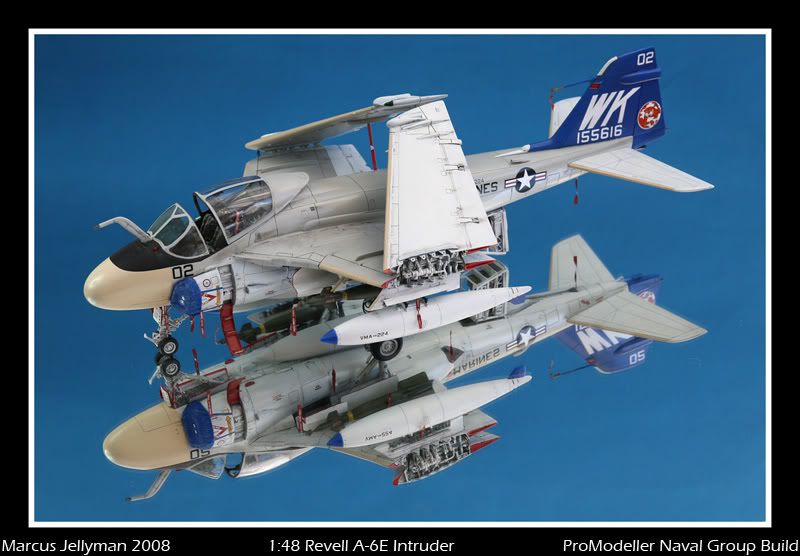


I was very fortunate to have the Intruder placed first in the first Group Build to take place here on ProModeller.
Marcus Jellyman