


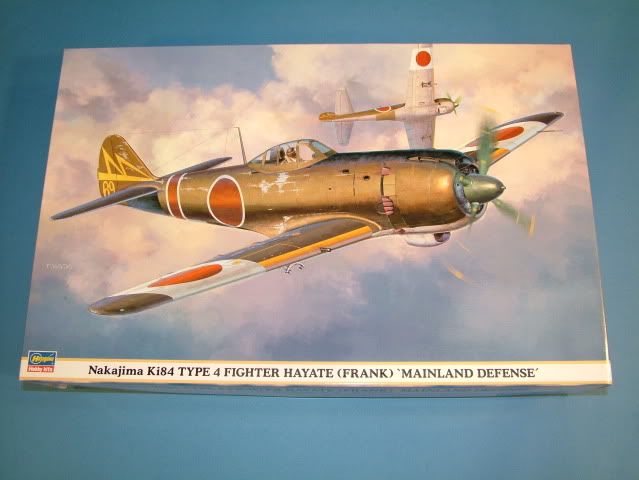
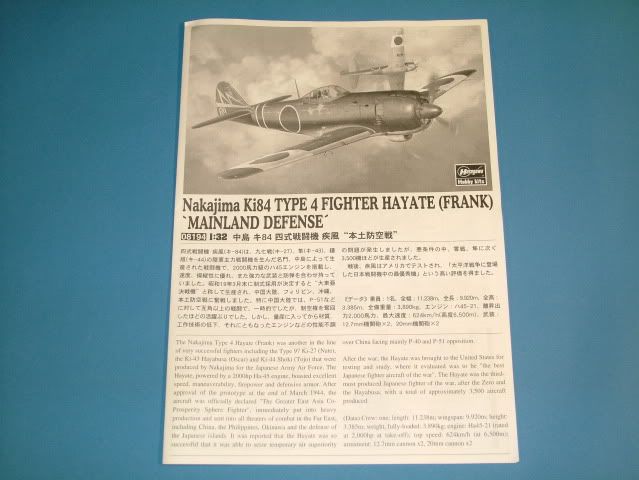
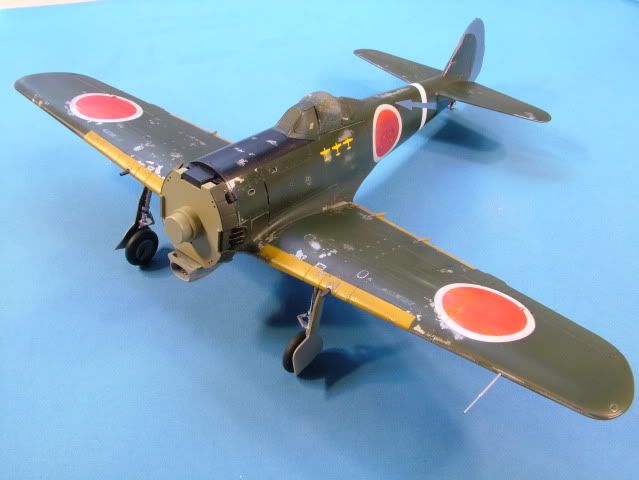
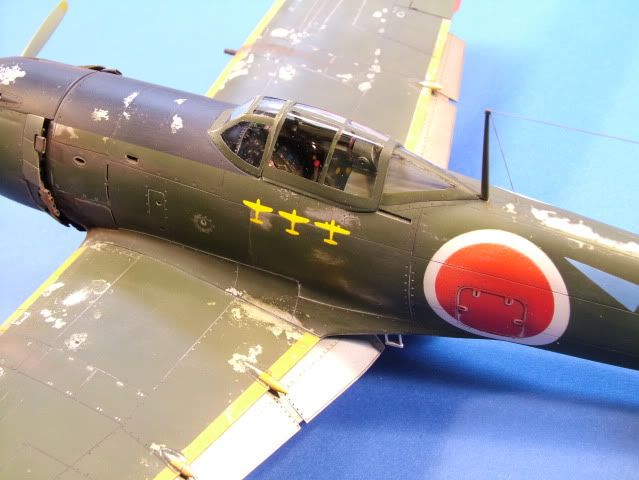
Nakajima Ki-84 Type 4 Hayate (Gale) code named: Frank
29th Fighter Regiment Summer 1945
1:32 scale release from Hasegawa of a Ki-84 frank, kit number 8194. I will be modeling the scheme of the 29th Air Combat Fighter Regiment which was deployed at Taichu, Formosa till the summer of 1945. The marking for this scheme can be found on the decal set from Eagle Strike “Ki-84 Imperial Hayate Pt III” #32067.
There are 2 known schemes for this particular pilot, the original factory Natural Metal finish,
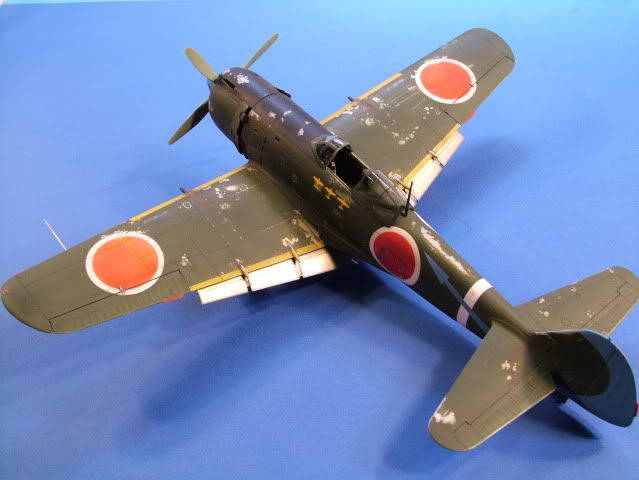
and the later applied overall Dark Nakajima Green, which weathered severely throughout the many missions flown.
Comments about the planned build:
I will be replacing the kit cockpit with the Aires resin version. The gear will be replaced with the SAC metal versions and polished up to a nice natural metal shine, some brake lines will be fashioned from soft lead wire. The kit exhausts will be replaced by the excellent AM part available through Quickboost. Finally the kit engine will be detailed out. The kit’s Pitot tube will be fashioned out of stacked brass tubing.
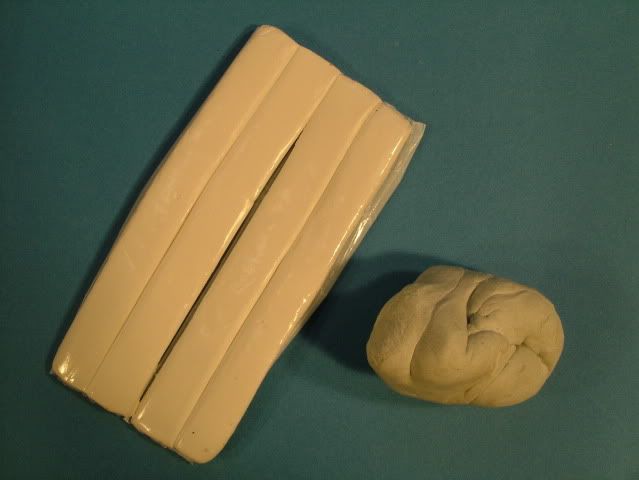
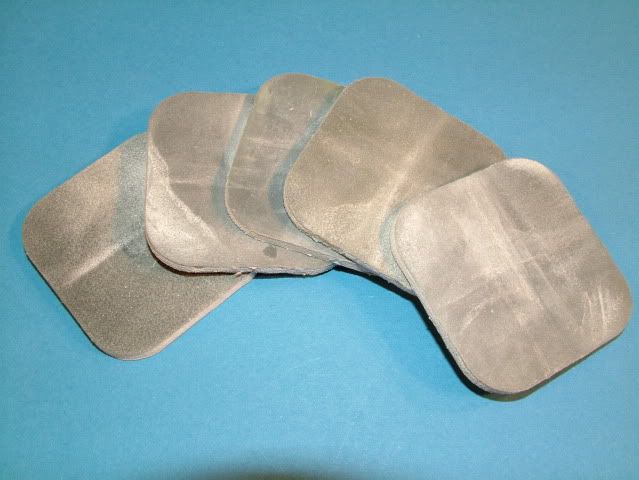
The airframe will be readied for painting by utilizing Squadron’s Plastic Prep first and rubbed with various polishing sponges from MDC. The base silver will be simulated with Alclad II Airframe Aluminum ALC-119 and only spot painted in areas where I plan to peel the Green Camo paint. Several panels will be highlighted by various shades of Alclad II (ALC-112, ALC-101, ALC-103 and ALC-102).
At specific areas of normal wear I plan to place some slightly wetted salt crystals and let dry, then the overall Green will be applied. The salt chips will later be removed with a toothbrush to reveal the aluminum airframe.
The main color of Nakajima Green will be painted with Tamiya JA Green XF-13, and then several panels and areas will be post shaded with slightly darkened and slightly lightened versions (potentially using XF-58 and XF-67.
The fabric control surfaces will be painted with a different shade of Tamiya Green. The undersides will be pre-shaded with Tamiya Flat Black then over-sprayed with Tamiya XF-12 JN Grey. Some post shading of lightened areas will be performed as well.
Cockpit will be a weathered Nakajima Green (potentially a home brew mix of Tamiya XF-71 or Mr. Color, using Alclad paints as a base coat and using the same dissolved salt technique to simulate peeling paint and chipped areas of general operational wear and tear.
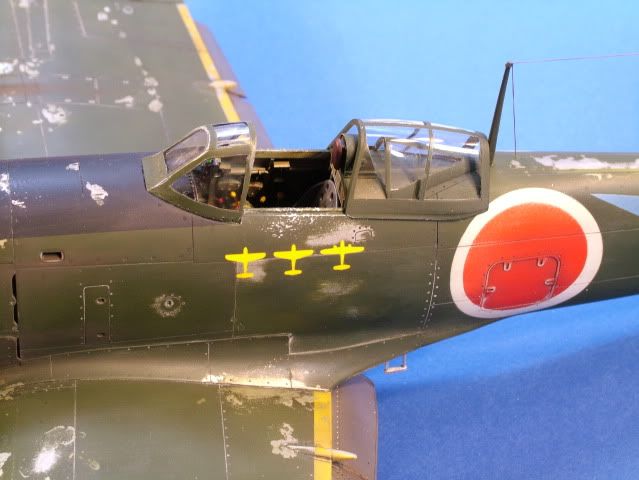
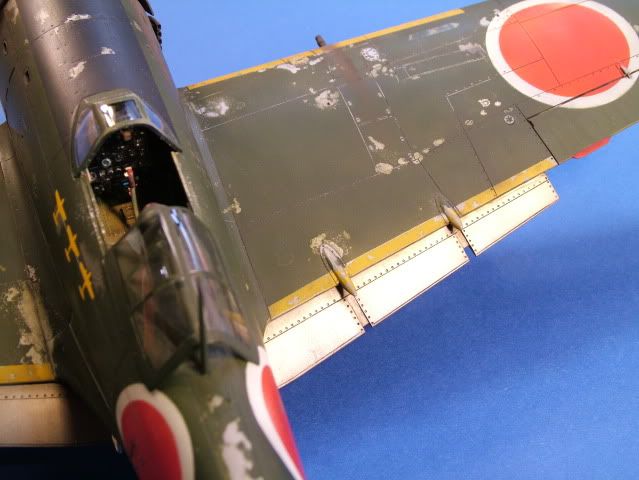
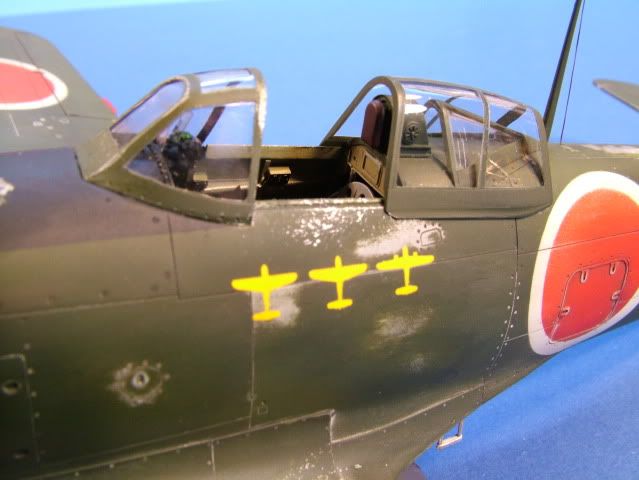
Planning to paint the Hinamarus with Tamiya Flat Red, slightly lightened with Tamiya Flat White plus an over coat of Model Master Super Flat Clear, as such simulate some slight dulling of the paint on upper wing surfaces due to the intense Pacific Sun. The anti dazzle area will be Nakajima Metallic Black (Mr. Color #125). The Yellow wing leading edges will be painted with Mr. Color #109.
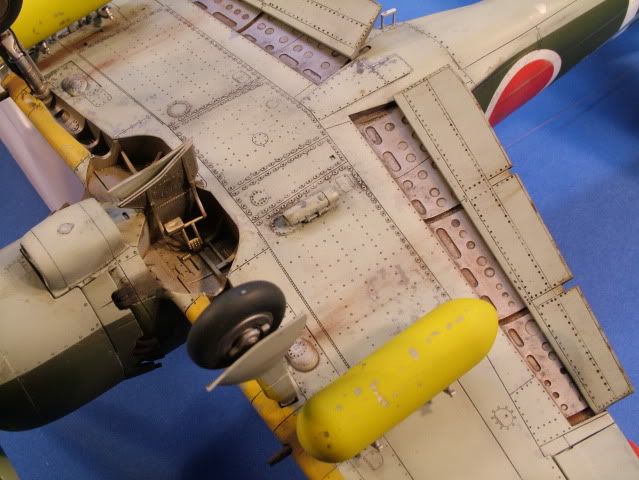
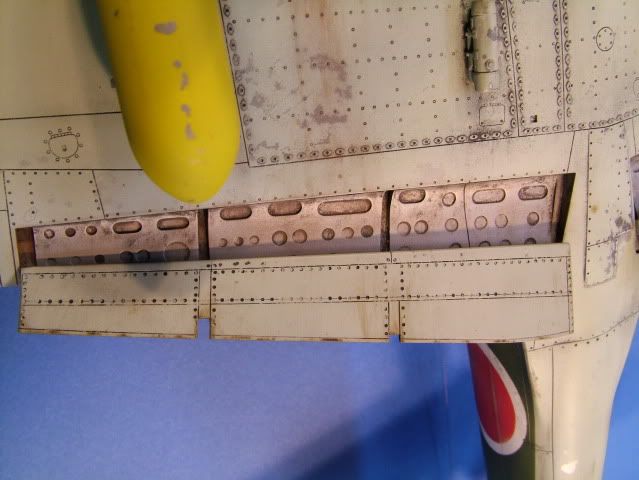
The interior of the flaps will be of a natural metal finish and some hydraulic fluid leaks made from Winston oil paints.
Bits of worn surfaces to be picked out with little dabs of Testors Model Master metallic paint for the propeller leading edges, the yellow leading edges slightly weathered.
Some boot scuffs on the walk ways to the cockpit and wear and there around hand holds to the cockpit glass will be simulated with a black artist pastel stick, fuel stains on wings and radiator leakage will be simulated with weathering powders from bragdonent.net.
A clear gloss coat of Testors Model Masters will be applied in preparation for the decals and snuggled down with solve- a-set decal solution if need be. Once the decals have been applied another Gloss clear coat will be applied to seal the decals in completely. The next step will be to apply ProModeller clay based washes (Dark Dirt) to accentuate the various panel lines and general weathering. Finally a flat coat will be applied to finish out the build.
Some exhaust staining around and aft of the exhaust tubes will provide some additional detail highlights. The exhaust tubes will be detailed with Mig Pigments and weathering powders from Tamiya and Bragdonent.com.
Antenna wire will be fashioned from invisible fishing wire and painted dull silver. Small blobs of Super Glue will be used to make up the insulators and cable tensioners.
Some additional dirt streaking effects will be applied over the airframe and bottom of wing from grass landings utilizing bragadonent.net weathering powders plus some light application for exhaust & gun stains.
Kit used:
- Hasegawa kit number: 8194
Paint Used:
- Tamiya Acrylic, Testors Model Master Metalizer, Mr. Color and Alclad II
References & aftermarket products used:
- Original Kit review: Kit Review
- Eagle Strike Decals: Eagle Strike
- Quickboost Exhaust stacks: Quick Boost
- SAC Metal landing Gear 32006: SAC Gear
- Weathering Powders by: bragdonent
- Hayate walk around reference pictures: Hayate Pictures
A special thank you again to Mike Smith & Fred at Colpar Hobbies and Ross from SAC for their kind and endless support while searching and chasing various aftermarket vendors whilst locating all the “bits and pieces” that make up my builds.
Box Art:
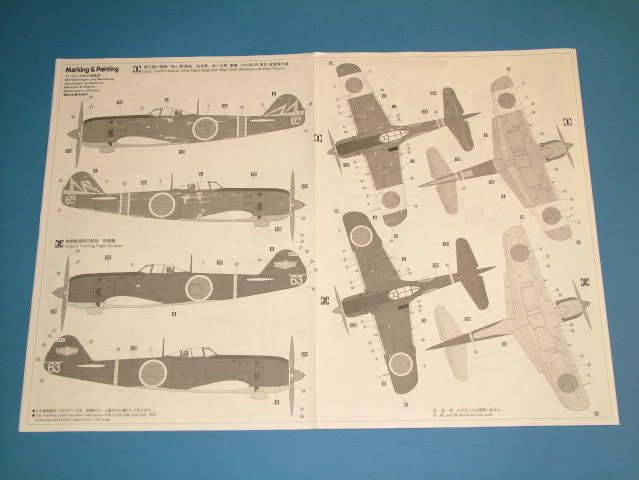
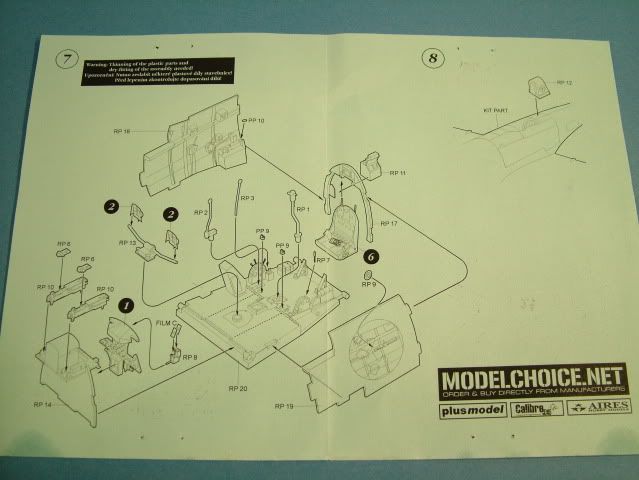
Instruction Booklet:
Color Schemes:
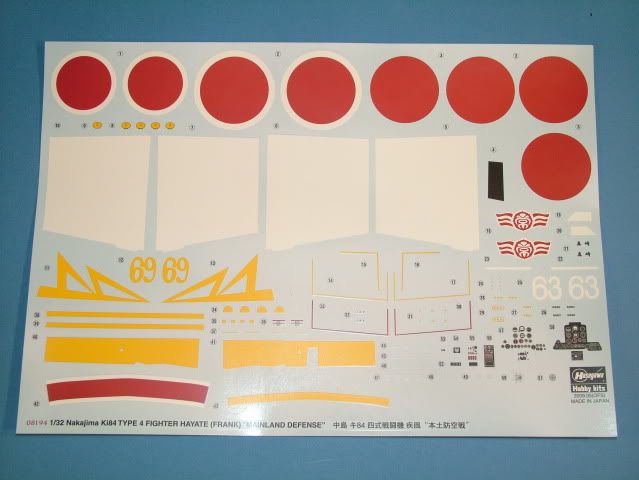
Decal Sheet:
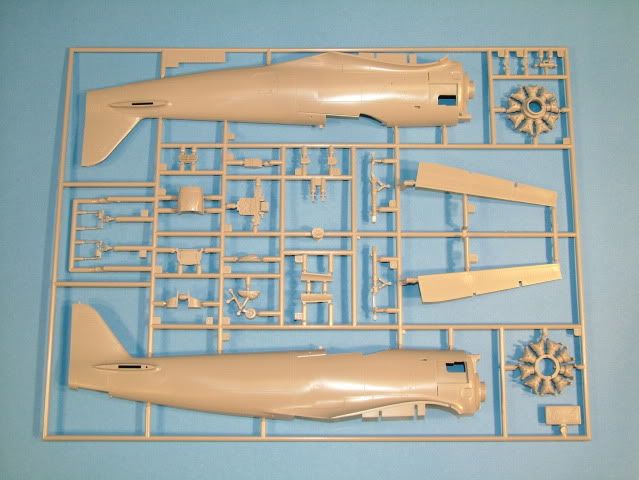
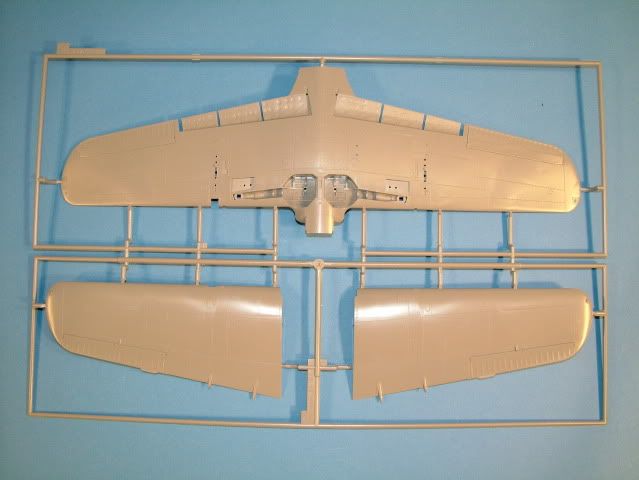
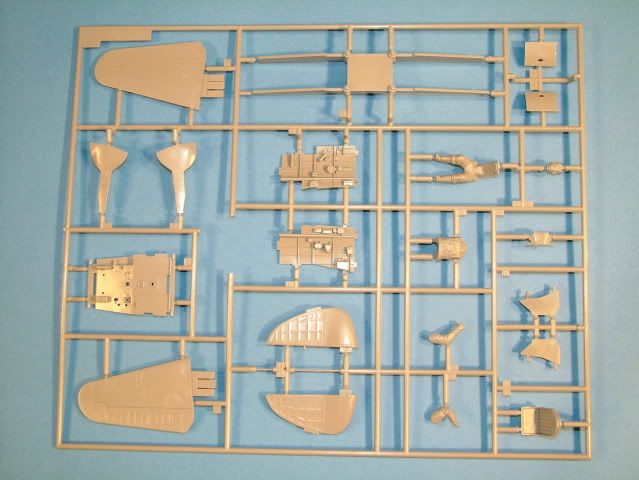
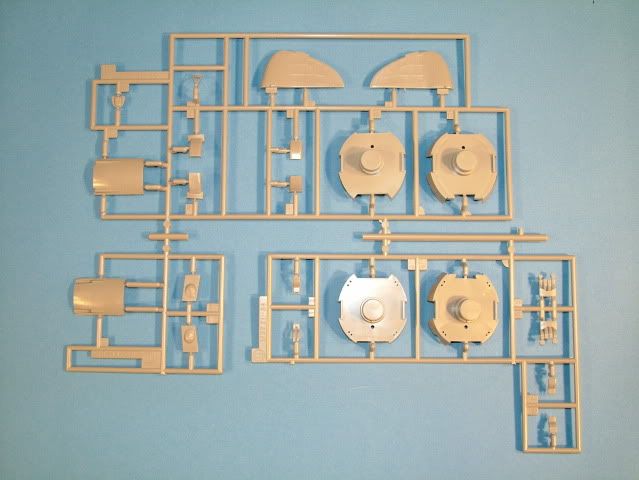
Sprue Shots:

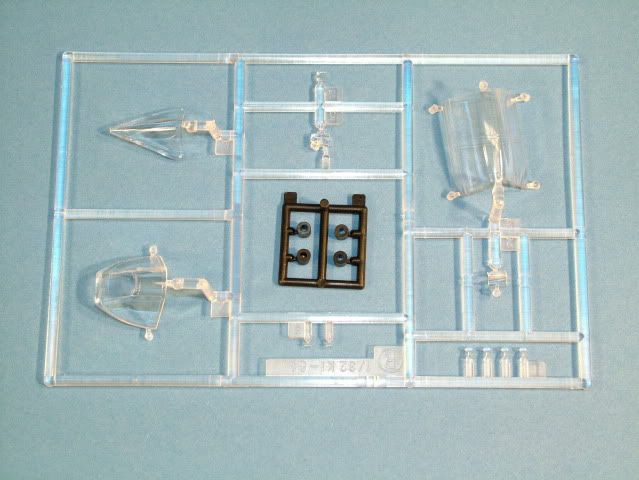
Clear Sprue:
SAC Metal Landing Gear:

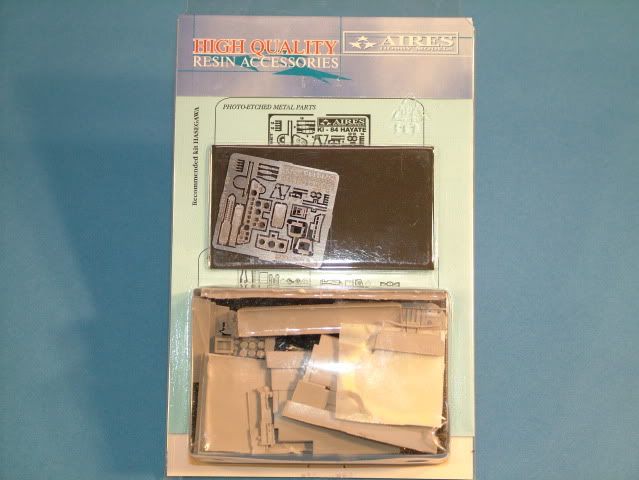
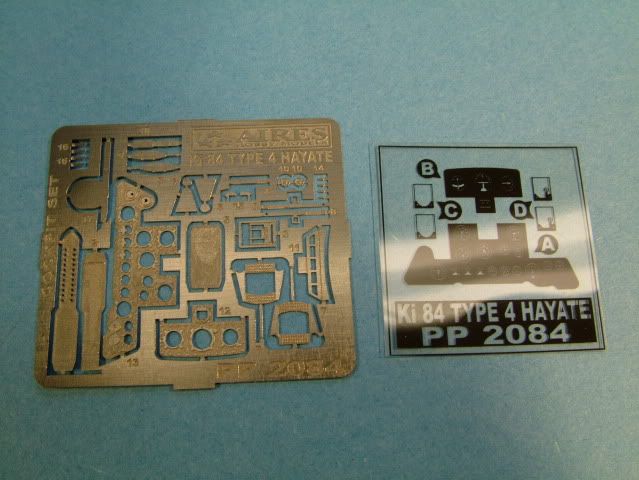
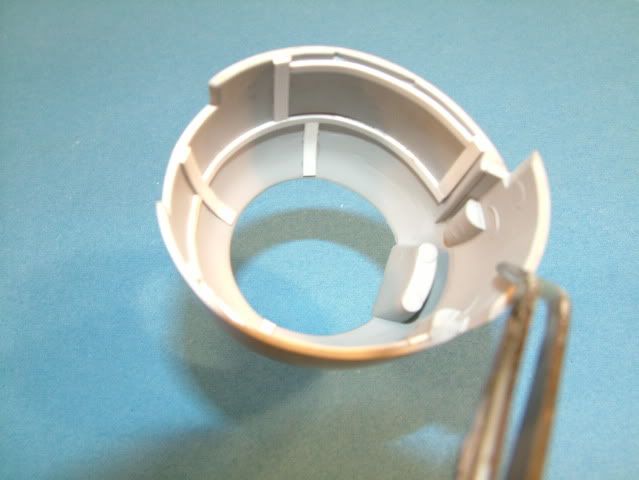
Aires Replacement Cockpit:
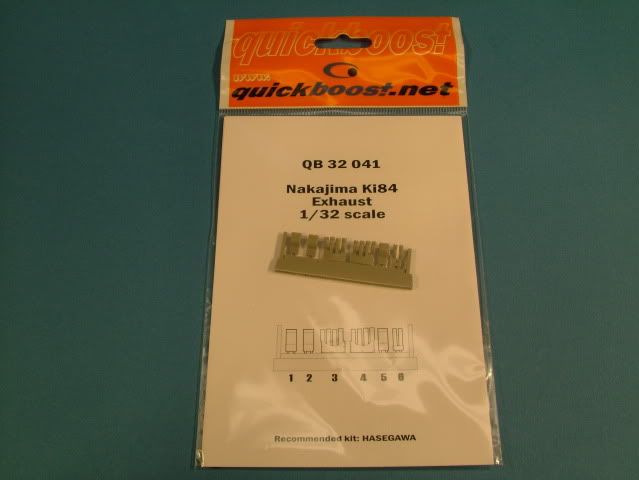
Quickboost Replacement Exhaust Stacks:
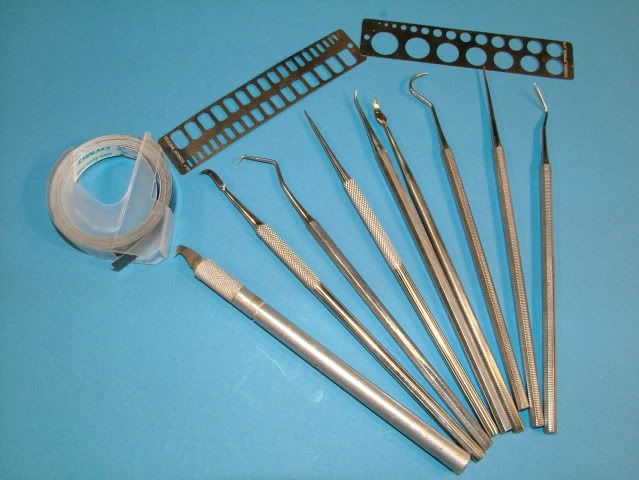
Started off with
cleaning off all the casting blocks from the Aires Cockpit.
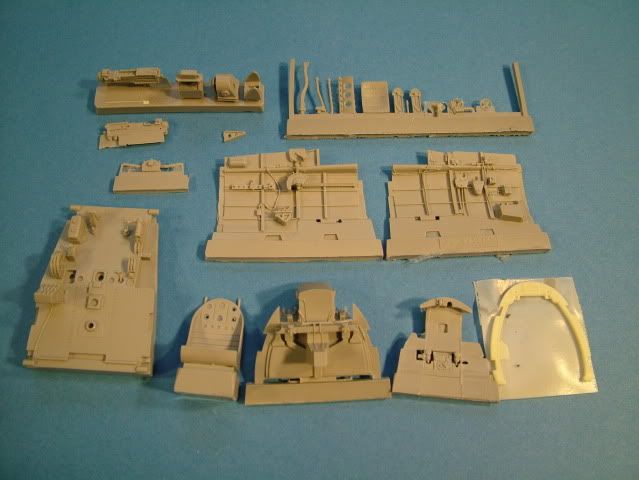
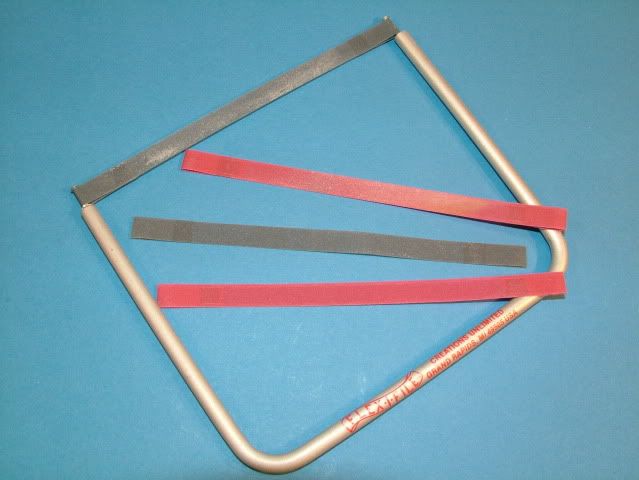
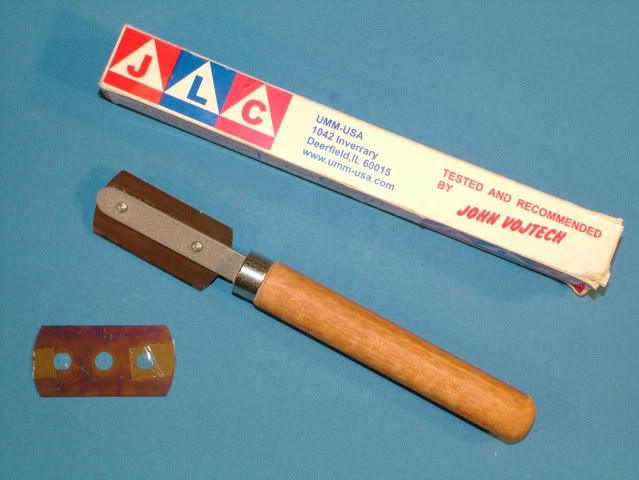
The
JLC Razor Saw works wonders on stuff like this.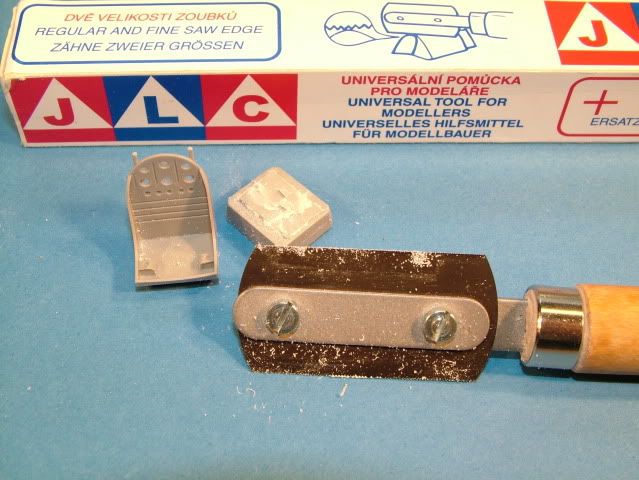
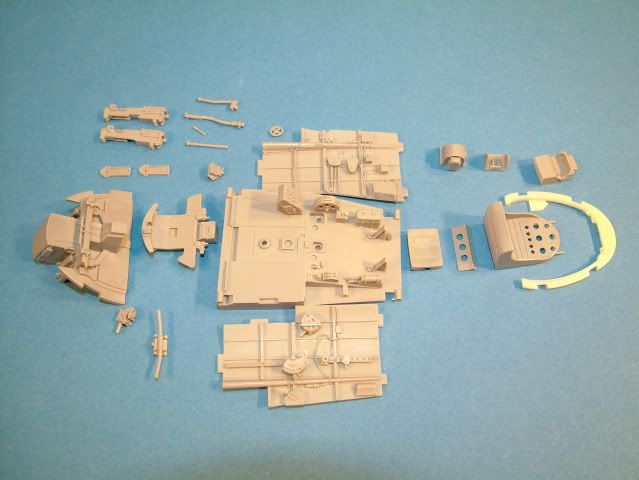
All the parts cleaned
up and fitted.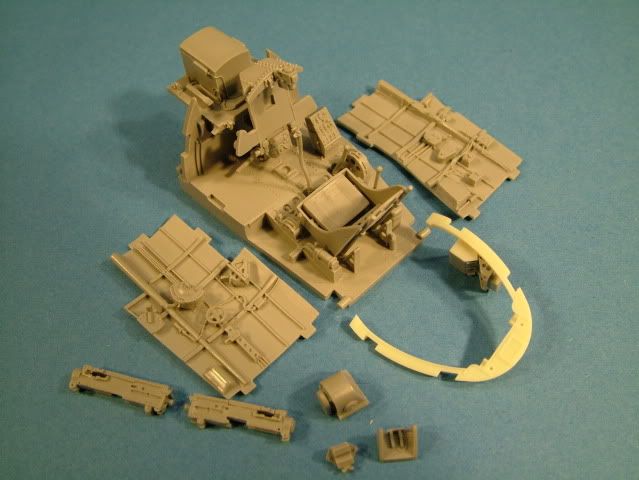
Some
very nice detail to start picking out soon.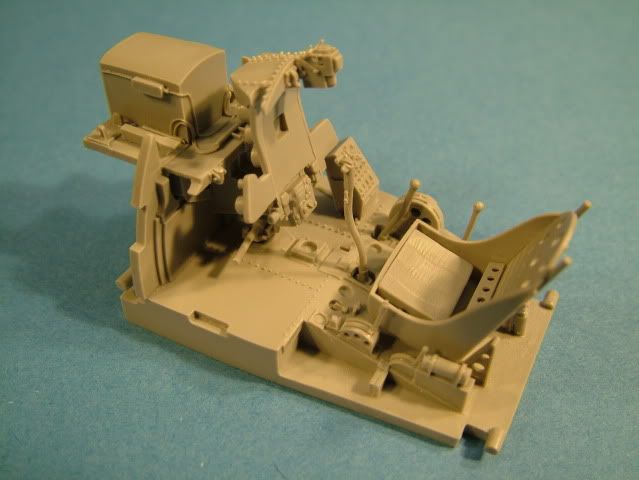
Rudder
arm bar was slightly off set to the left and will be simulated with
a
deflected rudder once we get to that stage.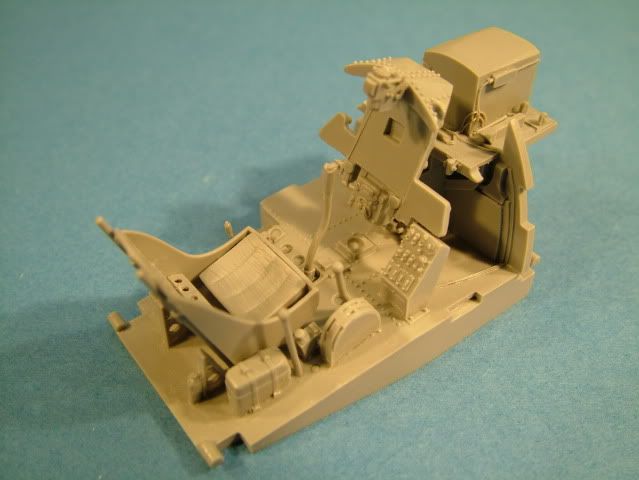
The
side panels are a drop fit, no sanding.
Started
cleaning up the glass cockpit pieces right away and dipped into Future so
they can dry for as long as needed (24 hours min). 
The
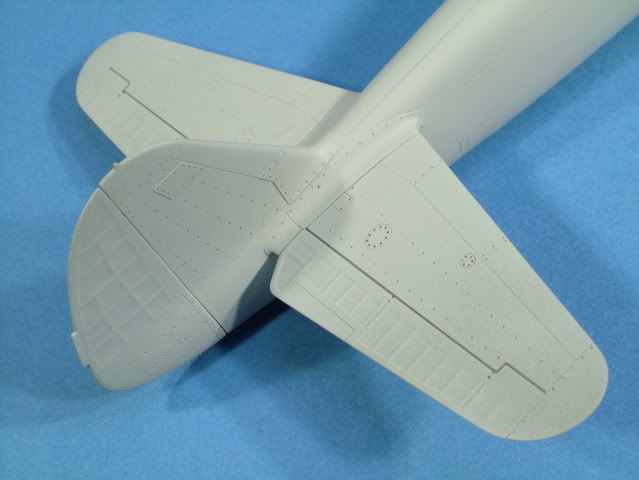
wing fit was like a glove, with very little clean up to speak
of.
Just used the bow sander by flexifile to get the leading edge
cleaned up without affecting the roundness,
There
is a large heavy plastic truss to keep the wings from drooping when final
assembled.
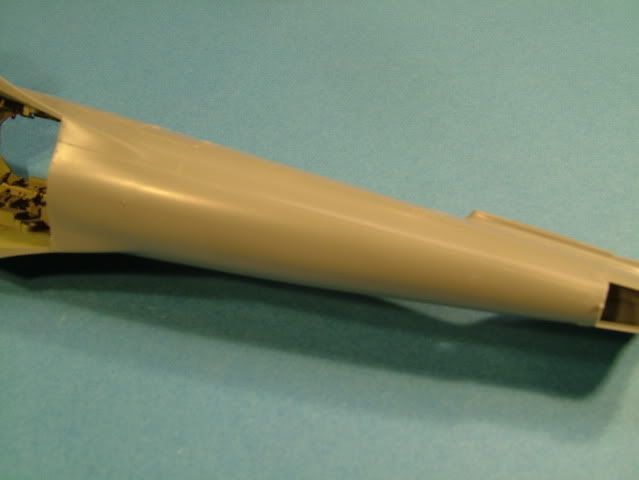
Quick
dry fit of the fuse halves with the resin sidewalls in place and the resin back
cockpit former in place.
Looks like all the panel lines join up
quite nicely.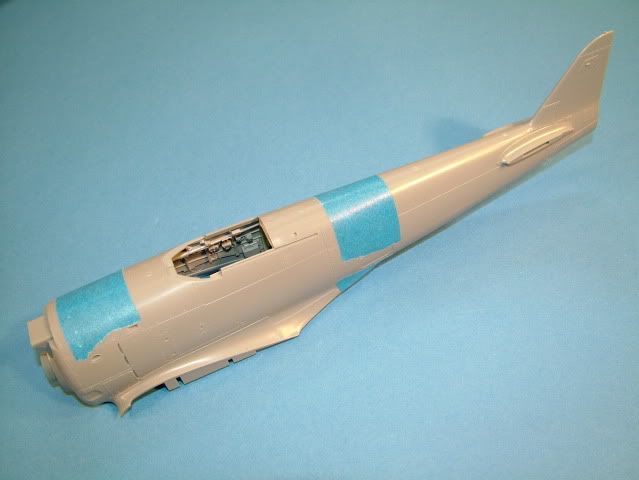
View
through the bottom.
Engine
and cowling sub assembly.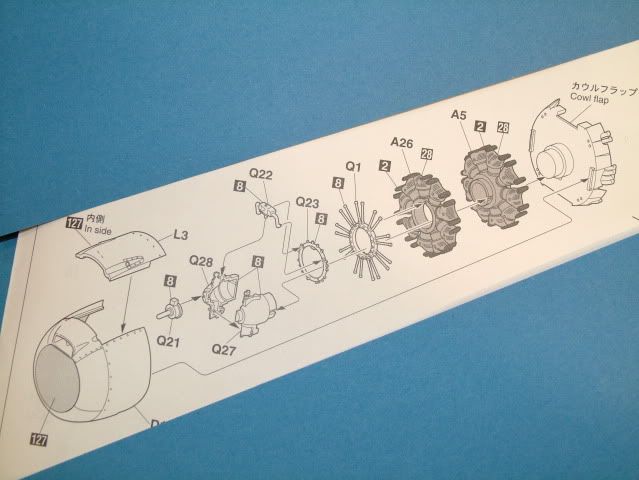
All
the plastic parts cleaned from minor flash, sanded for pin holes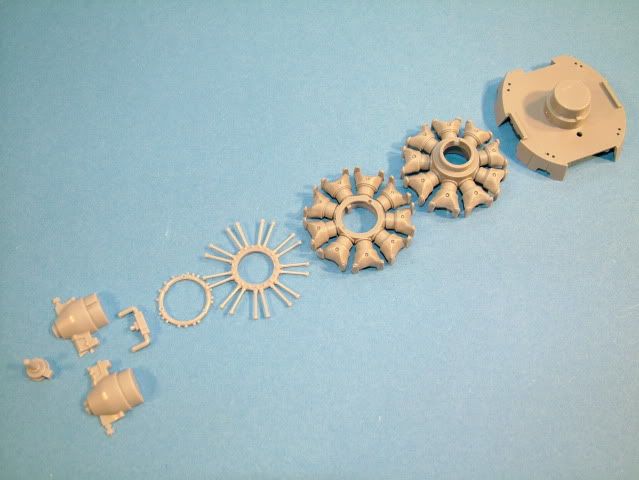
Parts
assembled.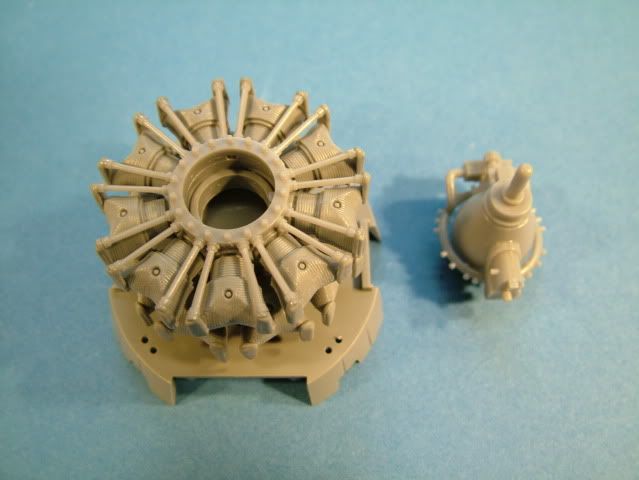
Cowl
assembled, fit is perfect without any major rework/filler.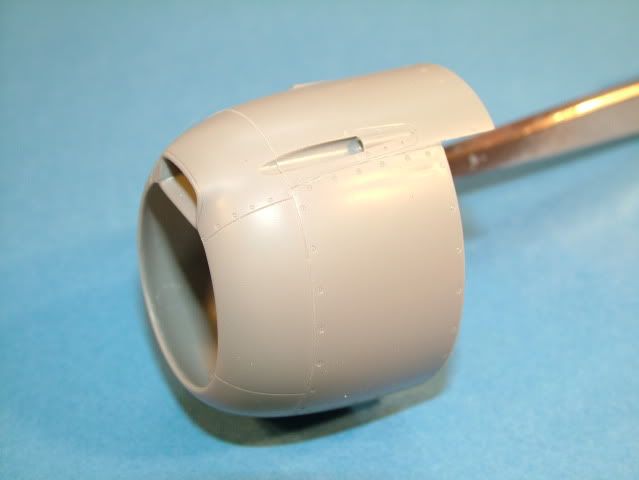
Propeller,
hub and spinner sub assembly.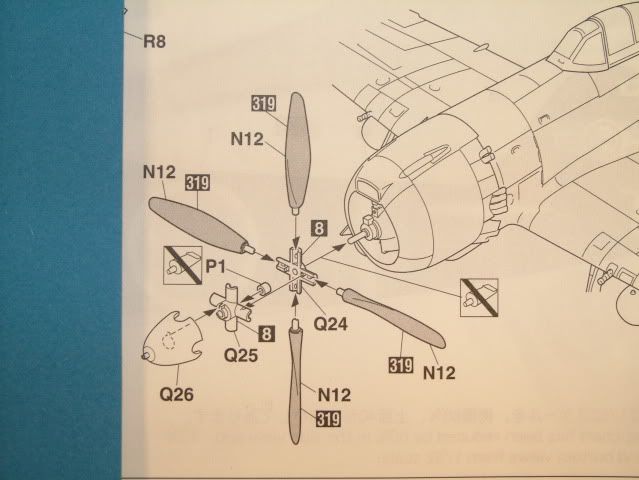
Sanded
down the blades to a more scale like thinness with the ProModeller sanding
sticks
then with circular motion used the MDC sponges to get a super smooth
blade.

Ready
for paint.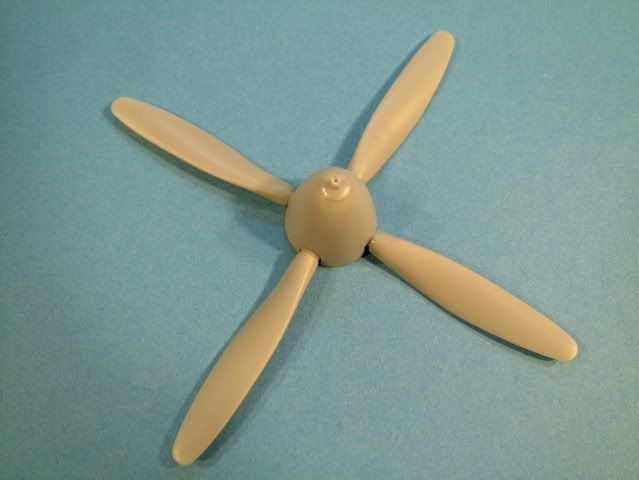
Two
extra fuel wing tanks getting prepped. Inserted a piece of brass rod to
simulate the "pick up".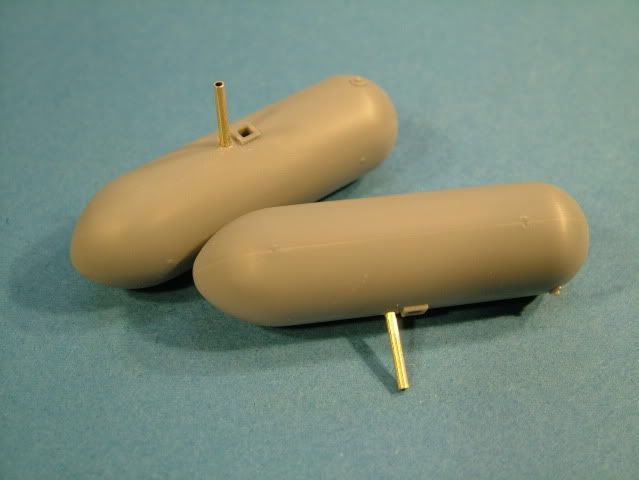
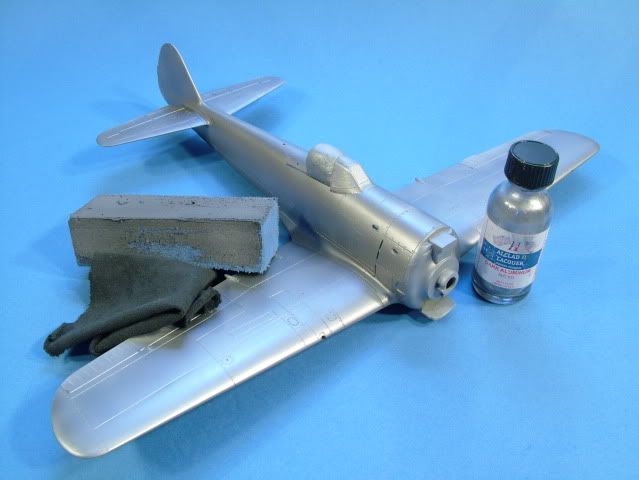
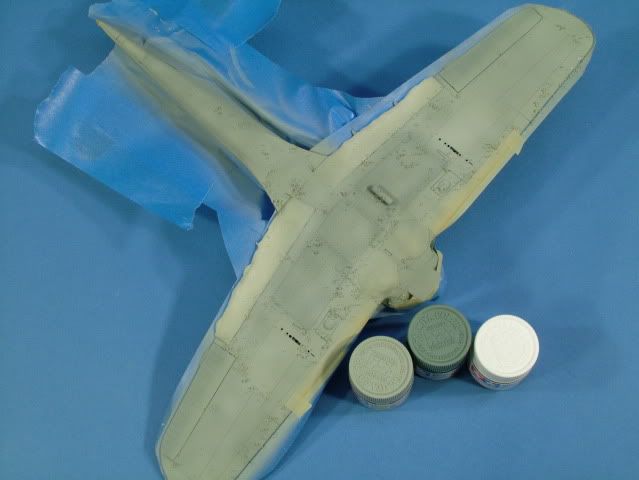
Airbrushed
on Alclad Dark Aluminum for a base coat.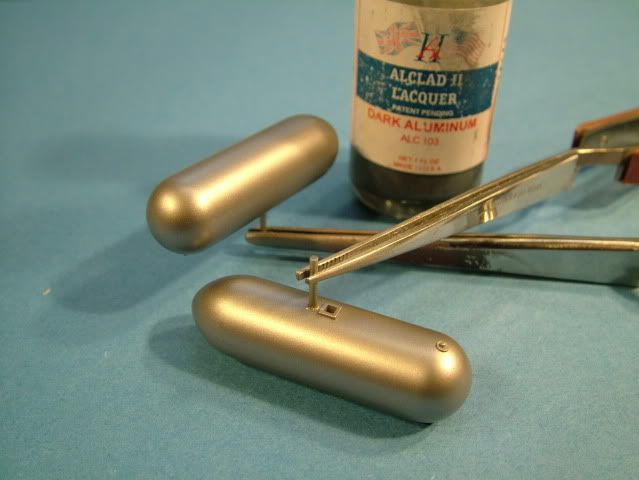
Applied
some salt crystals with distilled water and let dry for 10 minutes.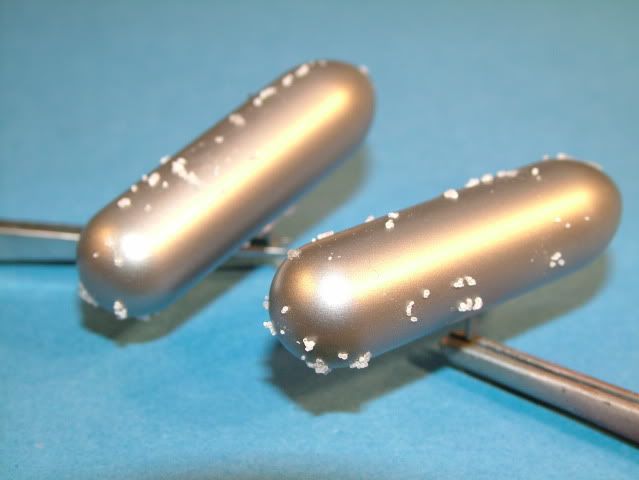
Airbrushed
on a 50/50 mix of Tamiya XF-4 Yellow-Green and Tamiya XF-3 Yellow at 8 psi, and
50/50 Tamiya X-20 Thinners,
very light dusty coats as not to disturb the salt
crystals, just building up layers.
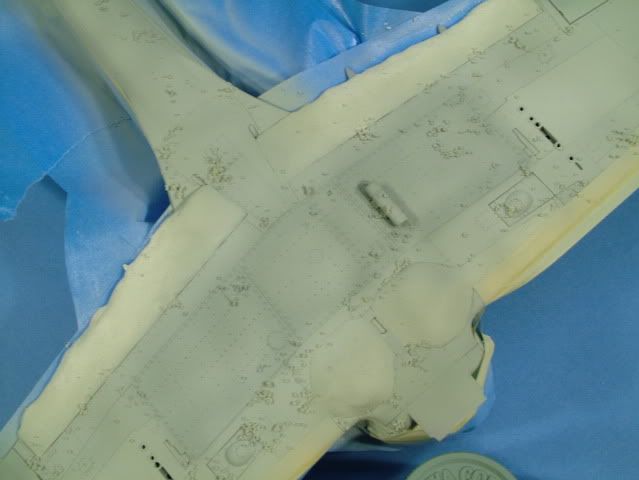
Rinsed
off the salt 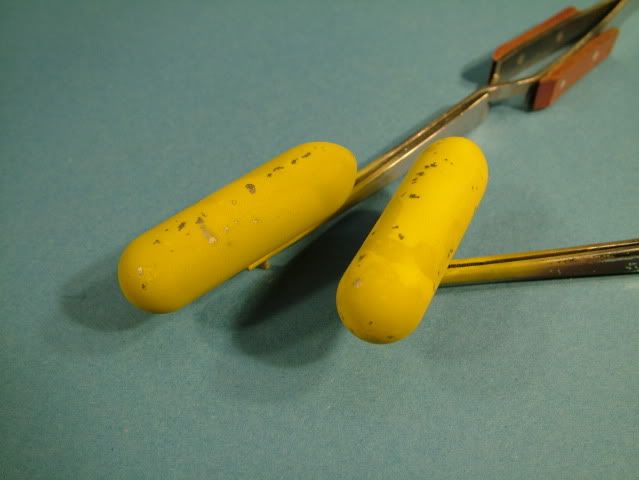
and
airbrushed on a flat coat with Model Master Flat Clear.
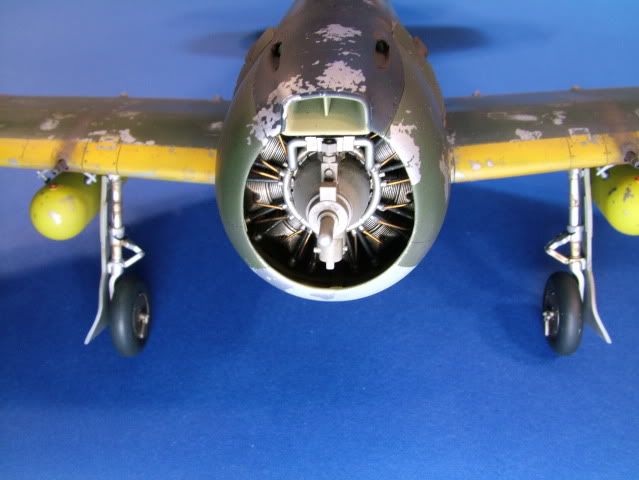
The inside of the
cowling was a little bare, decided to spruce her up with some strips of
plastic card from Evergreen Scale Models,
0.020 thickness, just following
the exterior panel lines as a guide, imagining where some structural detail
"might" have been on the real airplane.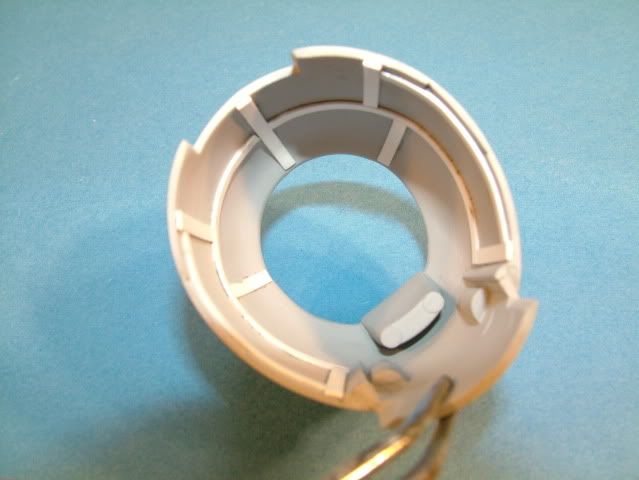
A
little later in the build sequence I will define some of the "inside
paneling" with an oil wash of burnt Sienna. Plus some oil splatters and general
grime.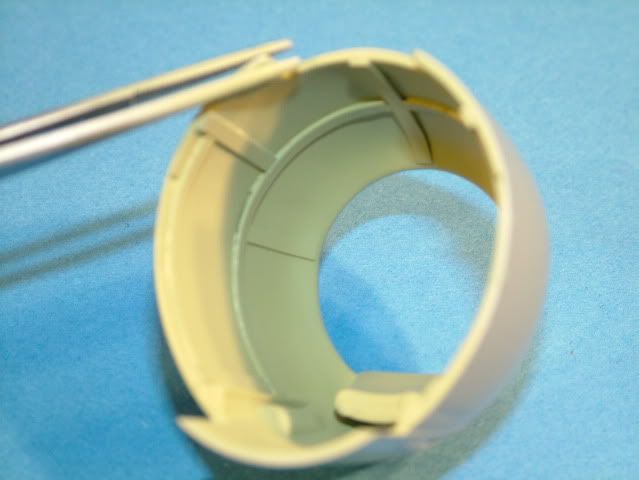
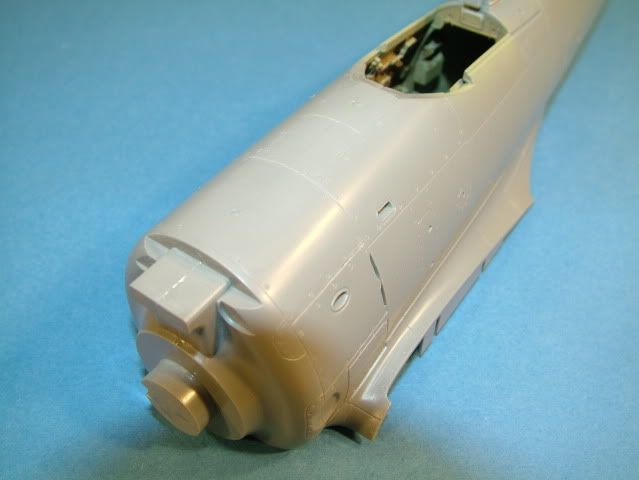
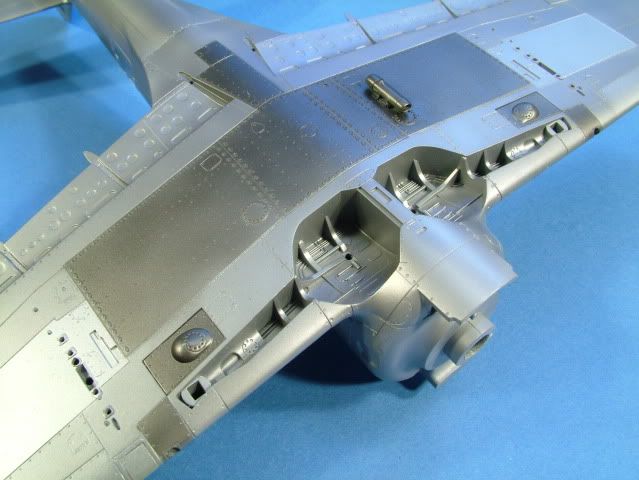
Drilled
out the wing gun barrels.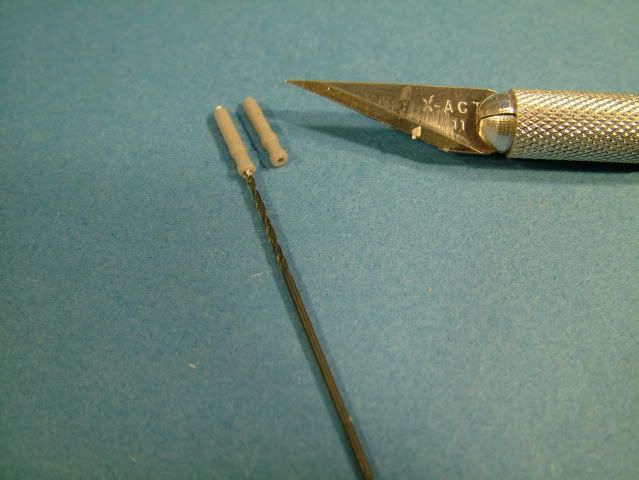
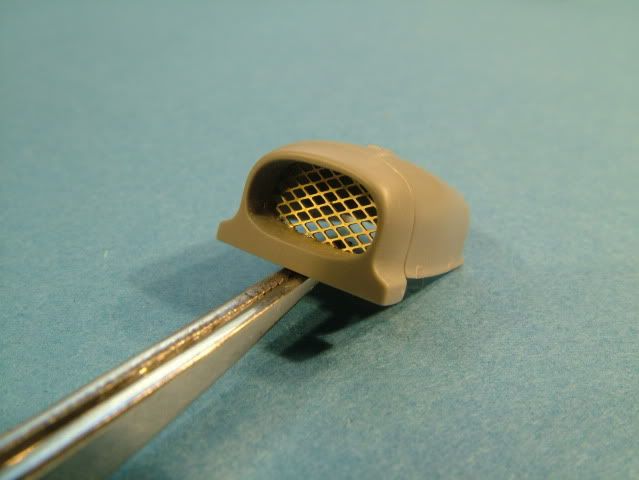
Added
a small detail to the front chin cowl radiator inlet.
Drilled, then cut
the original molded in plastic detail to remove it,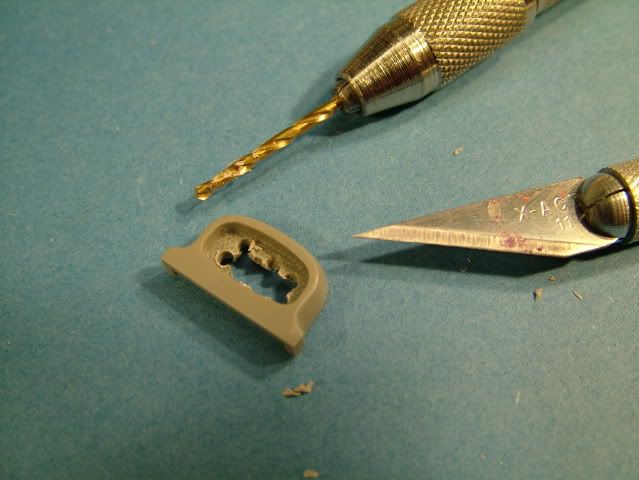
then final
sanded the plastic lip to shape.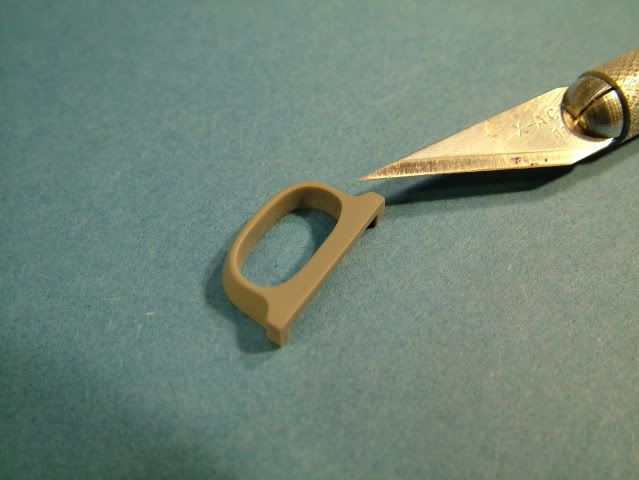
Suitable
brass screen (K&S Metal Brass) of approximate scale that looked good to the
eye.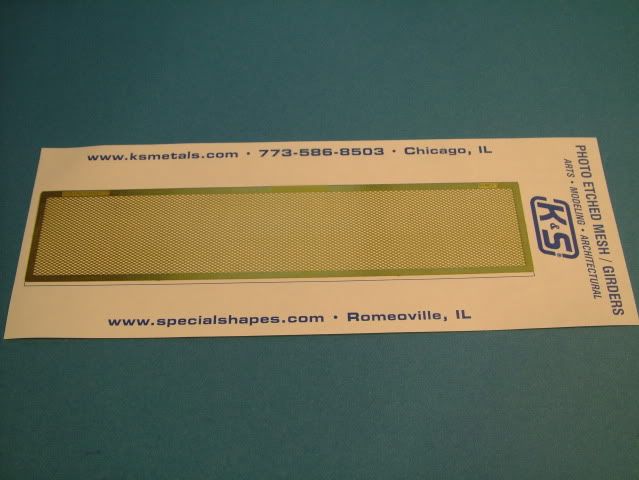
Cut
to shape and inserted, then glued with thick super glue.
Quite an
improvement over the flat original plastic.
Prepped
all the parts that would be in the Nakajima Interior Green shade.
A light
misting was applied over the Alclad II Dark Aluminum base
coat,
using Mr. Color leveling thinner and 4 drops of Mr. Retarder to a 2
ml. color cup.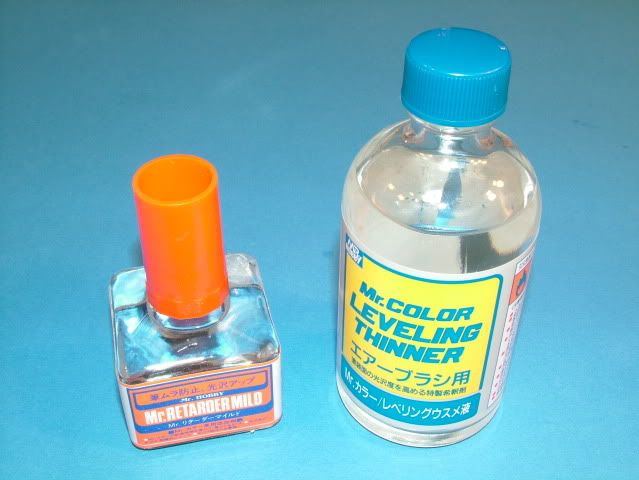
Sprayed
at 70/30 Thinner to Paint ratio and at 10 PSI max using my Evolution 2 in
1.
Paint color is Mr. Color #127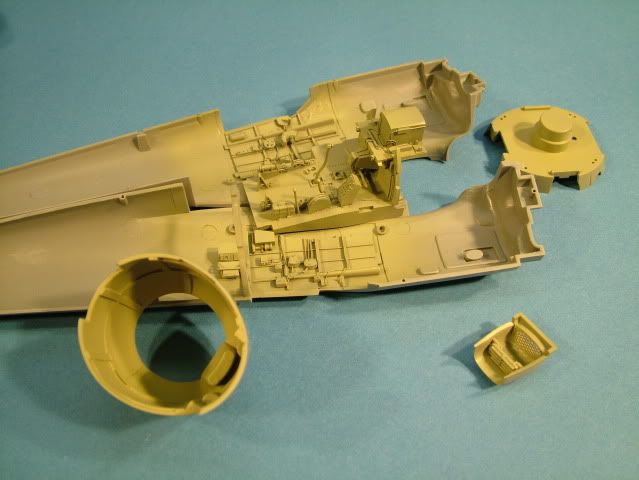
Finished up the
painting of the sides panels.
A light oil wash applied and some dry
brush to convey some general wear and tear.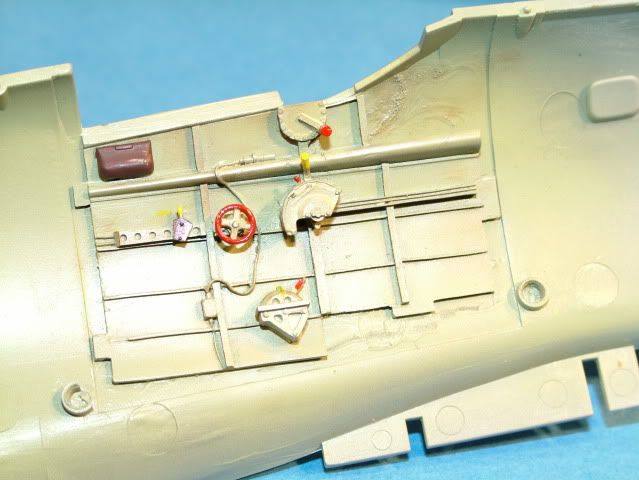
Wires
were picked out with a blunt Black Sharpie pen.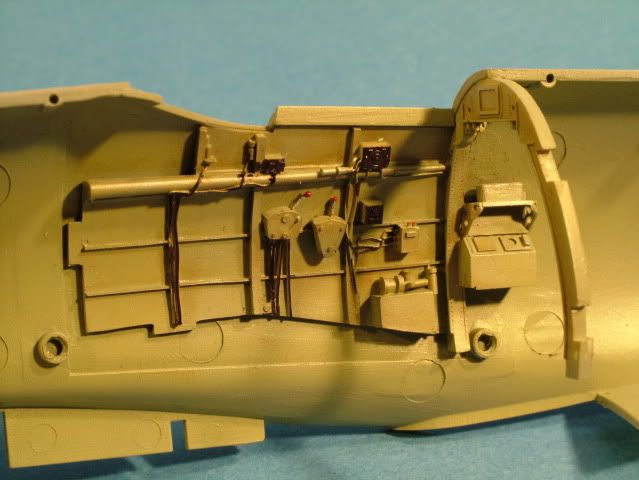
Glued
both fuselage halves together, using Tamiya Thin cement while she was held
together in key points with some Tamiya tape.
Spent quite a bit of time
to carefully align the various panel lines to ensure as little re-scribe would
be as necessary.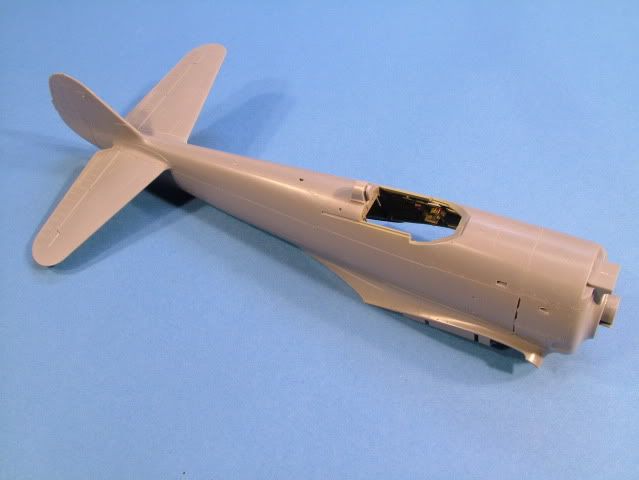
After
the glue was allowed to harden overnight spent time carefully sanding down the
top and bottom seam. Skipping past the panel lines.
Using a bow flex
sander and various grit sizes from the MDC sponge range...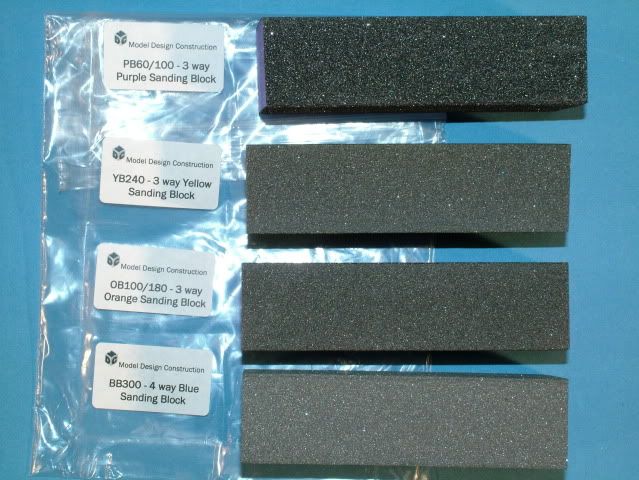
Thus
far no filler has been used.
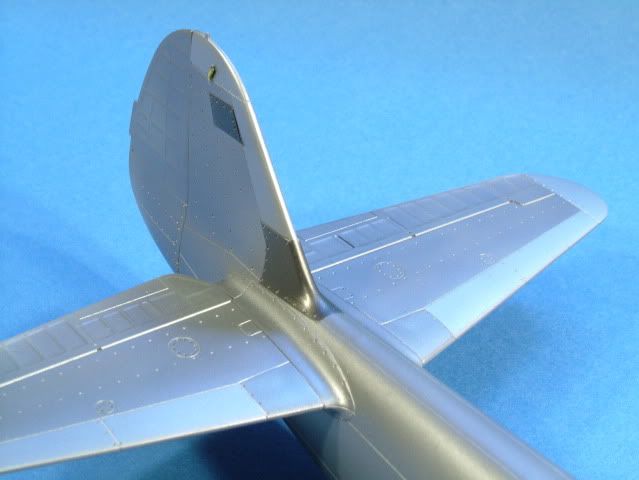
Glued on the Horizontal Stabs and the Rudder
sub assembly.
Super
glue was applied to the inside of the seams to minimize risk of the
dreaded "ghost cracks and seam separation" after a paint session on
these large flat glue areas.
Prep work on the engine sub
assembly has started by spraying first a base coat of Alclad Dark
Aluminum.
Rocker arms, push-rods picked out with Tamiya
NATO Black.
The front of the gear housing was painted with
Tamiya Medium Grey (XF-20).
Drilled out the holes for the ignition
wires.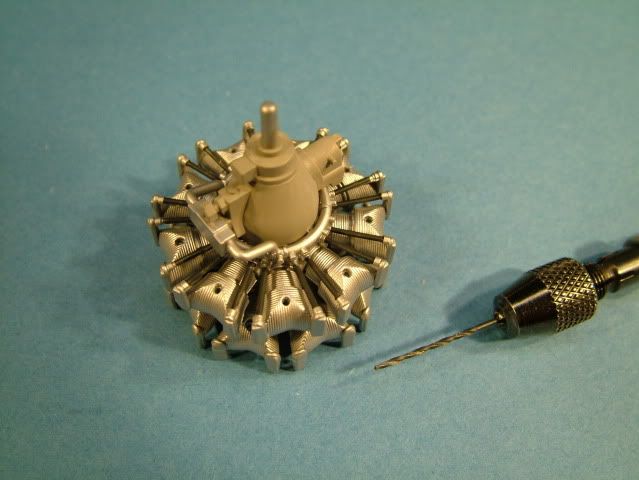
Copper
wire used and inserted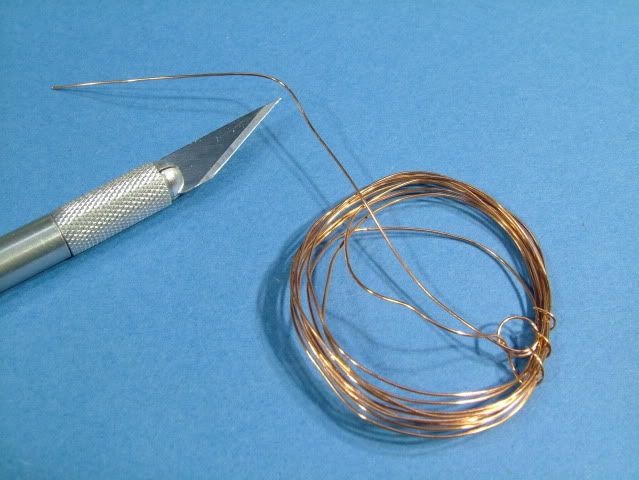
and
spot glued with thick super glue and a quick spray of kicker to set in
place.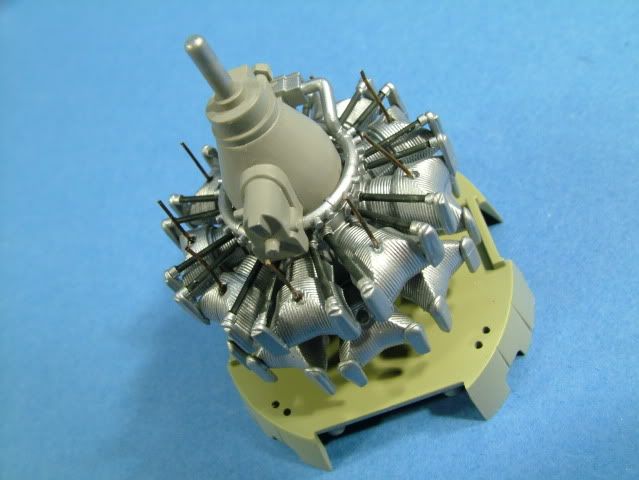
Prep
work for the propeller/hub/spinner sub assembly has been started by painting the
Alclad Dark Aluminum as the base.
A light over-spray with Model
Master Polly Scale "Soviet Green" FS 505358,
which ended up a beautiful match
to the color needed for the blades.
Propeller
tips lightly dusted with Mr. Color #109 Character Yellow.
Blade center
Tamiya NATO Black. Once dry over-sprayed with model master Super Flat
coat.
Spinner has been treated with salt crystals and left overnight to
dry.
Ready for the next stage Blue Sentai markings of the 29th Fighter
Squadron.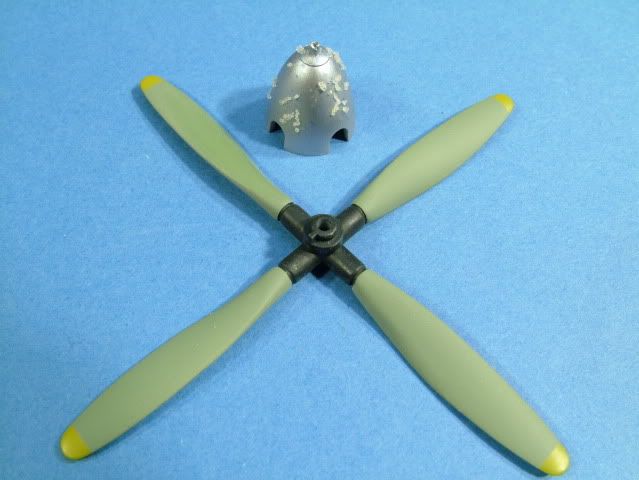
The
blades will be de-stressed with some Model Master metalizer on a
sponge.
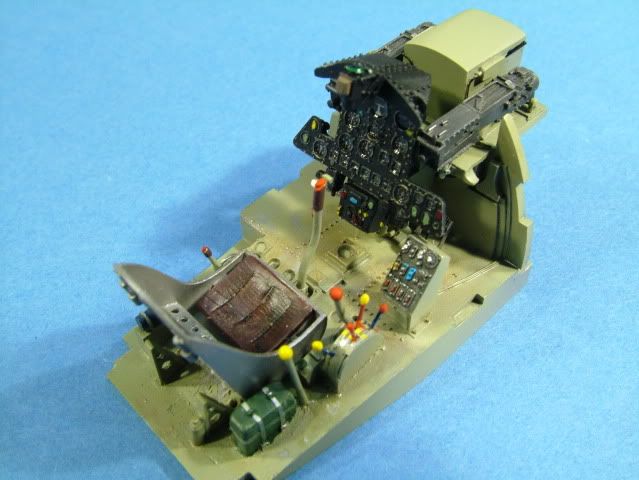
Completed the Aires Cockpit tub, picked out details with a light
dry brush of flat silver, and a light oil wash of burnt Sienna/Black at a
50/50 mix.
Made some handles and rods from beadery wire to create the
various controls.
Applied a bead
of thick super glue on the top to create "handles".
Applied 3
applications of Future to the dials to simulate a domed glass
effect.
Applied a wash to the seat "cushion" to show a leathery
effect.
Picked out some details for the oxygen? bottle with some
blue and the rescue case to the right of the seat in a deep Green, just for
fun.
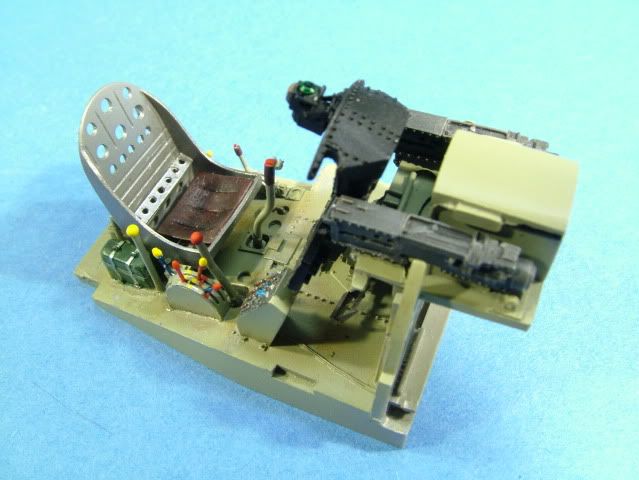
Airbrushed the guns with Model Master Gun Metal, then buffed and
details highlighted with a dry brush of dull silver.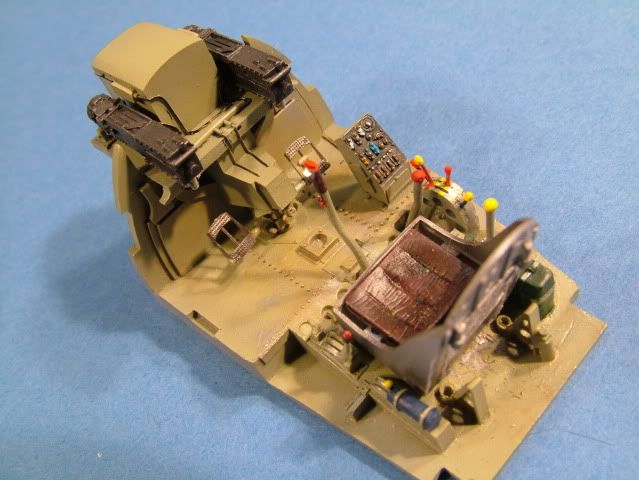
Rudder
pedals made from the PE set adhered wonderfully with a small drop of super
glue.
Instrument panel detail.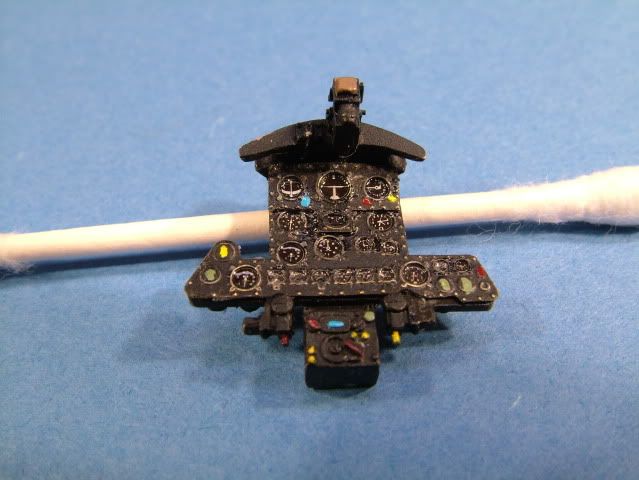
To
complete the seat belts and the reflector gun sight. 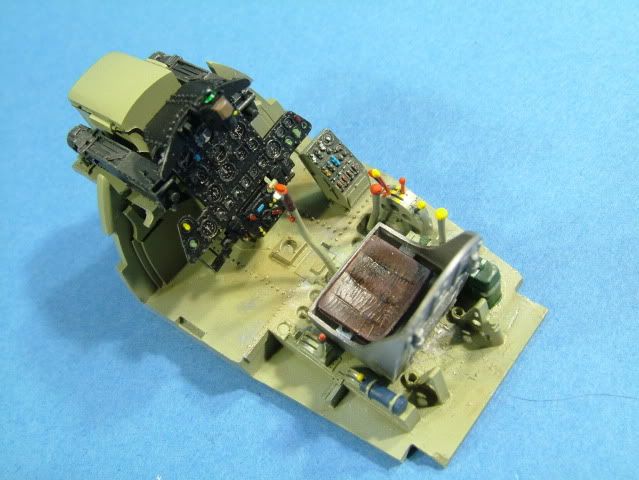
The
instrument panel is still removable and will most likely drop that from the top
to facilitate easy final alignment to the cockpit coaming.
Cleaned
up all remaining needed parts from the sprues, polished up the parts, filled a
couple minor sink marks in the flap detail, sanded edges etc.
Here are
all the "remaining parts" to finalize the build.
Painted up the wing tank
connection mechanism and connection siphon tubes with Model Master plate
silver.
Painted up the flaps exterior and the main gear doors and tail
doors with Tamiya JN Grey (XF-12).
Insides were treated with a blotchy
appearance of Alclad Aircraft Aluminum ALC119 and some shading of Dark Aluminum
ALC103.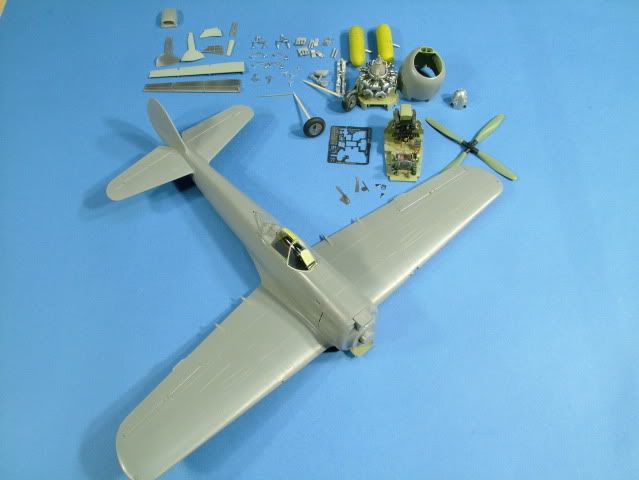
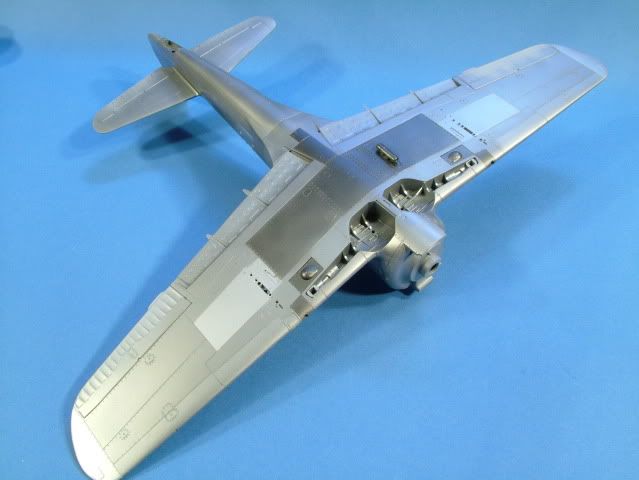
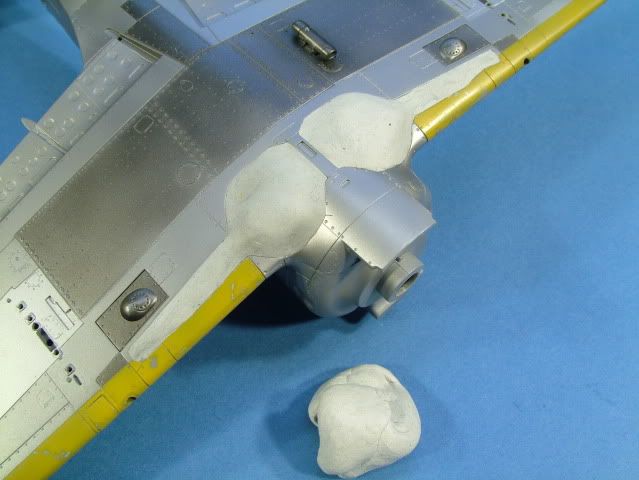
Checking
wing to fuse seams.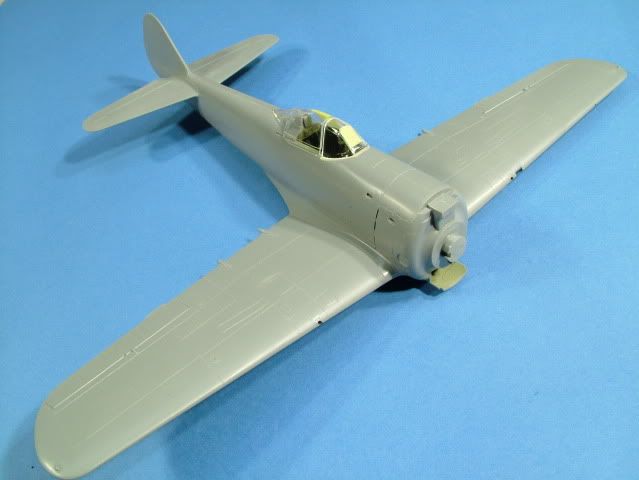
Overall
fit is pretty good, most likely will place a spreader bar on the inside
of the fuse under the resin cockpit
to ensure an "as good as
possible fit" and minimize the filler need.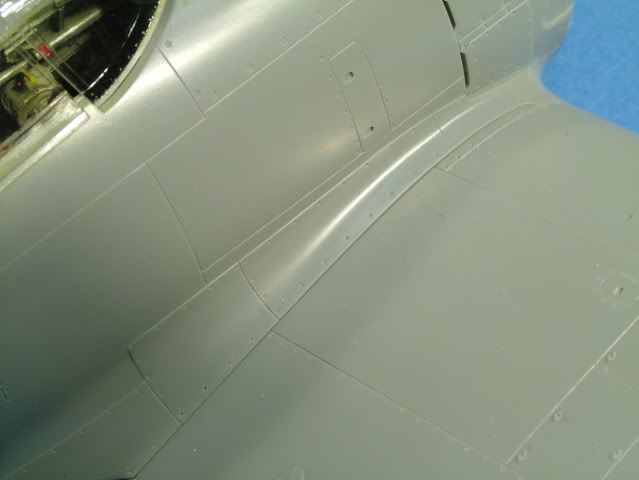
The
right side fit is very very good 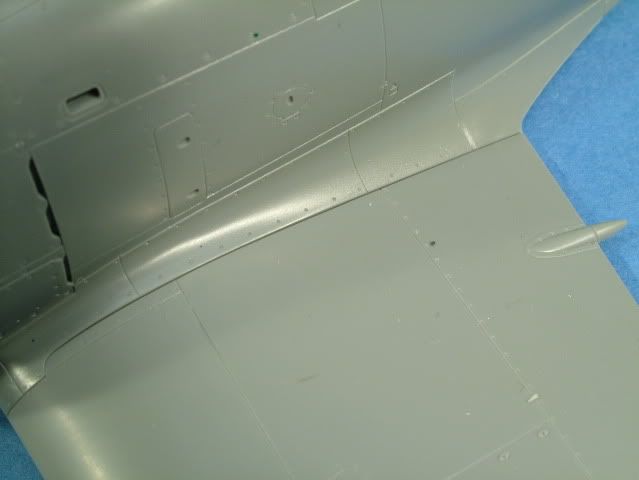
the
left side has a minor gap throughout the join.
As I don't want to
introduce unnecessary extra di-hedral to the wing plan-form and force fit with
it with a rubber band to close the gap, the spreader bar is the better option in
my opinion.
Finalized the cockpit by installing
the PE belt Painted it a light Brown, close to "leather",
and
some minor paint chips to depict more wear and tear.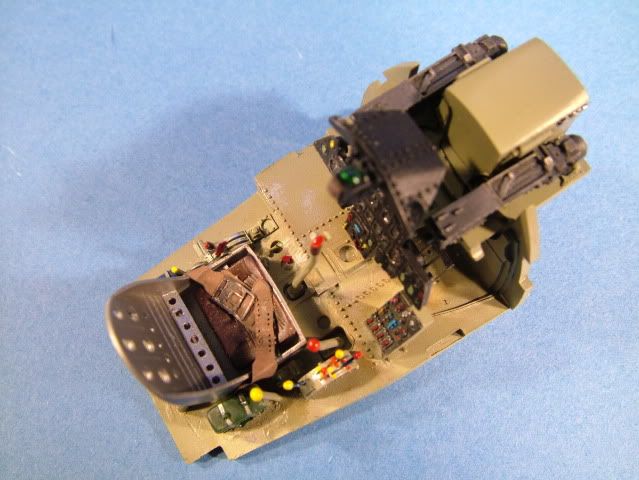
The
whole resin tub (minus the instrument panel) was dropped in.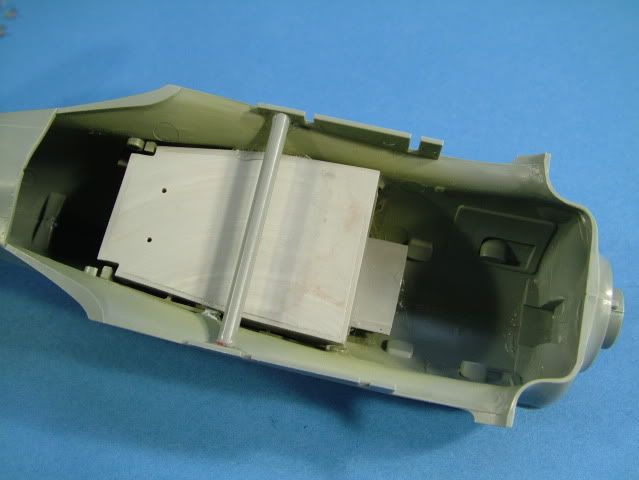
Checked
for alignment and then spot glued with some thick Super Glue.
A spreader
bar was inserted to tighten up the minor gap to the wing join.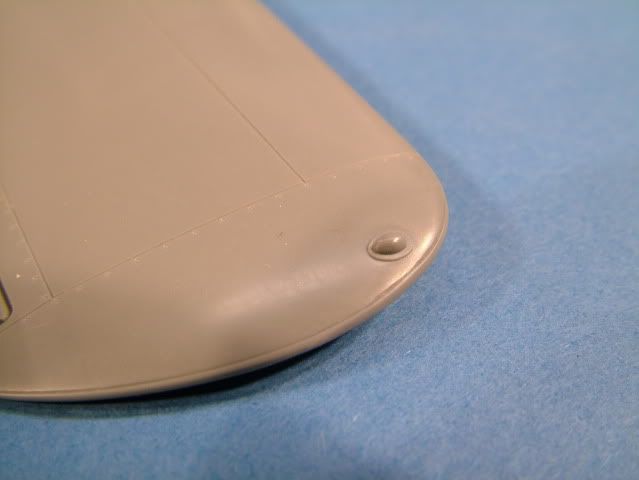
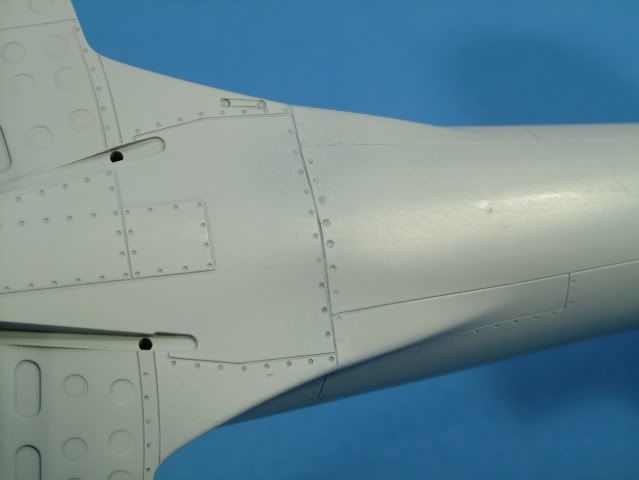
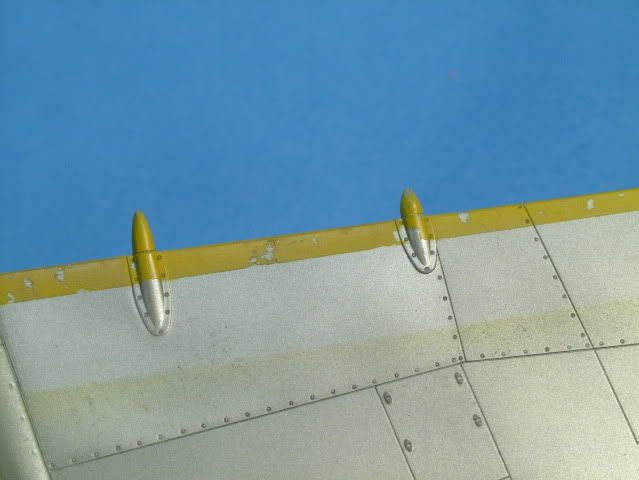
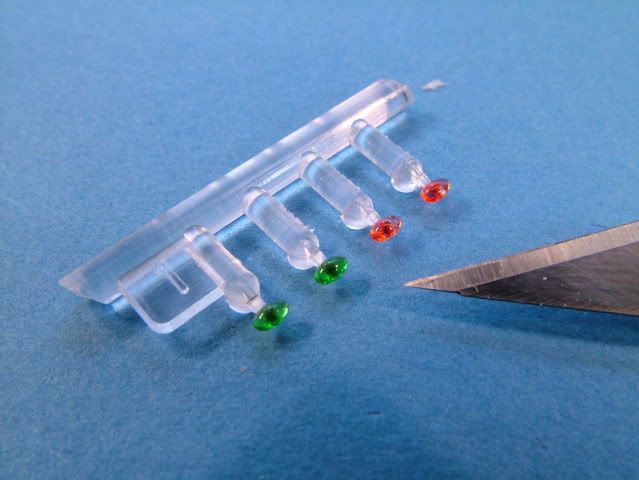
Removed
the "bumps" from the wings (top and bottom) and from the horizontal tail that
were representations of the navigation lights.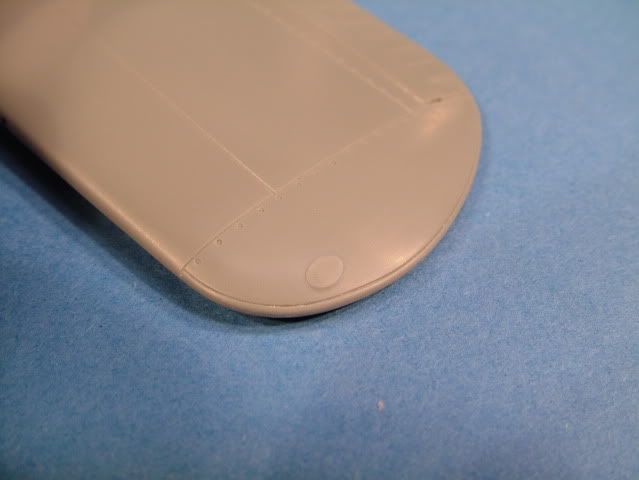
Will
be replacing these with clear sprue'd versions.![]()
To
prepare for painting, rubbed down the fuse and wings with plastic
prep.
Plus vacuumed the whole model shop and dusted off all surfaces, in
hopes to eliminate dust settling into the paint.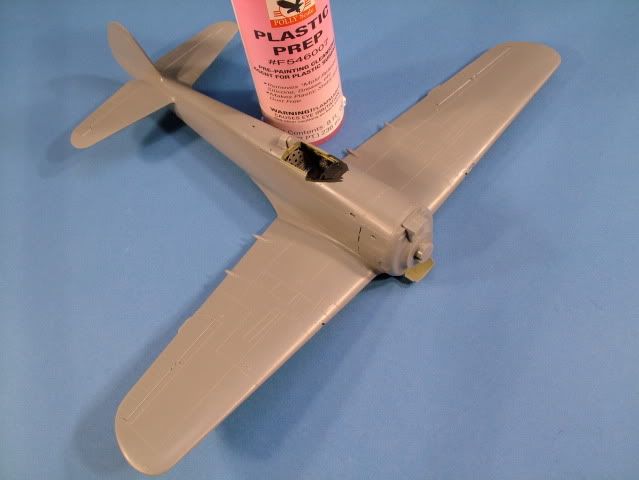
Inserted
the Instrument panel through the top and aligned with the top dash.
Glued on the front canopy with Gator Grip glue.

Masked off the interior with some 3 M White Tack.
A light coat of Mr. Surfacer 1200 (Grey) primer was applied.
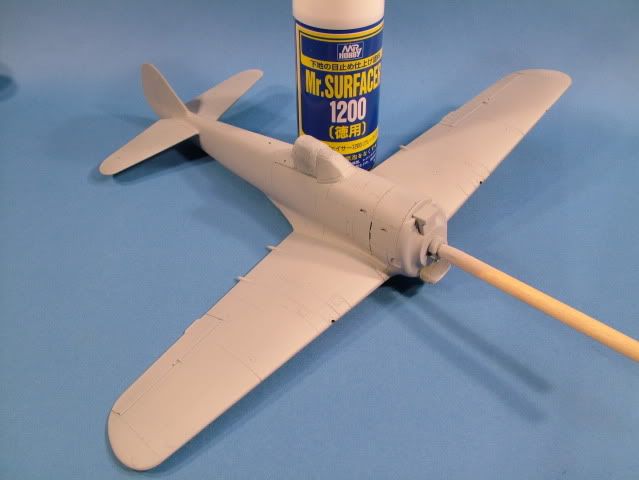
Once dried (about 30 minutes) rubbed down the surfaces with MDC sponges and checked the over all fit and finish.
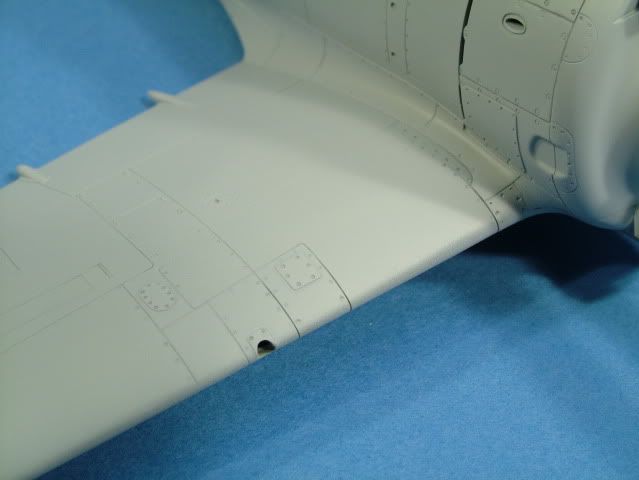
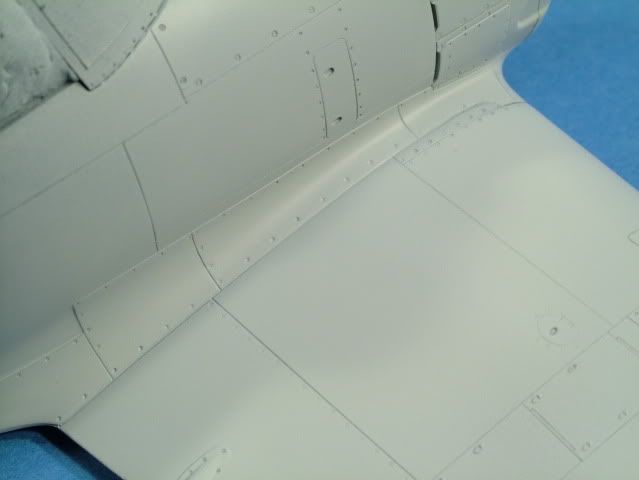
Particularly liked how my panel lines ended up after being re-scribed around the leading edges.
Paying close attention to line up top with bottom lines in the original plastic.
Used the JLC razor saw, to set the panel, the "teeth" on the saw allows for a quick alignment
of the panel line by lightly "sawing into the plastic" and set it in place, then lightly followed with various scribers.
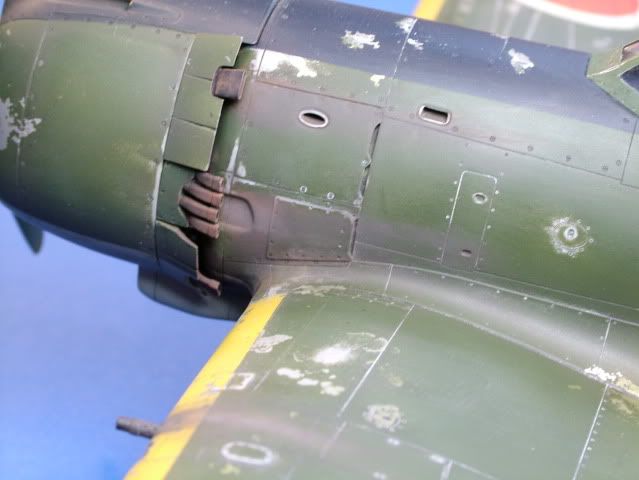
Some rivets were applied close to the cowl on the "strengthening plates" and look the part.
The wing join to fuse turned out wonderful.
Applied some final rivets at strategic locations.
Lightly rubbed it down with a well worn out MDC sponge.
As a last step used a piece of an old T-Shirt to polish it down.
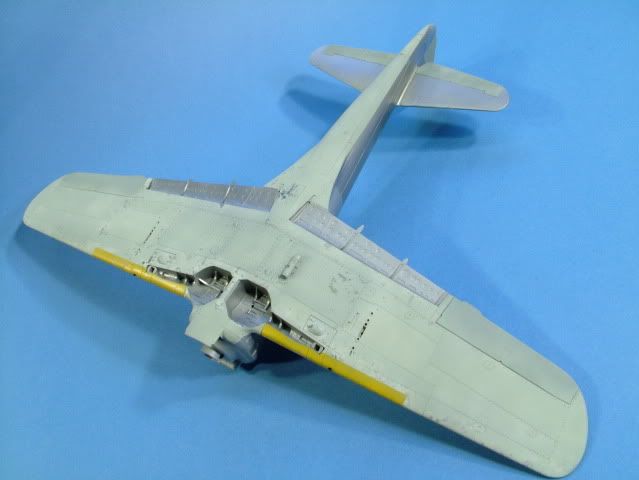
Treated some panels with various shades to try a pre-shading technique, Alclad "Steel" and "Aluminum"
and also to allow some of the chipping to have character.

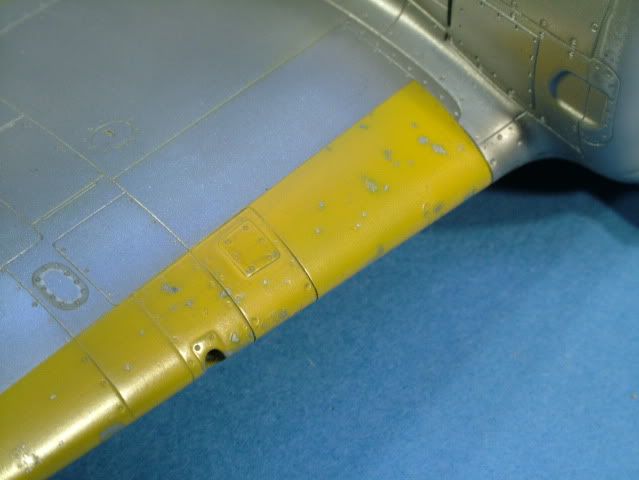
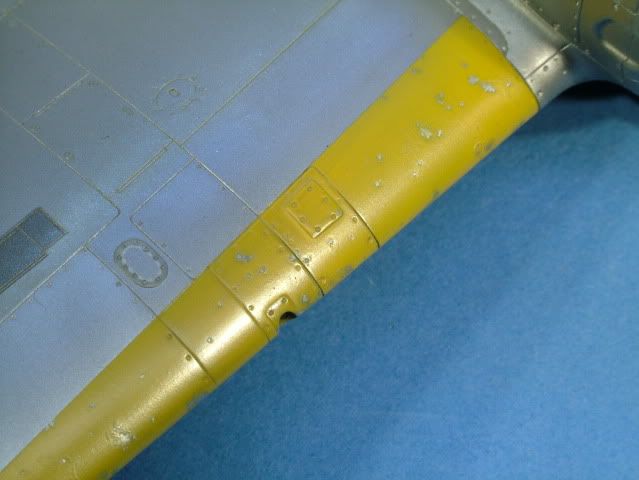
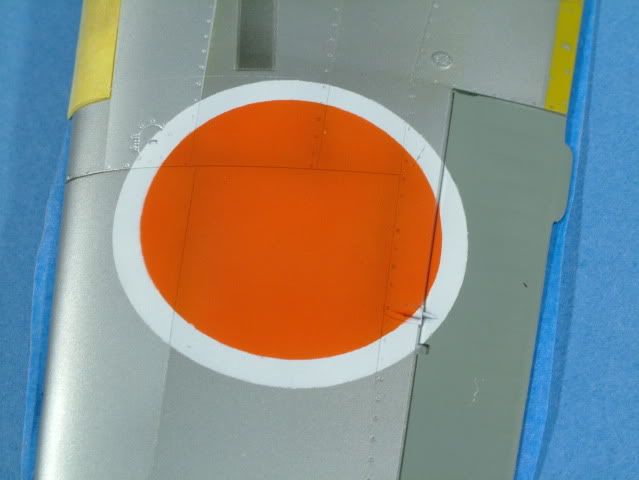
The Yellow Identification bands were masked off, Salt applied and left to dry for 20 minutes under a light.
A light application of Mr. Color "Character Yellow" #109 was then airbrushed on --ever
so careful -- at a pressure of 8 psi, as not to disturb the salt.
#109 has a slight tinge of "Orange" and looks much more the part than a regular Yellow.
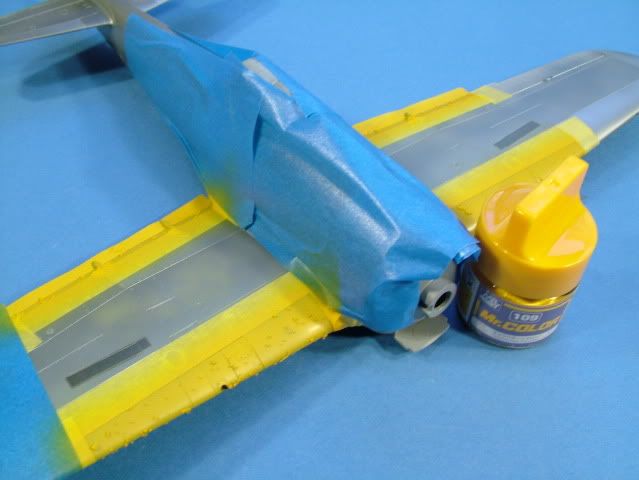
Masks removed and Salt Chips dissolved with distilled water.

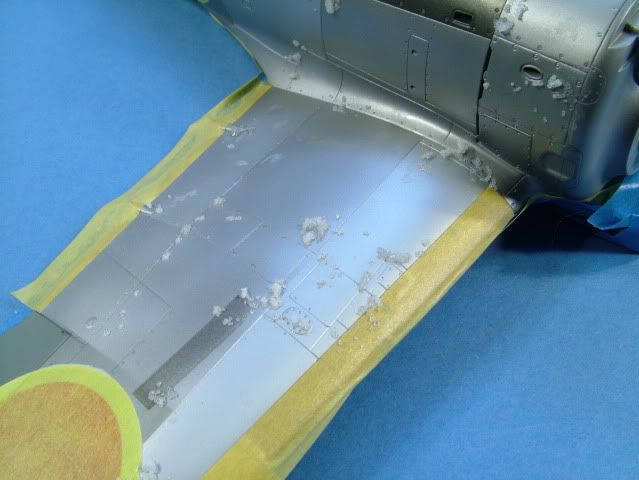
3 M White Tack inserted into the wheel wells to protect the nice Metal Finish already applied.
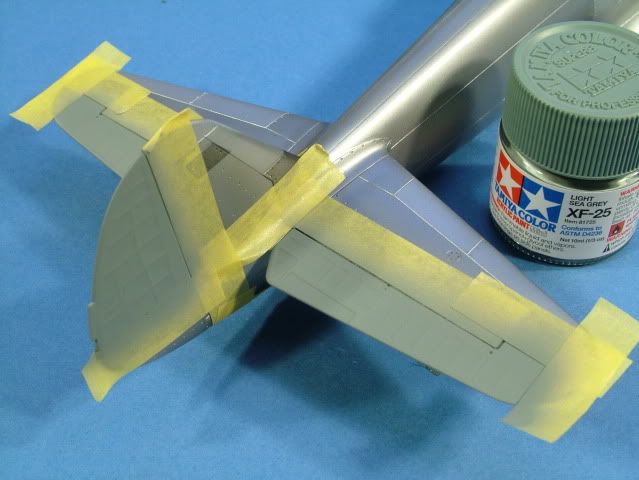
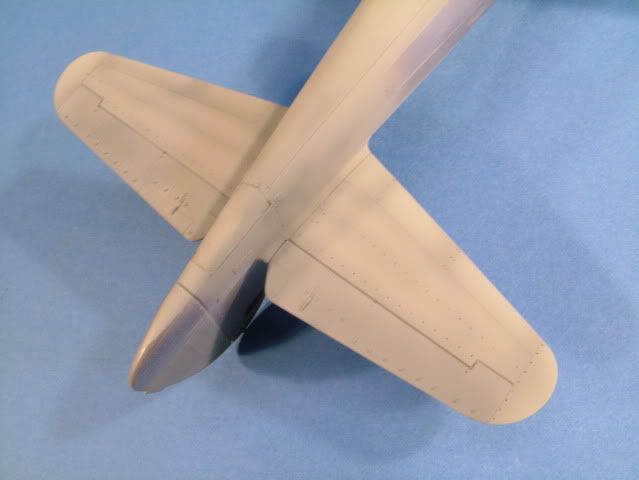
Airbrushed all fabric flying surfaces with Tamiya XF-25 Light Sea Grey.
This color is a very nice companion to the JN Grey under surface.

Salt Chips were applied to the Silver under side, then Three Shades of JN Grey applied, using some White to tone down.
Some nice post modulation and Pre-Shading of the "Steel" are peaking through.
She is quite "blotchy" now, this will be adjusted with a final blend of an over-spray at 70/30 thinner to paint.
finish off the tail section with Tamiya JN Grey XF-12.
Airbrushing was performed at 8-12 PSI for all stages to follow.
Post shading performed with Tamiya Light Sea Grey XF-25.
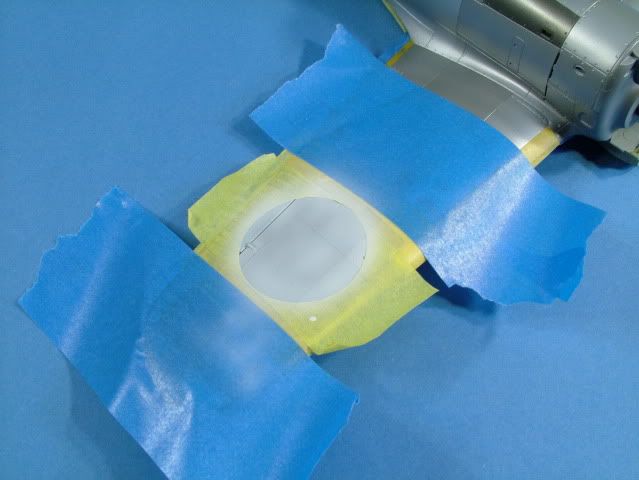
Made some masks out of Tamiya Tape.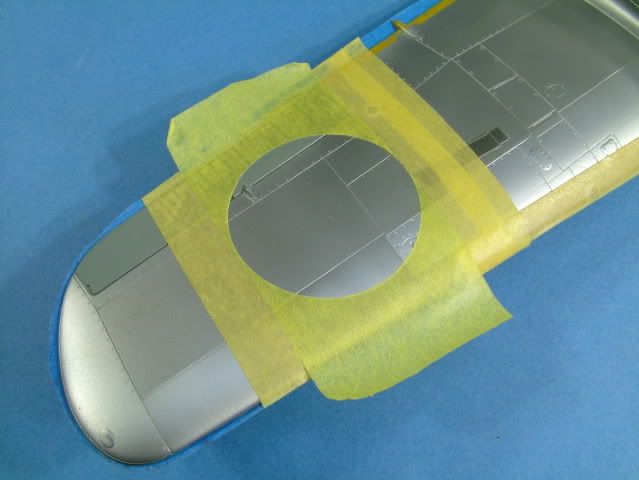
Airbrushed on Tamiya Flat White XF-2, light dusty
coats,
purposefully having an uneven coverage over the
Alcad. 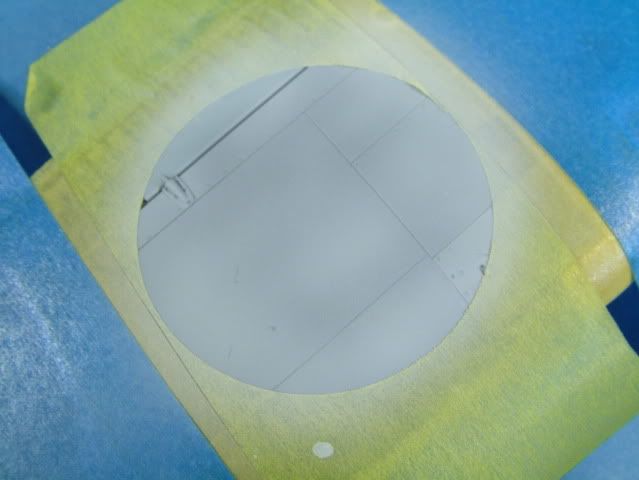
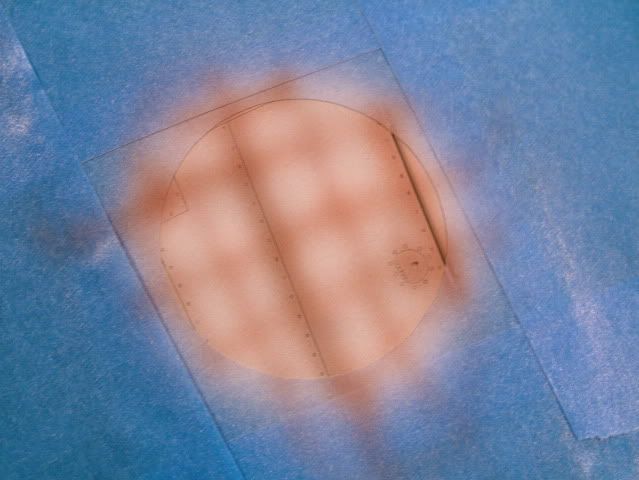
Pre-shading
is performed with Tamiya Hull Red XF-9, mixed with Tamiya Flat Yellow XF-3
(75/35) mix.
In the picture it shows up much more Yellow then it
truly is.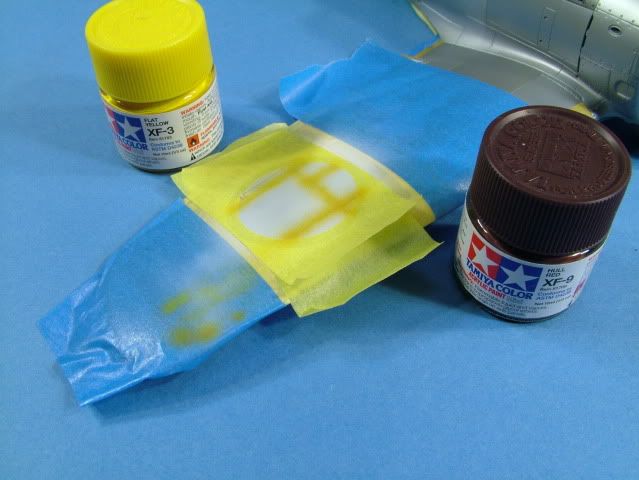
A
light layer of Tamiya Flat Red XF-7 and 3 drops of Tamiya Pink X-17 is applied
in between the pre-shading.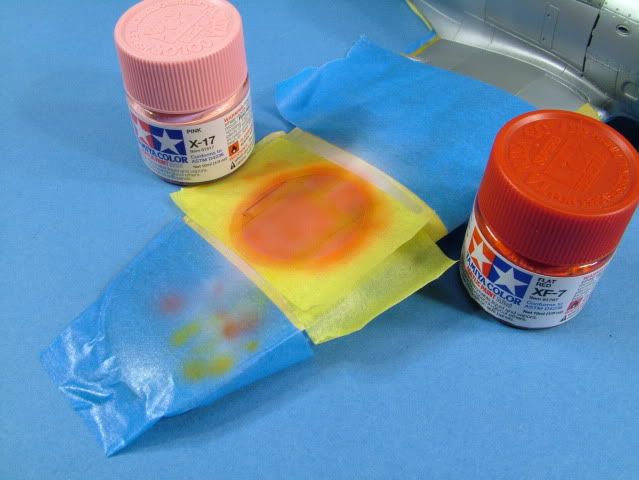
Two
light dusty coats are then built up with Tamiya Flat Red (70% Thinner),
until pleasing to the eye.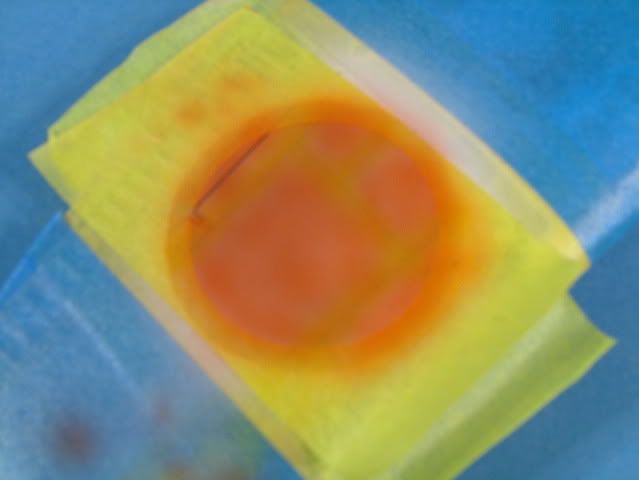
Unmasked
with the decal for comparison. you can see the nice panel shading coming
through the Red.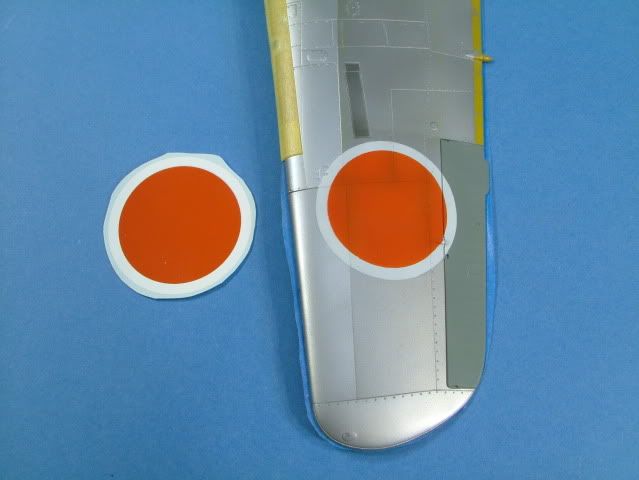
The
fuselage Hinamaru's where accomplished in the same fashion,
with a
slightly darker rendition to show a little less sun fading than the upper wing
ones.
All Hinamaru's where then masked off and salt chips applied with
distilled water.
This was left to dry/evaporate for 30
minutes.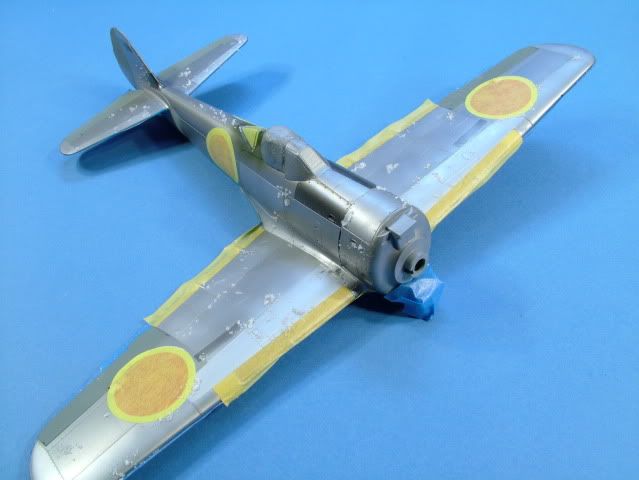
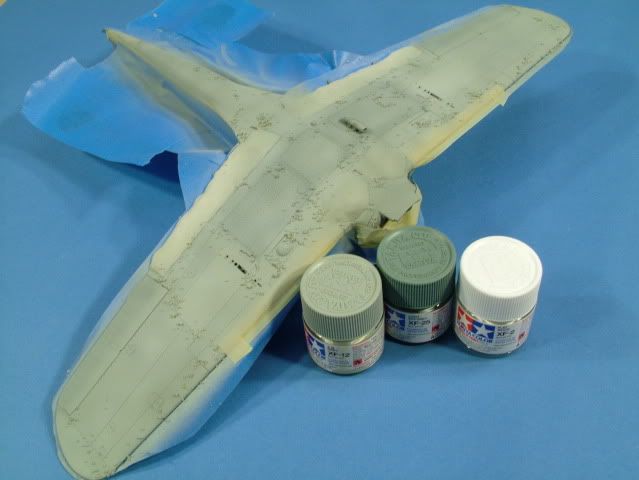
Next
was to apply Tamiya JA Green XF13, along all panel lines.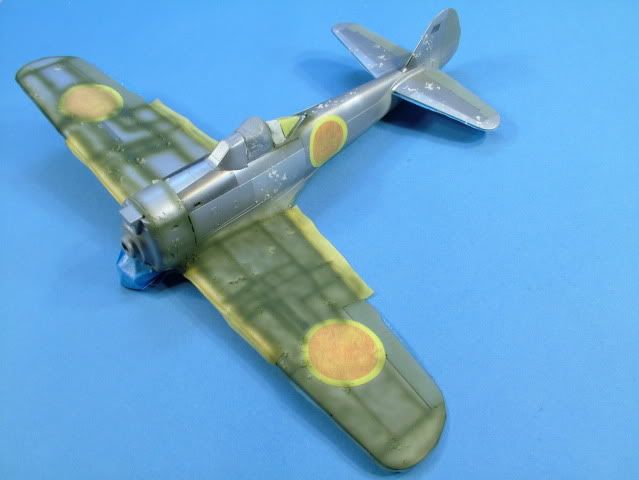
As
progression is made, slowly started filling in towards the centers of the
panels.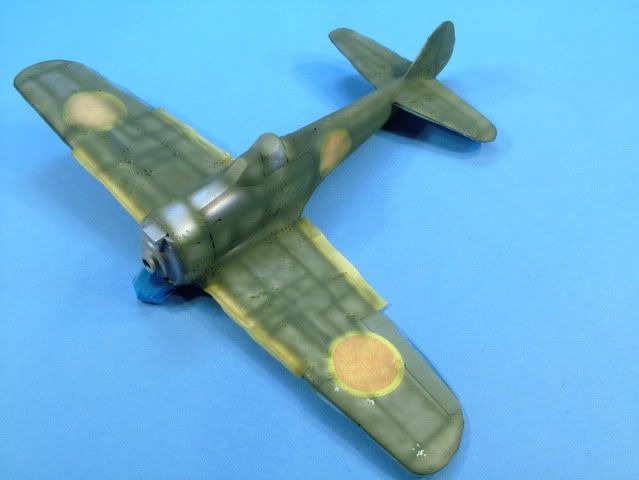
Tamiya
XF-67 NATO Green and Tamiya XF-58 Olive Green were then applied at a 70 %
thinner ratio.
Highlighting areas randomly to provide different
depths in the paint.
Another pass was performed with Tamiya Khaki Drab
XF-51 at 80% Thinner ratio following the panel lines once
more.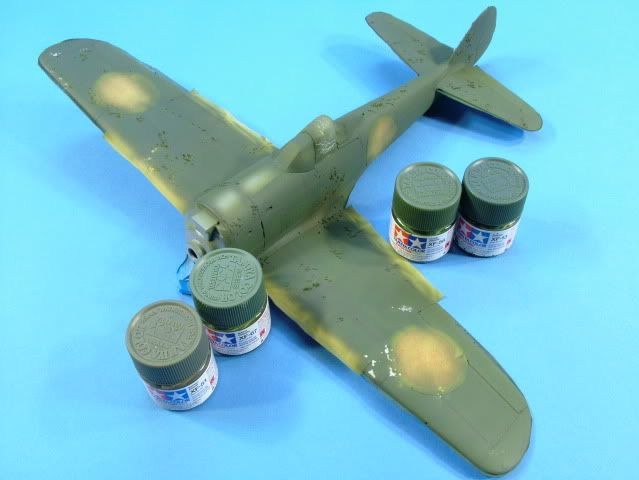
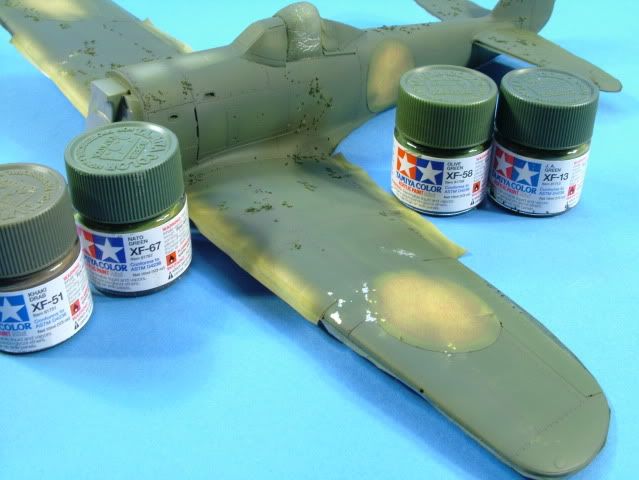
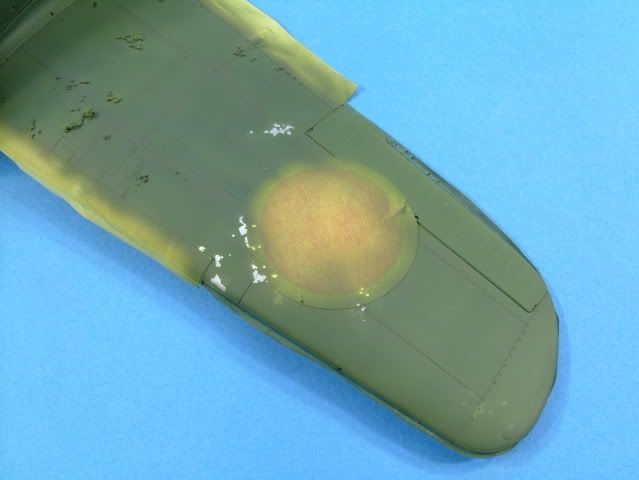
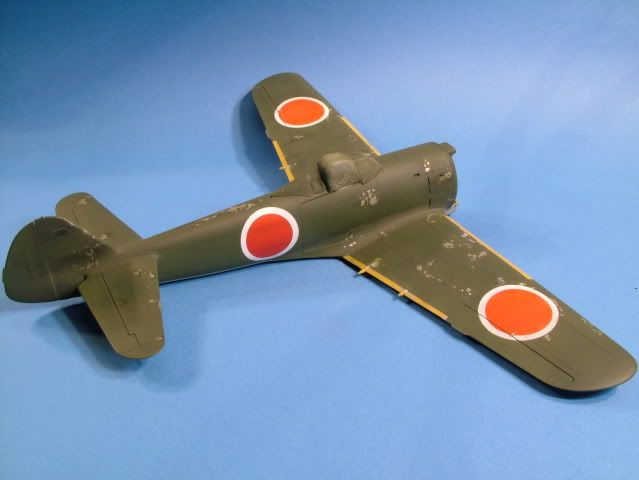
Next
stage is to removed the salt chips with an old tooth brush.
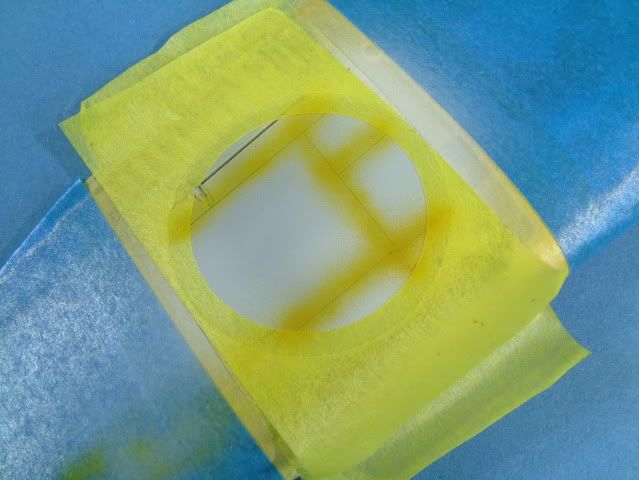
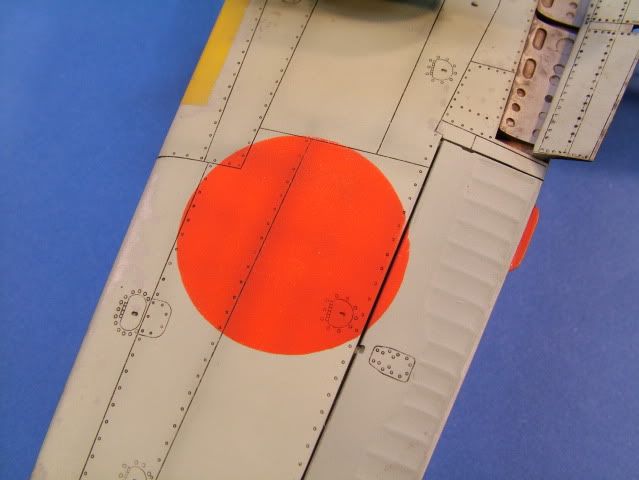
Hinamaru's
on the bottom were masked off, using the "dot" to align with the
top
hinamaru, then overlay the "blank" and removing the "dot"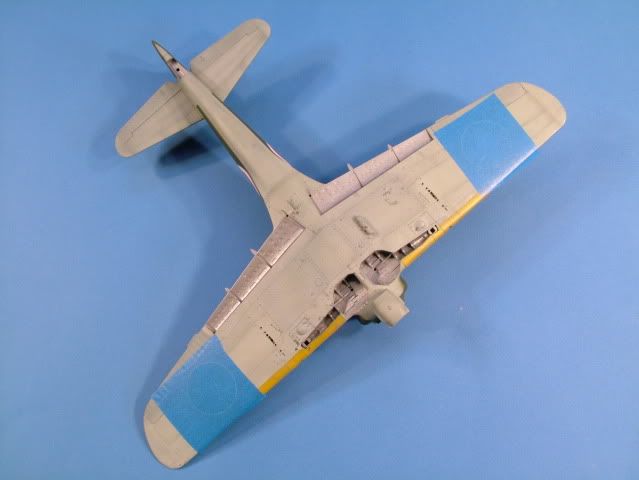

Same
technique as the others, I did apply a "white" first over the JN Grey.
As
to get a nice color tone in the Red.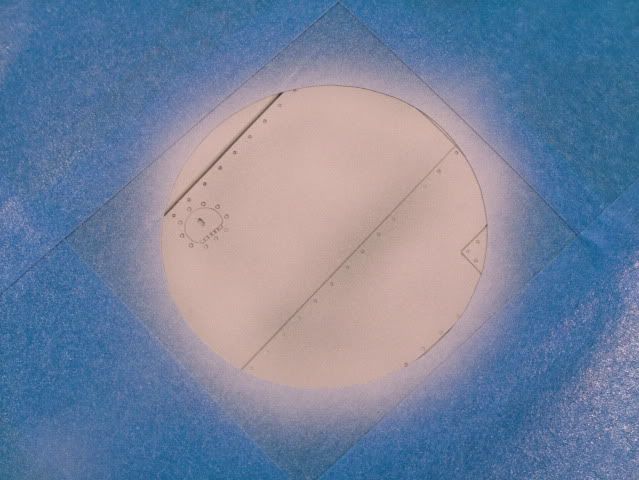

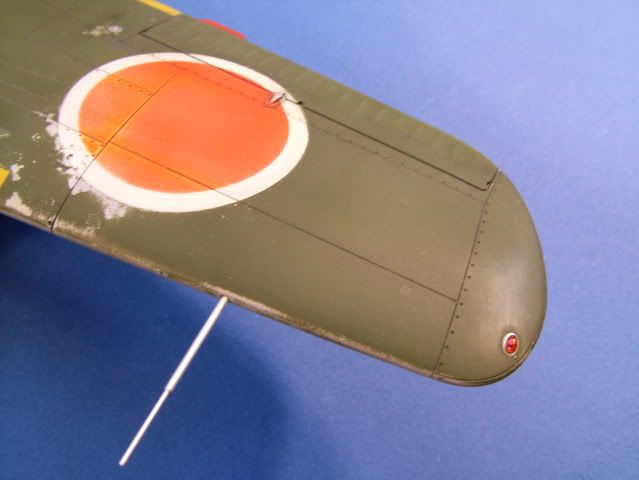
Bottom
ones completed.
And do not have the white outer ring per
regulation.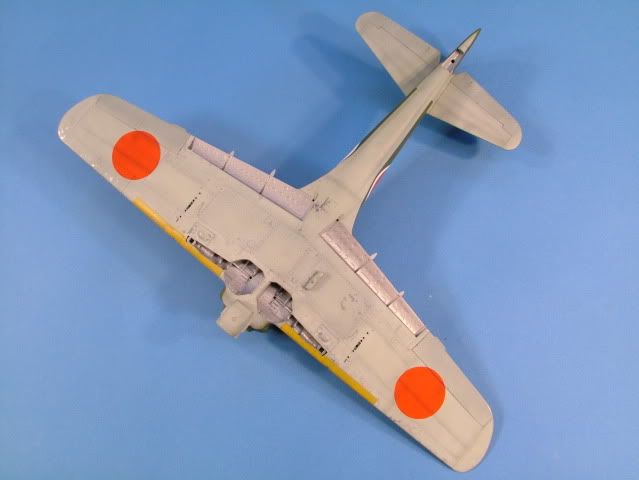
These
have another darker tone of Red.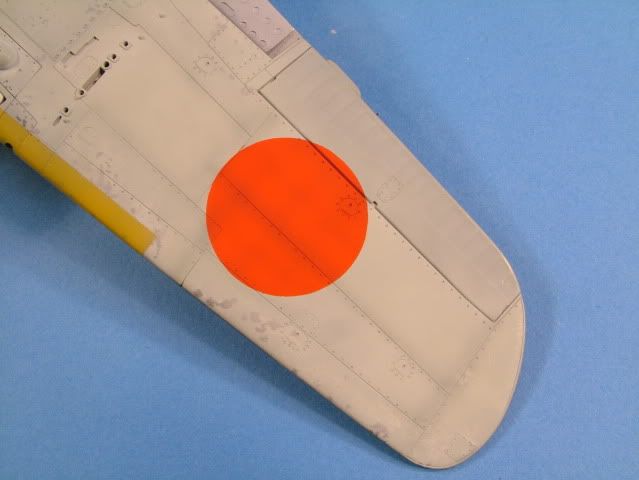
And
are not as weathered as the top ones, still some nice pre-shade tones peaking
through.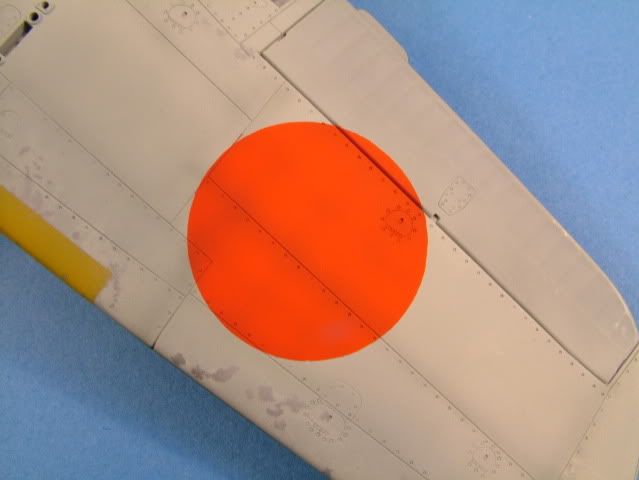
Unmasked.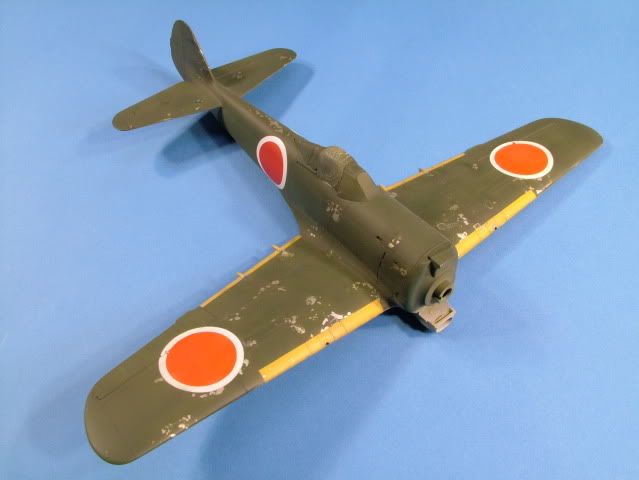
Still
some cleanup needed to even out the Greens.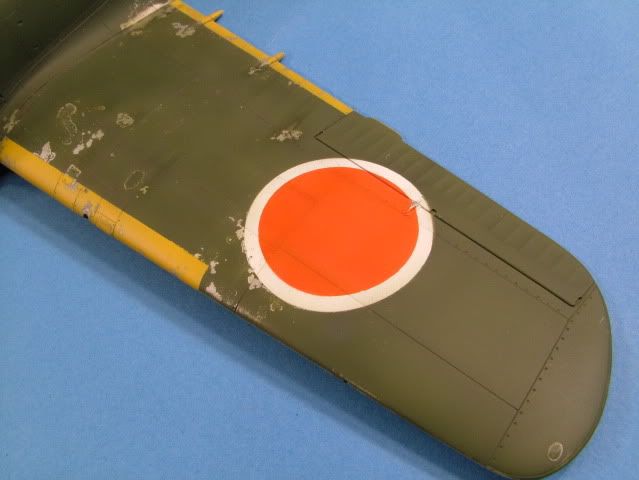
Pretty
pleased with the results. A flat coat will blend in the overall
effect.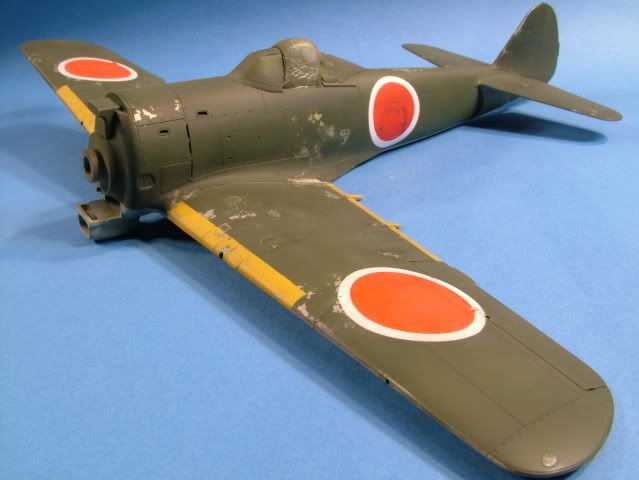
After
the flat coat.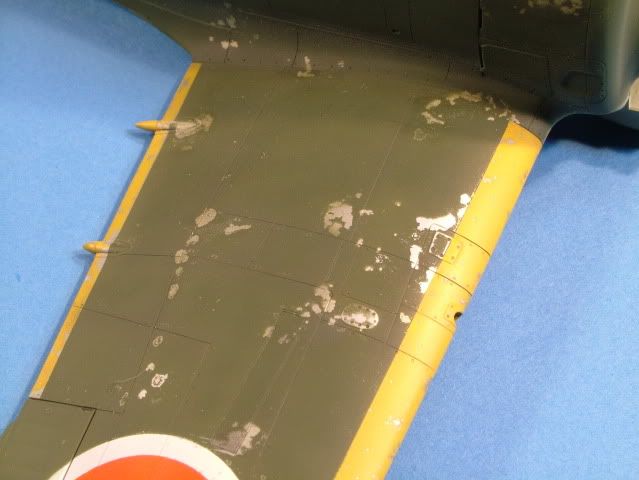

Next
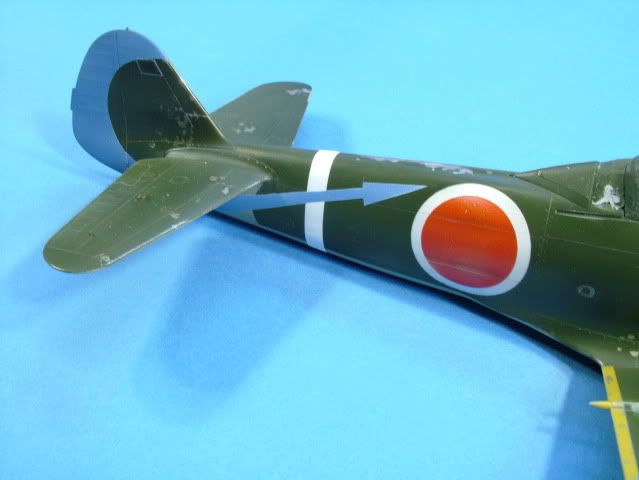
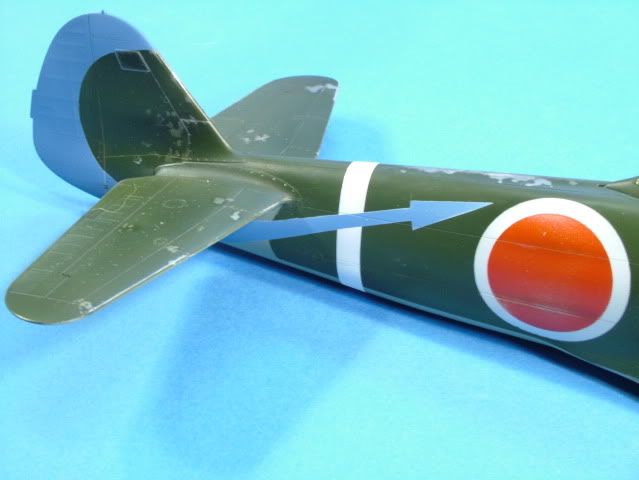
up is to make a template from the decals for the arrow tail art.
And come up
with a suitable Blue for it and the Spinner.
work involved airbrushing on
a Gloss coat. There are a couple minor decals to go. Will be using
the White decal for the rear of the fuse.
Used the decal sheet to make a pattern on the computer which will be used to
cut out a mask of Tamiya tape for the Blue Fin Flash/Stylized
Arrow.
Cleaned up some of the chipping and filled in some areas I wasn't
happy with, with a couple of shades of Green.
Lightly
rubbed the Hinamarus (in the direction of the airflow) with a polishing
sponge (1200 grit) to reveal some of the shading and wear through.
This
will now need to dry for the next 48 hrs or so.
Finished
off the interior of the cowl with a Winton Oil Wash.
80% Oderless thinner: 
to
a 50/50 mix of Burnt Sienna to Van Dyke Brown.
Followed by a wash of
60/40 mix of Ivory Black to Paynes Grey.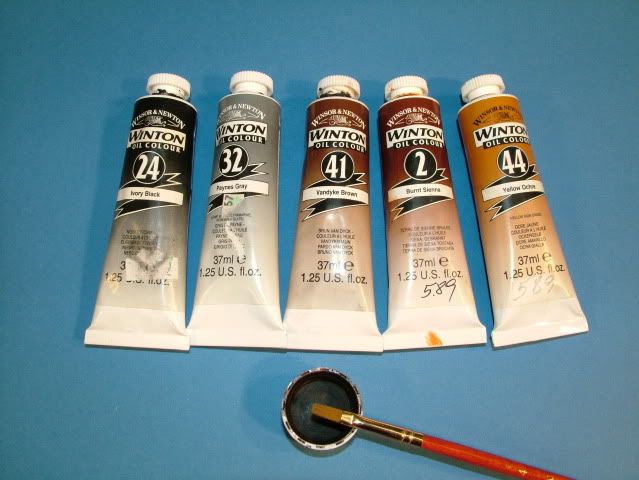
Splattered
some of the wash as Oil drips on the bottom of the cowl to simulate
leaking.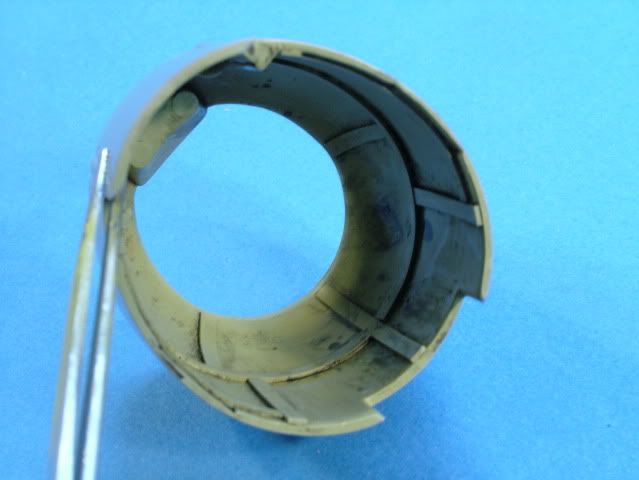
Completed
the propeller hub with a custom mix of 50/50 Mr Gunze Deep Blue and Light Blue
and destressed the hub.
Still some light chipping on the leading edges of
the blades to go.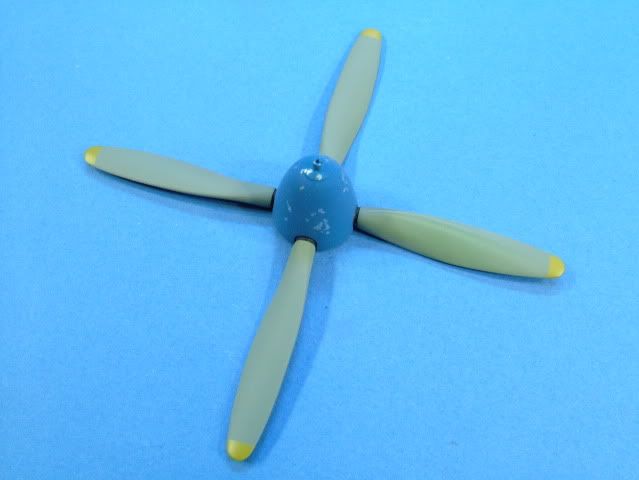
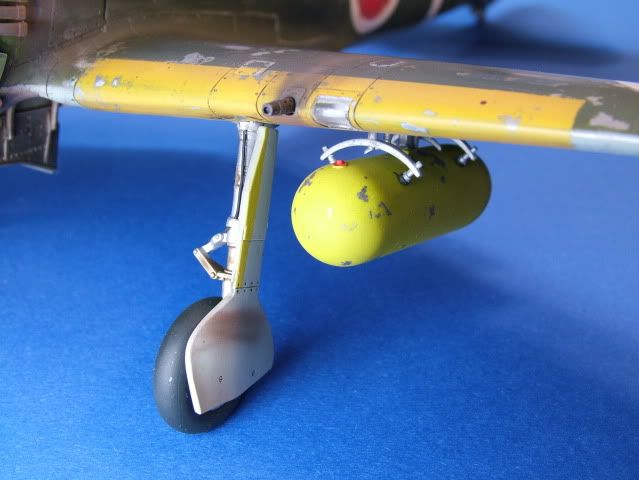
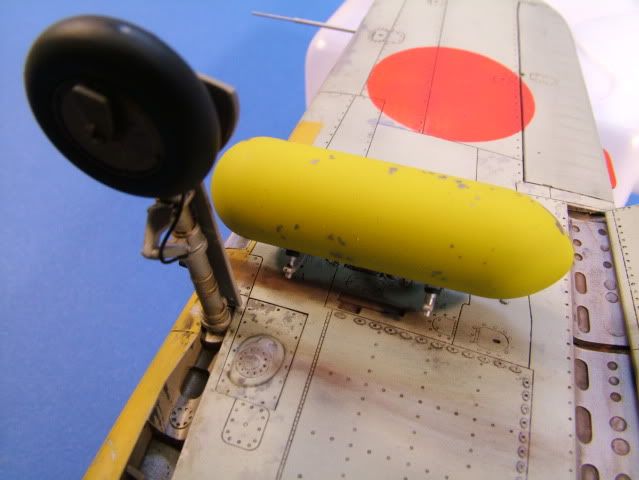
Brake
line held in place with thin strips of Tamiya Tape, then painted
silver.
Painted the leading edge Yellow to match the wing and installed
the doors to the gear.
Tires are painted with Tamiya XF-69 NATO black to simulate the
rubber.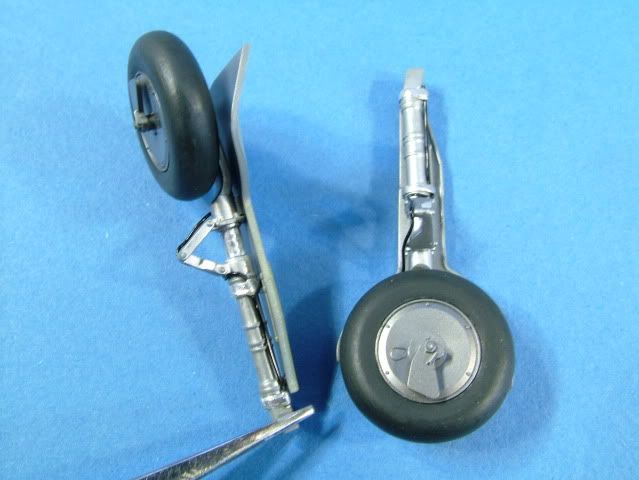
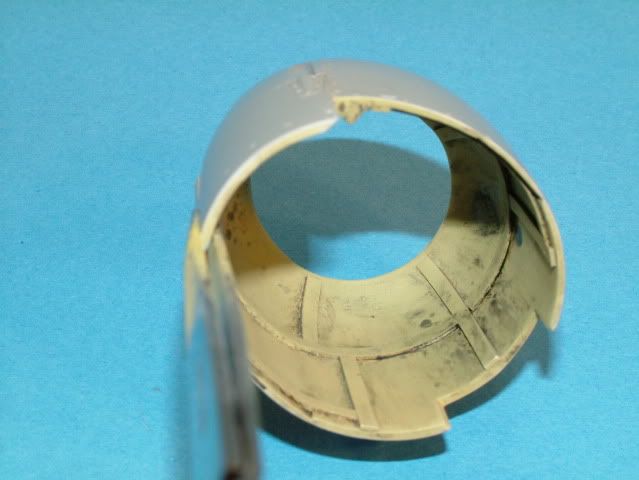
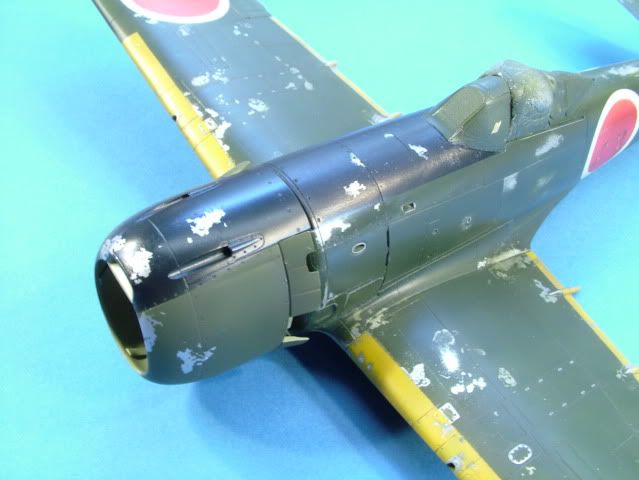
Work commenced with finishing up the cowling.
First a
layer of Alclad was airbrushed on.
This time used some micro-mask
dabbed on with a sponge.
Then
the SNJ Green, Nakajima Black and the bottom SNJ Grey were sprayed
on.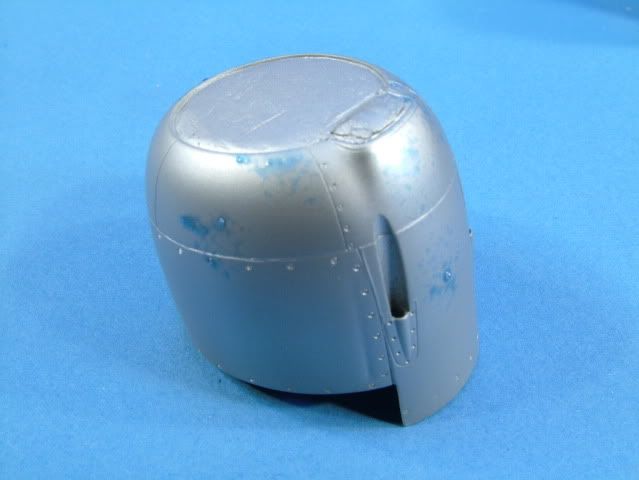
Once
left to dry after 10 minutes attacked the paint with some balled up
painters tape pressed onto the areas where the Micro Mask was placed and pulled
it off.

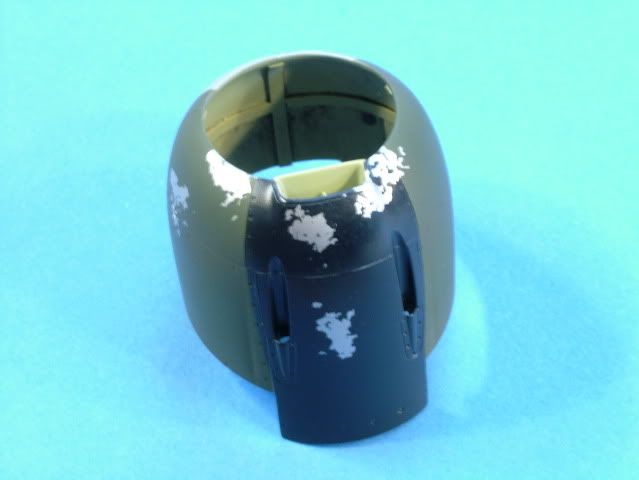
The
White ID band was masked off and airbrushed with Tamiya Flat
White.
Still need to weather that one into the overall
effect. 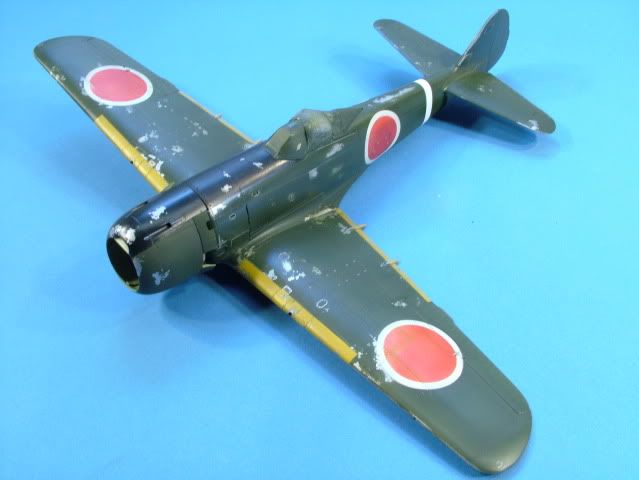
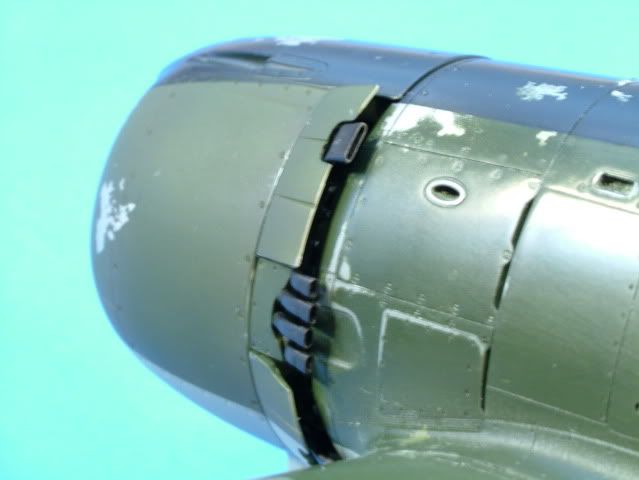
Installed
the Quickboost exhaust stacks and painted those with Model Master burnt
Iron.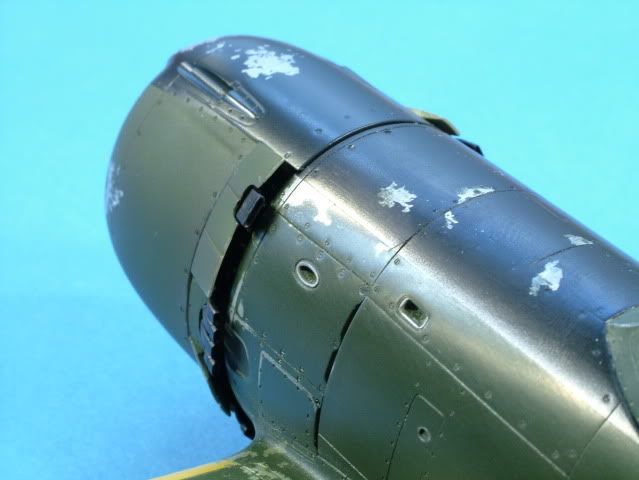
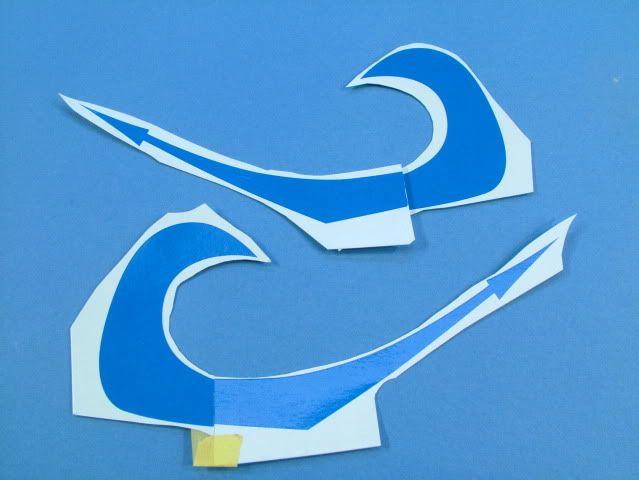
After
that I scanned the decal into the computer, and printed out two
"blanks"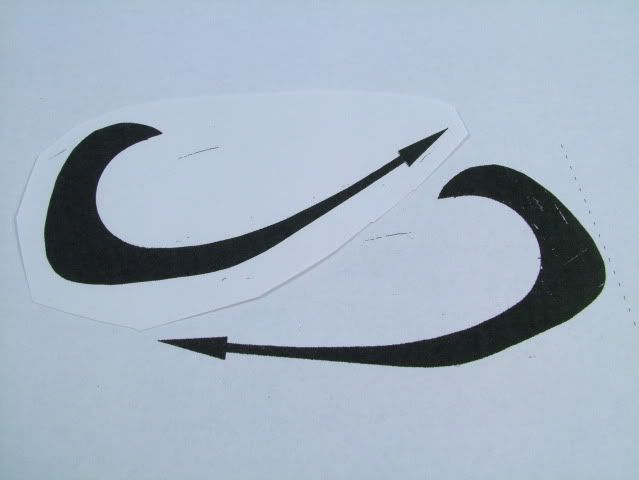
These
were then carefully cut from the heavy stock paper.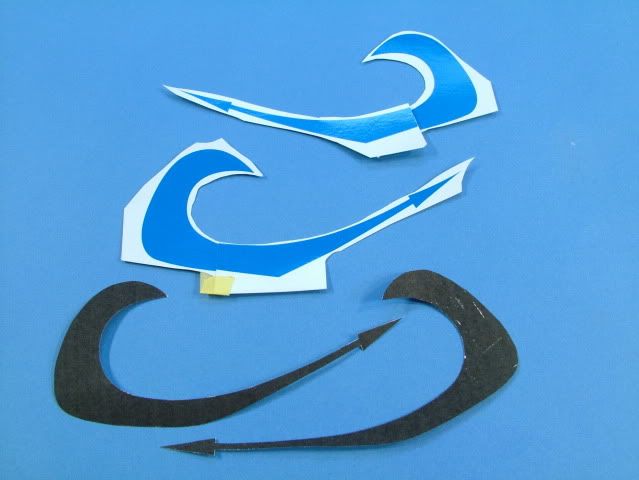
The
paper "blanks" were then glued onto some Blue painters tape with yellow wood
glue.
Using a brand new knife I followed the outline and pulled the
"reverse mask" and applied it onto the model.
I did this for both
sides and carefully aligned left to right, top to bottom.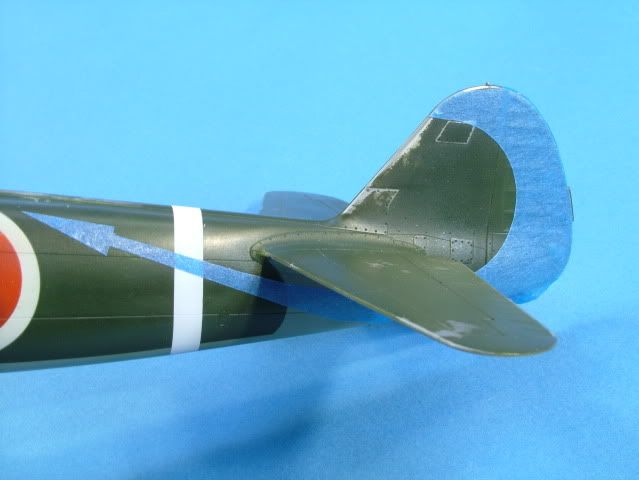
Placed
the outline tape pieces onto the plane and pulled the "blank" off revealing a
nicely cordoned off Tail Flash to be painted.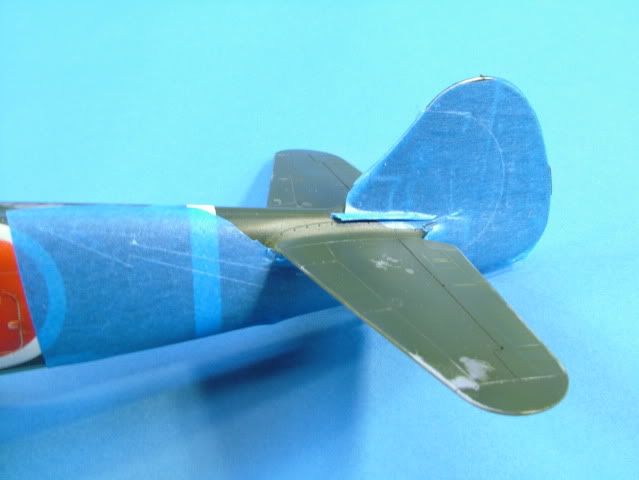
I
used Tamiya Flat White to provide a lighter back ground for the Blue to go over
at first.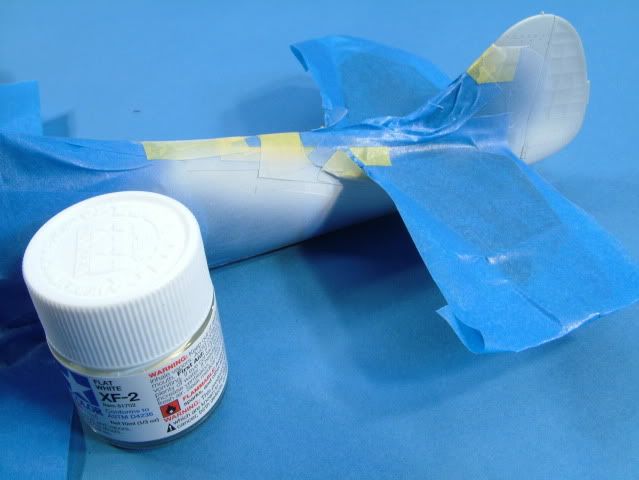
The
White base coat was then over-sprayed with my own mix of Blue.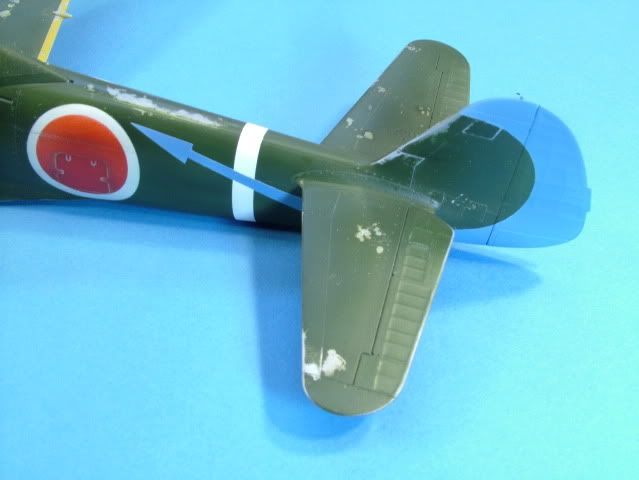
Finalized the rack for the wing tanks. The black rubber
boots simulated with Tamiya NATO Black.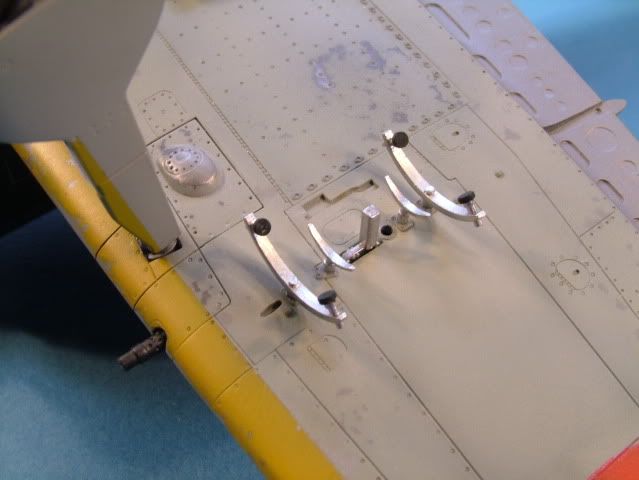
Gear
was glued on with Thick Super Glue and a shot of kicker once aligned front to
back and side to side.
Installed
the stacked brass fashioned pitot tube and painted silver.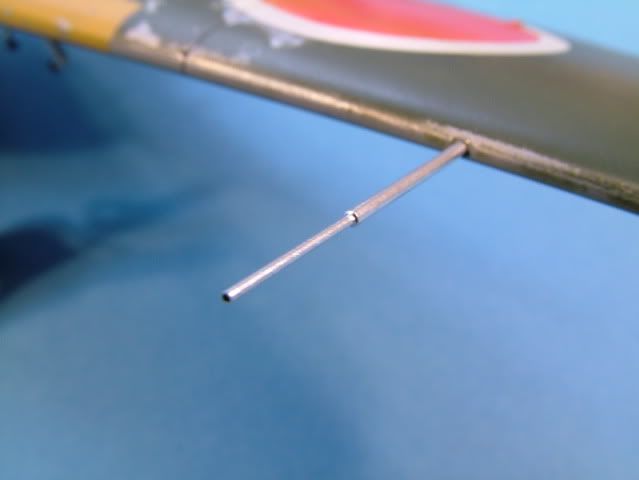
Drilled
out the navigation lights and painted them with clear Red and clear
Green.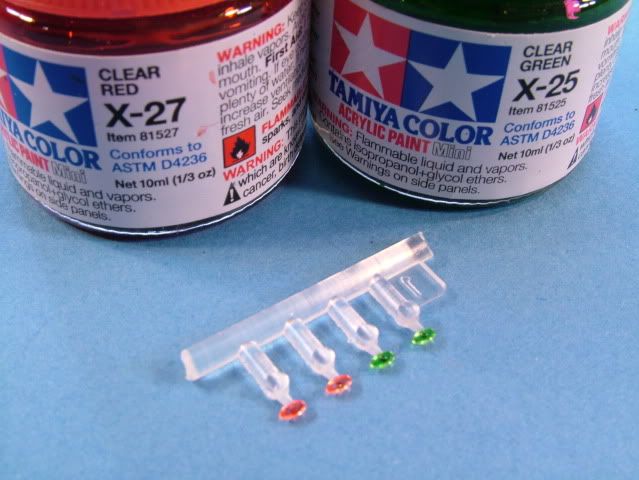
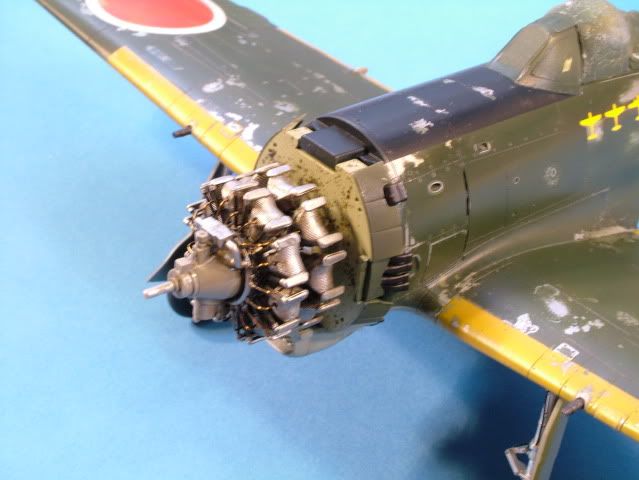
Dirtied
up the firewall with some splattered on oil.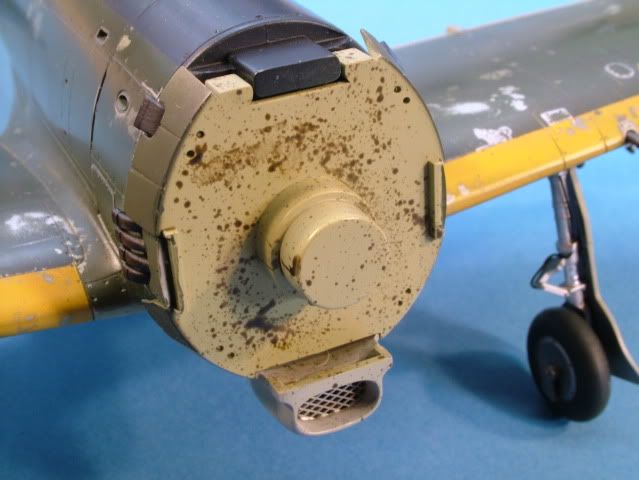
Engine
completed with wires and a pin wash of Winston Oils.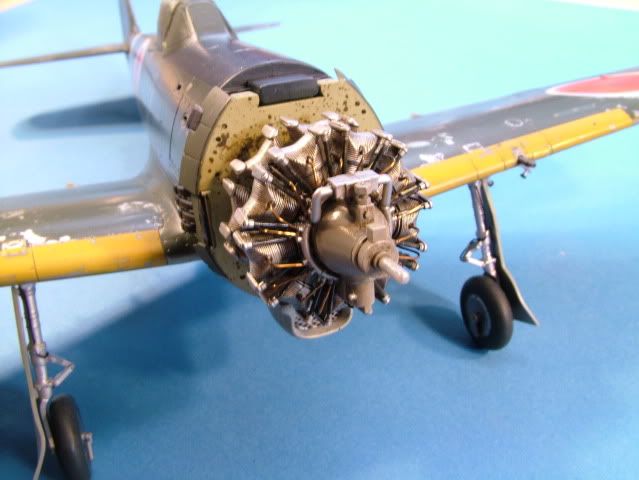
Final
work on the sliding canopy.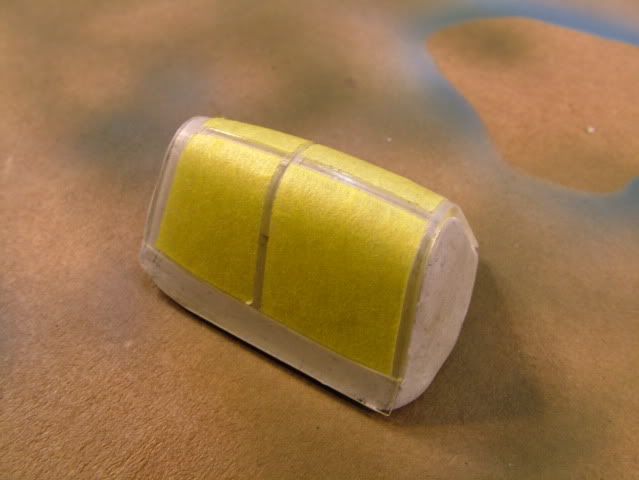
Airbrushed
on some Alclad Duraluminum first.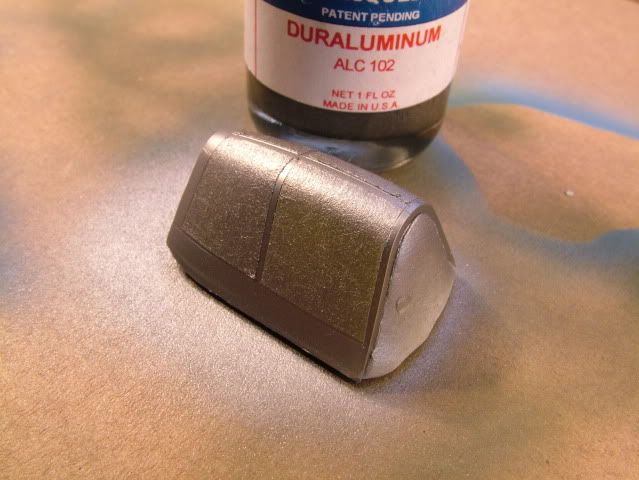
Then
some Tamiya JA Green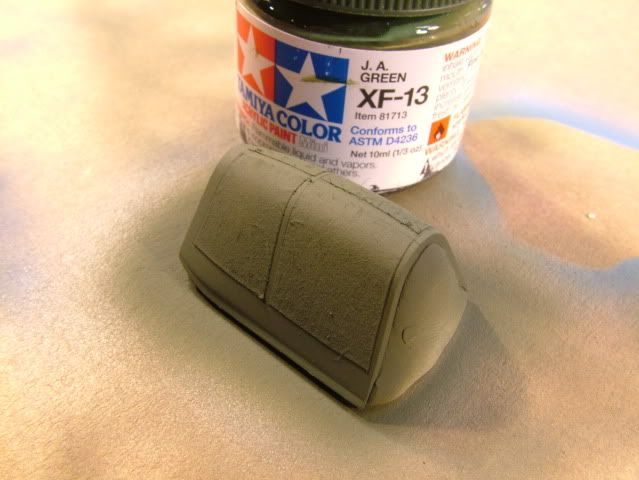
Unmasked.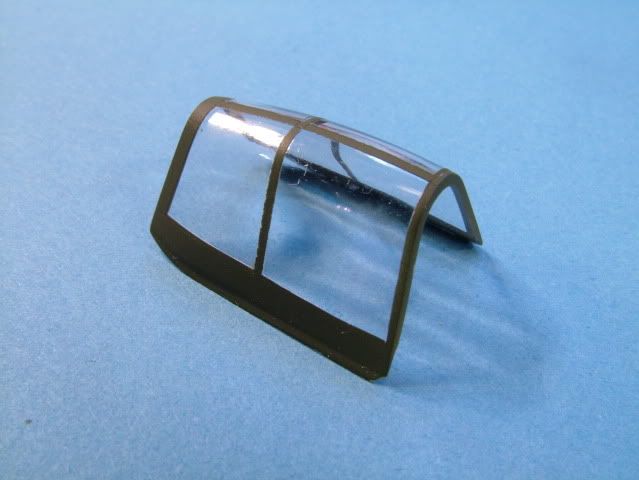
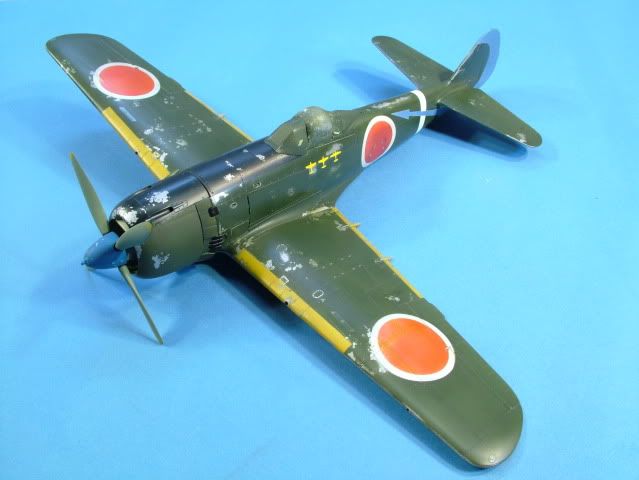
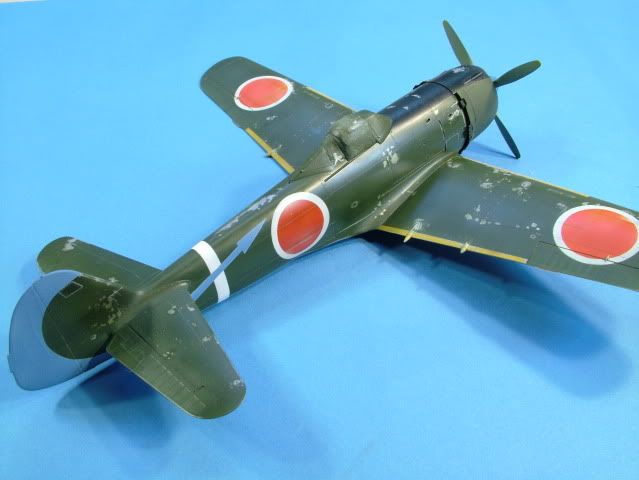
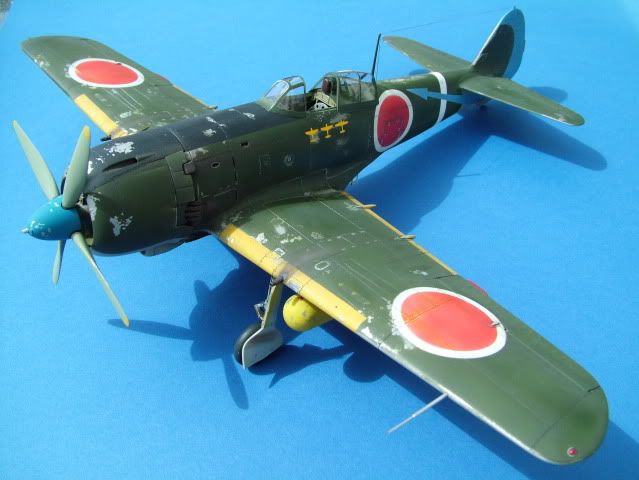
Well
we are getting very close, the tanks and the prop are pushed on not
glued.
Still needs one more overall Gloss coat. Then a pin wash,
and the final semi gloss coat.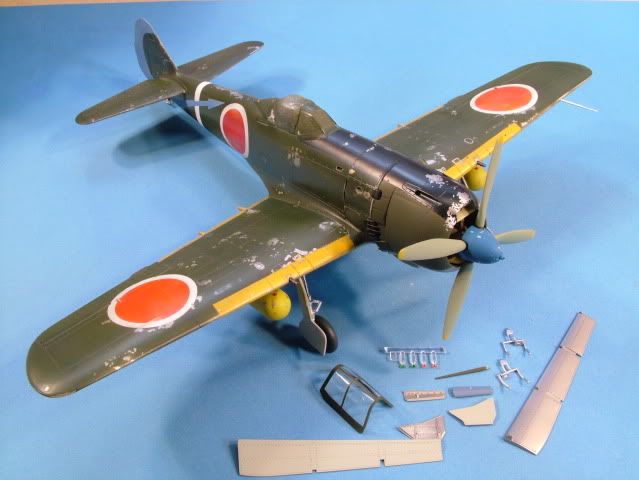


See you on my next Photo Build project.
Hans Pennink
Promodeller.com