


Dragon M1A2 SEP Abrams with TUSK2 upgrade
Kit used was kitno. 3536 Dragon 1/35 M1A2 SEP Abrams
The TUSK2 upgrade was made by legend
The figures were from Alpine Minatures
Stowage from Legend, Tamiya and Black Bart models
Paint:
Xtracrylix XA1812 US Gulf war
Vallejo Panzer aces Dark Rust, Light Rust and Dark rubber
Also used were various Lifecolour and Tamiya paints
Oil Paints
Mig oils Basic Earth, Buff and wash Brown
Windsor and newton Raw umber
Washes
Mig wash .....Neutral
Promodeller Dark dirt and rust
Also used were various mig pigments and artists pastels.
After along break from doing a build thread, i thought i would return with my first attempt at a conversion. First the kit i will be using which is the Dragon M1A2 SEP. The box is stuffed fill of parts, from the usual plastic to a section of turned aluminium that makes up part of the barrel.


The conversion kit is by Legend productions and contains resin and pe to enable you to add the TUSK2 armour upgrade to the Abrams. For those of you who don't know TUSK stands for Tank Urban Survival Kit.

First part of the build covers the running gear. The drive sproket is made up of three parts...

The parts fit together nicely
The wheels are also made up of three parts and as you can see from the picture below for some unknown reason the centre is made of clear plastic

Moving on to the front suspension arms which is made from five parts

Though fiddly to get everything lined up, the parts do look good when in place
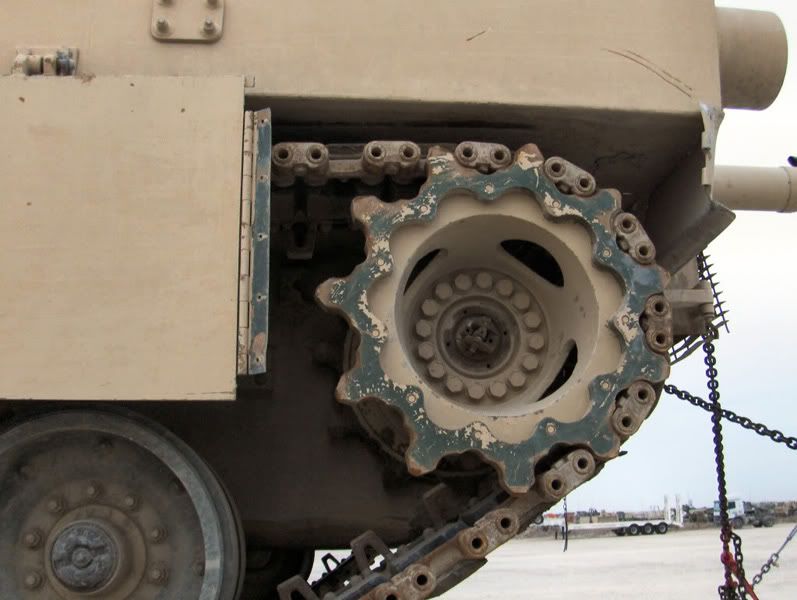
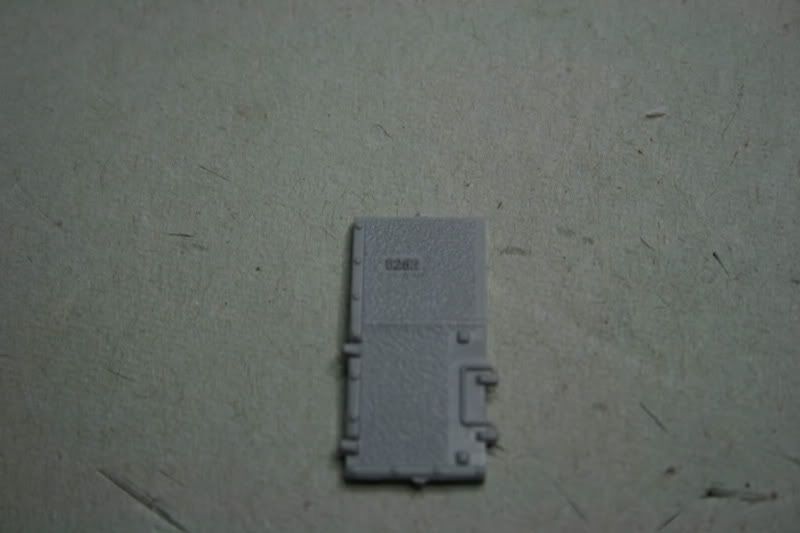
I have carried on working on the running gear area and the underside. First of all I sprayed the suspension with Xtrarcylix US gulf war armour xa1812. Then the tedious job of any armour build....the wheels. Each wheel was in two halves, then a clear centre was added. Yet again i sprayed the wheel with XA1812 and then the rubber part was hand painted with Vallejo Model color 70862 Black grey. I will weather the wheels at a later stage. For a bit of interest I also sprayed the odd wheel green to represent the fact that the wheel was a replacement from another Abrams. The center of the wheels has been left clear. I was wondering why Dragon had moulded the centre of the hub in clear plastic, so i did some research. In the photo below you can just make out the clear hub on an actual Abrams. Hats off to Dragon for getting this detail right. As for the drive sprockets I have decided to replicate the wear and weathering of the one in the picture above. Here is my work in progress efforts The next stage in the instructions has you moving to the rear section of the hull. The first job was to add the brass grills to the upper hull above the engine. The brass that i used was included in the kit. The first grill section was made up before adding to the main body. the rest of the brass panels were then added. Next I moved to the rear of the Abrams and the exhaust area. To get more detail into this area the grills have been made up of several parts These were soon glued together and attached to the back of the tank. I also added the rear lights and various boxes to the back. Here is the finished rear section Now onto the side panels which before i could put them on i had to add the tracks. The method I used to paint the tracks is 1. Spary the tracks with a base coat of a very dark grey. Also the wheels were given a light dusting with the Lifecolor sand paint and a wash mixed up from various Mig oil paints As you can see from the picture below, only the rear 2/3rds of the kits side panels were added as the front section will be replaced by parts from the Conversion kit. The fit of the kit parts needed a little trimming in places in order to get them to fit The parts were folded using my "Hold 'n' Fold" photo-etch bender, they were then glued together with CA glue and fixed into position. From now on things will become interesting as the armour upgrade has to be added to the sides. One of the final jobs I had to do on the turret was to install the additional armour plates. first I had to make the two frames on to which the armour plates would be glued. Here is the Abrams in complete state prior to the stowage etc being added. 


Next up are the tracks, in their wisdom Dragon put the track teeth on a seperate sprue which meant each one had to b glued on seperately.
In total I stuck on approx. 160 teeth to both tracks, a rather tedious process though the end result look good
Wjilst on the underside I added the first parts of the TUSK upgrade, the belly armour. This consisted of two large peices of resin. First they had to be trimmed and casting blocks removed (the areas in red)
Each piece was then fitted in place with CA glue. The belly armour only covers the crew compartement. I have yet to find out if the belly armour on the actual Abrams was made of either one or two pieces, therefore i will leave it as too until i can find that information out.

I then turned my attention to the upperside and started with the headlights. The kit provides pre-formed metal rod to act as the power cable to the lights. This was held in place with some metal brackets, also included in the kit.
For the headlight glass I used Little-lenses which I bought from Little-cars.co.uk at the Cosford model show. The lenses are an excellent product and come in all shapes and sizes as well as colour.
The lense was placed in its mounting
and finally the light in place on the Abrams


2. This was then given a light spray of Lifecolor UA019 sand, the aim was to give the tracks a slight dusty look.
3. I then dusted on some Mig pigments Gulf war sand.
4. the rubber areas on the tracks were painted with Model color 70862 dark grey.
5. I then went over the metal areas with a graphite pencil


Now for the fun bit, the installation of all the side armour. The instructions for the TUSK upgrade are made up of colour pictures and are a little vague in places.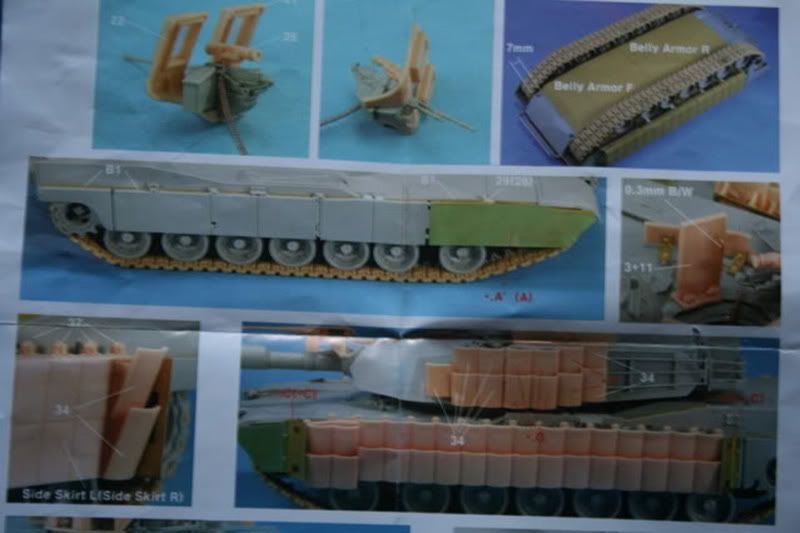
The first stage is to add the rear PE end piece. This is made up of three parts of pe.

The endpeice was then added to the side of the Abrams.
The next stage is to add the additional large armour side panel, which was attached to a large casting block. the area in red was removed.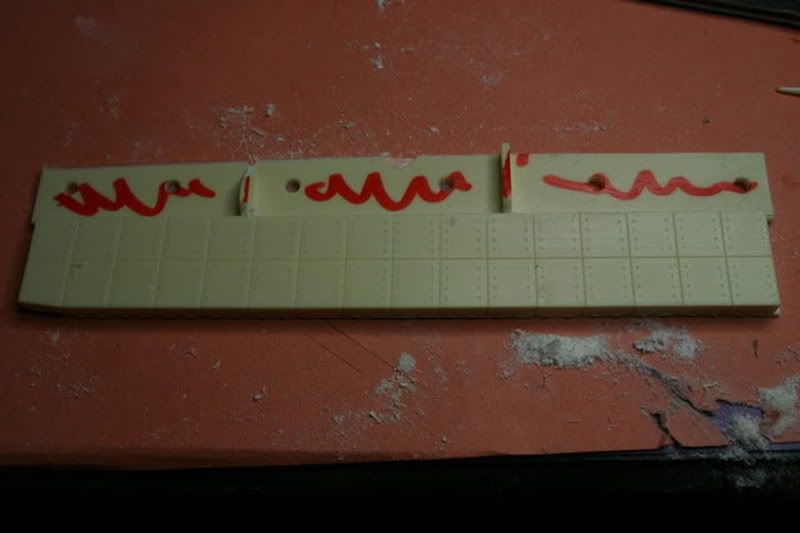
The side panel was then glued in placed, again with CA glue. Then the front end piece was attached.
Then I needed to attach brackets to the additional side armour. this picture shows the brackets on their casting block, in total 34 brackets were used.
The brackets installed.
The next stage was to add the outer layer of the side armour. The panels

Once they were removed from their casting blocks, each panel had to be glued on to the side panel. I started with the top row.
then the lower row was glued in place. If I remember correctly there is 32 panels on each side of the Abrams' Hull.

The hull is now complete and i can now move my attention to the Turret.
With the wwork on the hull done, i started work on the turret. First of all is the construction of the barrel which needs to be in place before the two turret halves can be join together. I was orginally going to use an aftermarket barrel from armourscale, however Dragon provide a turned aluminium barrel so i thought i would use that instead. The barrel went together in stages.
Parts for stage 1 and 2

The parts added to the barrel.
The spring enables the barrel to simulate the recoil of the barrel when fired. next was the parts for the breach, as they will not be seen i decided not to paint them.
the finished breach.
Here we go with the next installement. First up is the commanders hatch. I started by getting all the kit parts of the sprues.
\the parts were assembled. The glass parts were painted with Tamiya clear red. On a lot of refence pictures the visors appeared to be red, however i may tinker with the colour at a later date. When it comes to painting the tank i will use masking fluid on all clear parts. Here is the finished turret prioir to adding the upgrade parts.
Now for the upgrade parts, first is the protective screens that go around the turret. Even the glass provided by Legend Productions is to scale so they included a piece of perspex from which you cut the glass from.

Once the perspex is in place, PE is used to frame the windows. Here is finished turret minus the .50cal which will be added at the end. Also attached to the turret is a small PA tannoy, to this i added a length of copper wire. i wrapped the wire around a small drill bit to get the spiral effect

Another major feature of TUSK upgraded Abrams is the .50cal mounted directly above the main barrel. First I had to make the .50cal which was made up from numerous parts. The detail is superb.
Here is the 5o cal made up and installed on the Abrams


The loaders machine gun was slightly easier to build.

The frames was made of a large piece of PE and some resin brackets.

The frames were the fixed in place on the sides of the turret using CA glue
The plates were then added, the top row first then the bottom. Some of the plates required 1mm spacers to be added to raise them up slightly.


Now for the fun part, the painting and weathering.
Work has been slow on the Abrams over the last few days. I started the painting process by giving the Abrams a coat of Tamiya XF19 sky grey. Here are a couple of pics, the first shows the primed turret and hull. The second the primed parts yet to be put on the Abrams.

Then I pre-shaded the panel lines/ weld lines and other details that i wanted to be shaded.
Then it was on with the base coat which was Xtracrylix XA1812 U.S. Gulf war armour. A coat of Klear was the applied ready for the decals.


I have just about finished the weathering on my Abrams so i will now let you know how i went about it.
First of all I gave the tank a wash Of Mig productions neutral wash. Once dry I went over certain areas again to build up the dirty look. I mainly did this on the non-slip surface. Then i dry brushed the abrams using mig productions Buff oil paint.
The next job was to give the armour panels a filter using oil paints in an effort to introduce different tones to them. Alot of this was guess work as despite intensive searching I couldn't find any decent reference pictures of the tusk2 upgrade.
The paints used for the filter.
I placed a small dot of each of the oil paints on to the panel, next I dipped a flat brush in Mig thinners and then got rid of the excess thinner until the brush was almost dry again. Then I blend the oils together, this changed the tone of the base colour. I varied the colours used on each panel, sometimes I used all the colours then on the next i may just use a couple of them.


On the storage baskets at the rear of the turret I added some rust paint as these would take alot of abuse when the crew loaded the stowage into them. You can also see in the photo below where I used Buff oil paint to fade the number before adding a little grime using the filter method
Also I used a little buff paint to fade the number 70 on the front of the Abrams before applying the Neutral wash. The tow bar was painted using Tamiya NATO green ten faded again using a touch of buff oil paint applied like a filter. Then I applied some Promodellers rust wash
The last part of the weathering was to apply a pin wash to certain details around the Abrams. I made the wash by placing a blob of raw umber oil paint on a piece of foil then i added a drop of Mig thinners. 
The Abrams also had a dusting of Mig pigments mainly their Gulf war sand. This is where I am at now. The markings for the Abrams are for the 1st Btl.8th Cavalry Rgt., 2nd BCT "Black Jack", 1st cavalry DIV.
I have added all the parts that make up the Tusk2 Abrams. All thats left is to add the stowage and place the tank on a base with a couple of figures to add some scale to it.


Here are the pictures of the finished build, be warned there are alot as i believe this to be my best build to date.


Thanks
Steve 