


Introducing Hans Pennink from Colorado USA
Hans’ comments about the SU-100 build/interpretation:
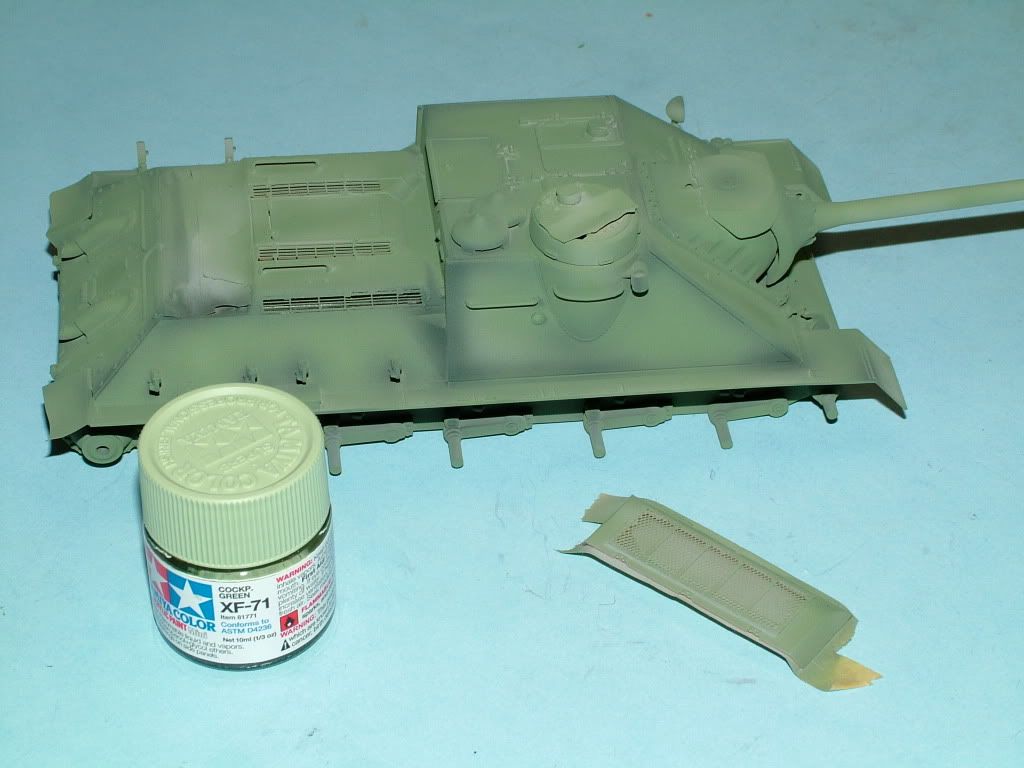
- Base coat of Tamiya Neutral Grey XF-53, pre-shading with Flat Black XF-1.
- An overall coat ofJA Green XF-13.
- Post shading with a DarkerGreen ofNATO Green XF-67 and Black Green XF-27 additional highlights to be achieved with Deep Green XF-26.
- A “Johnsons” Future Coat to protect the Base Color and decals.
- “Dot Filter” method is next, utilizing Yellow Ochre and “Ivory Black” to simulate depth and shading/blending into the greens.
- Weathering of the wheels will be done separately from the tank to give some variation in color.
- Next up is to weather the hull using Mig pigments ( ) Brick dust (PO29) andLight Dust (PO24), will be used to pick out a couple spots of "interest". http://www.migproductions.com/
- Rusting effects will be performed with Mig Pigments and “the Weather System” from Bragdon Enterprises ) Light, Medium and Dark Rust plus Soot smears. http://www.bragdonent.com
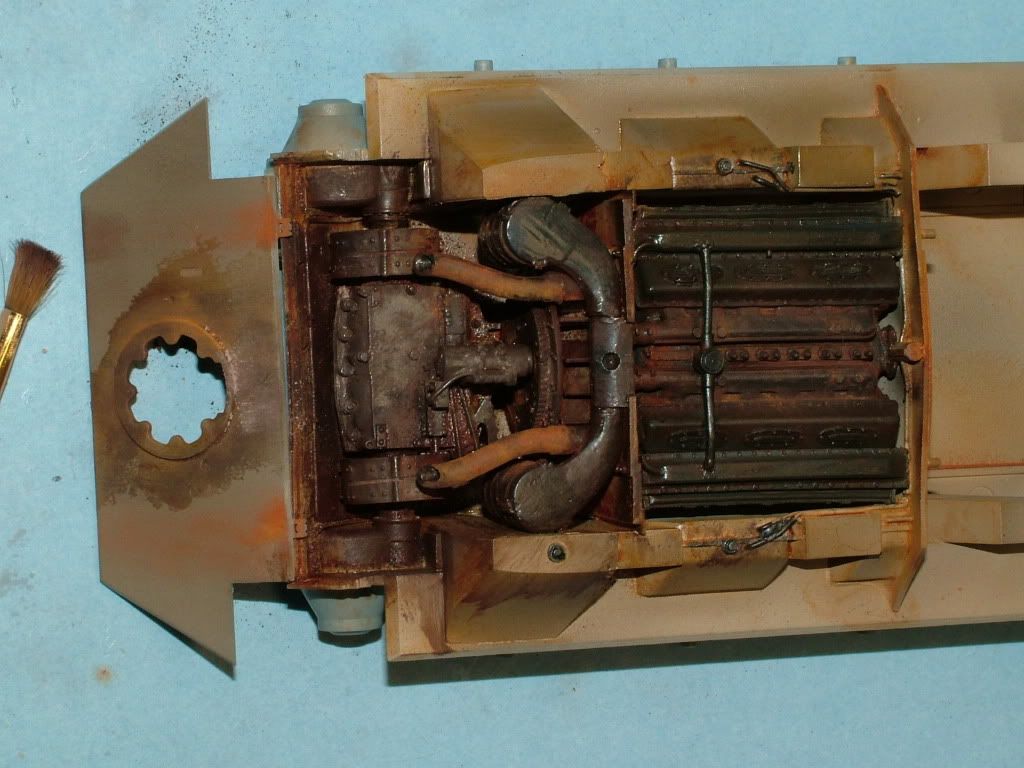
- Localized washes to the hull/engine deck, fuel and oil stains made from Tamiya Smoke.
- Gunze Oil mixed with a gloss varnish to create a wet-effect, dripping out of the various locations at the wheels bearings and heavy grease smears.
- Mix of buff (XF-57) and flat earth (XF-52) was applied to the undersides front and back for a dusty effect.
- Paint chips using Vandyke brown and Payne's Grey --oil paints, plus a rust effect with Vandyke brown.
- Testors acrylic Super Flat coat will be sprayed as a last stage in order to seal in the decals, various details, protect the pigments and combat damage chips and the like.
- The FriulTracks being white metal will be given a wash of "Blacken It" again (as my first shot at this gave great results). A graphite pencil will be used to add metal effect to the tracks and other areas of the tank. The Tracks will be rubbedwith a sandingstick and steel wool where normal road contact would occur.
- Hope to find some sort of “Battle Slogan” to dress up the side(s).
Hans’ References used:
-
- Original Kit Review: SU100 Kit Review
- Photo Reference: Walk A round
- Friul Track # ATL09 (this is the exact same track for the T-34/85, the SU-100 base Chassis is in fact a T-34). Friul Metal Track Assembly: Click here
- Jaguar Engine detail: Engine Detail
- Dot Filter Method: MIG Jemenze
- Without too much more typing and reading pleasure....

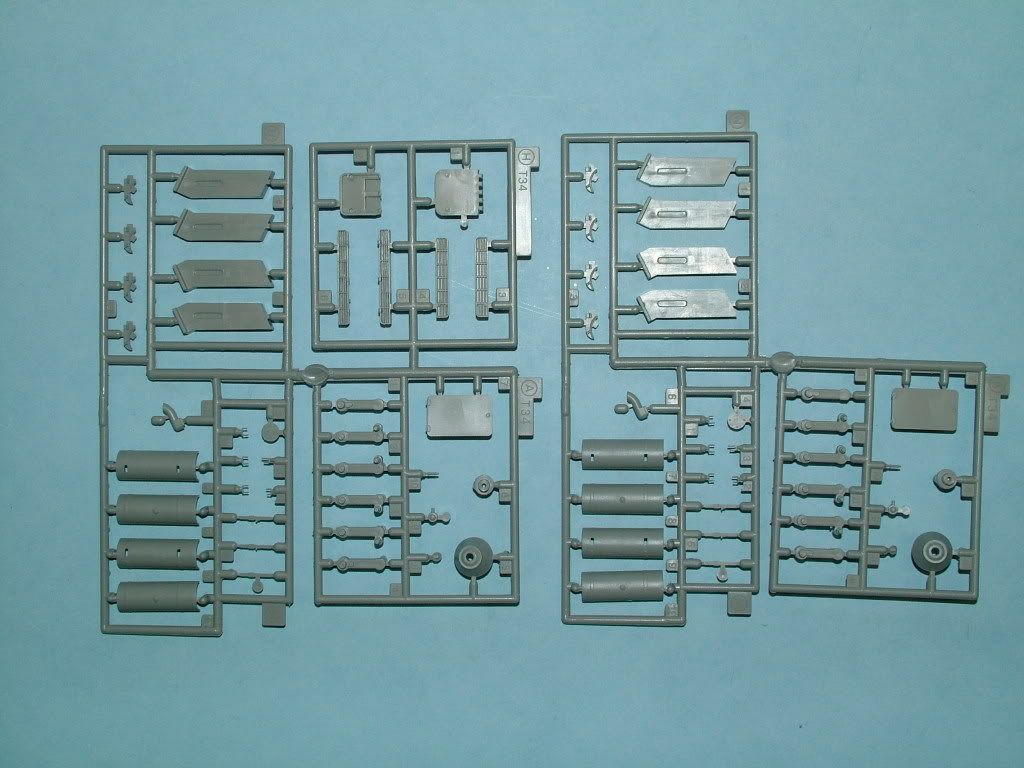
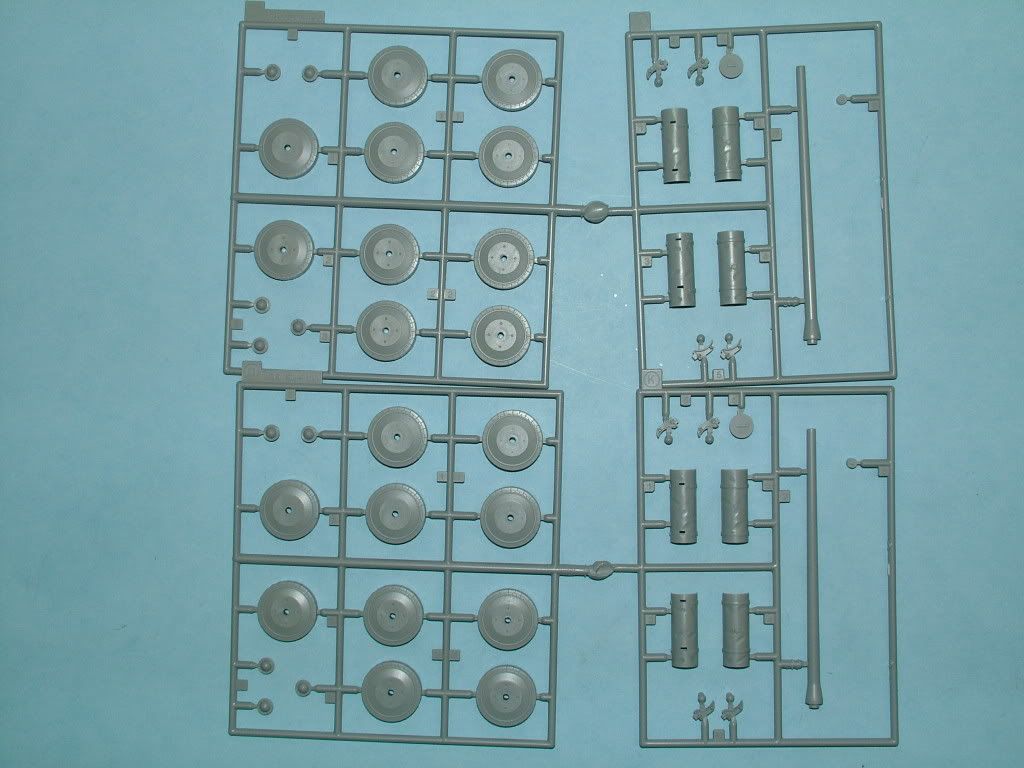
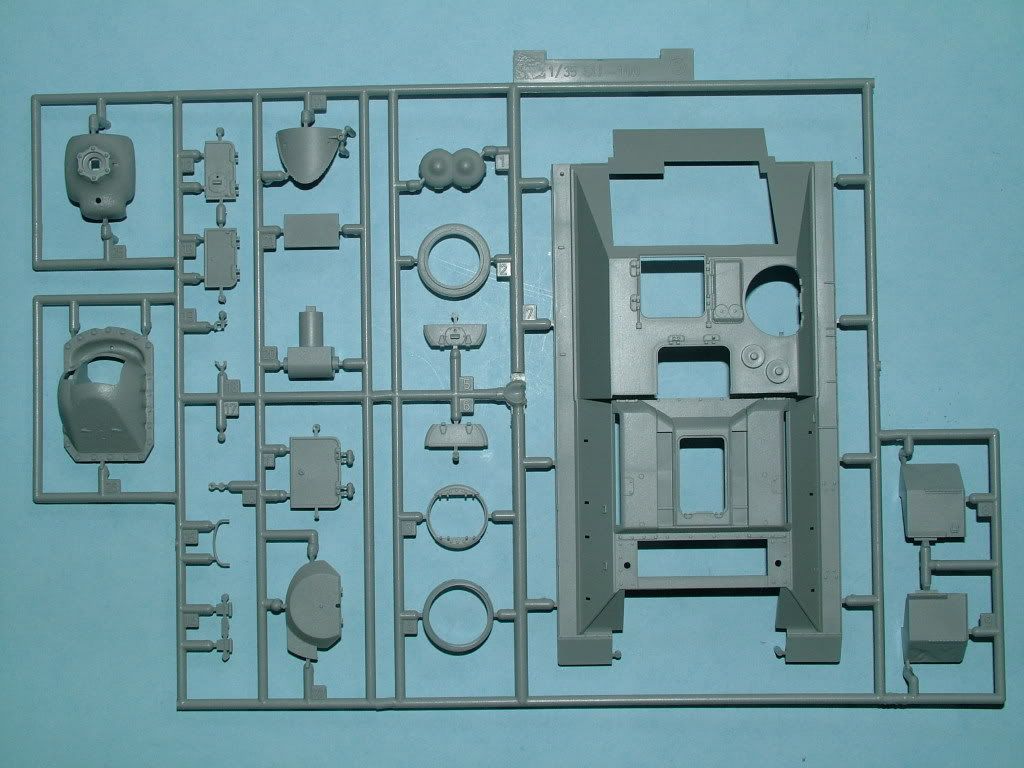
Here are the box top shots and contents for the SU-100.
Box Top: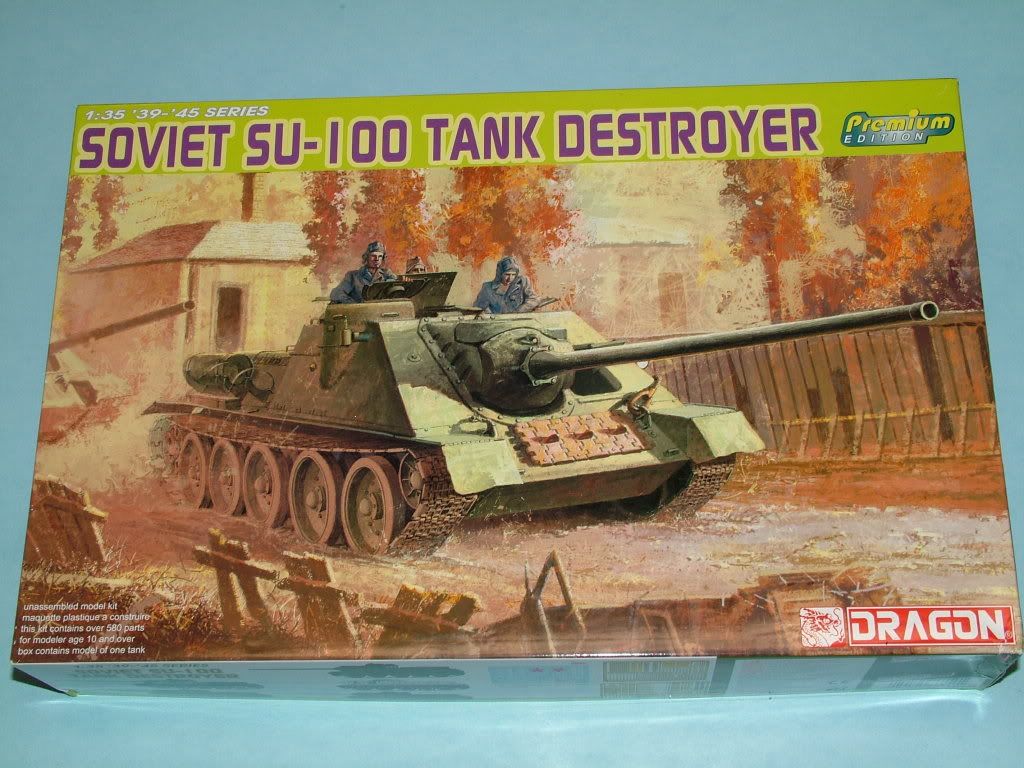
Box Bottom:
Box Sides: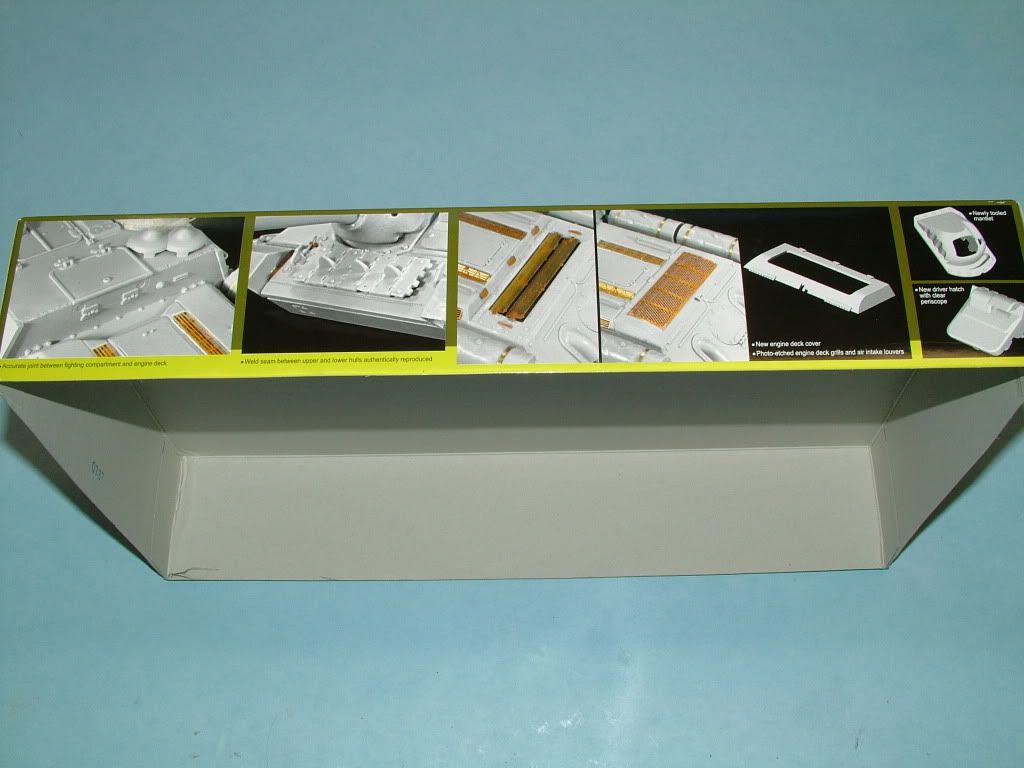
All the PE and metal parts: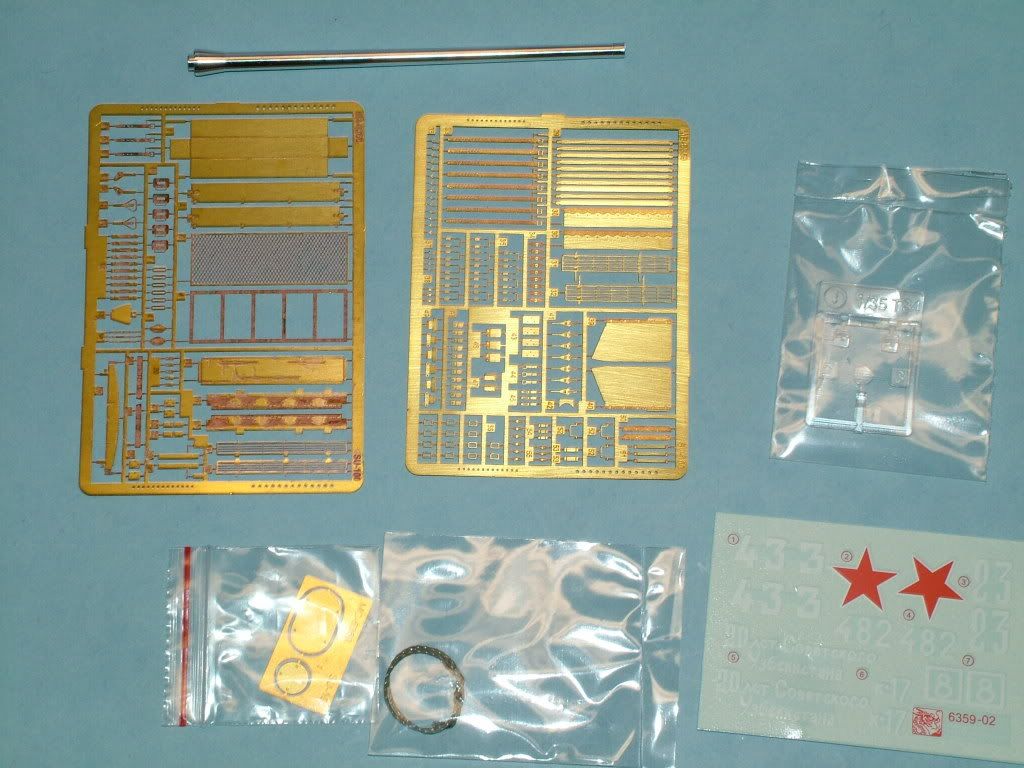
Magic Tracks to be replaced by Friul Tracks (same type as the T/34/85)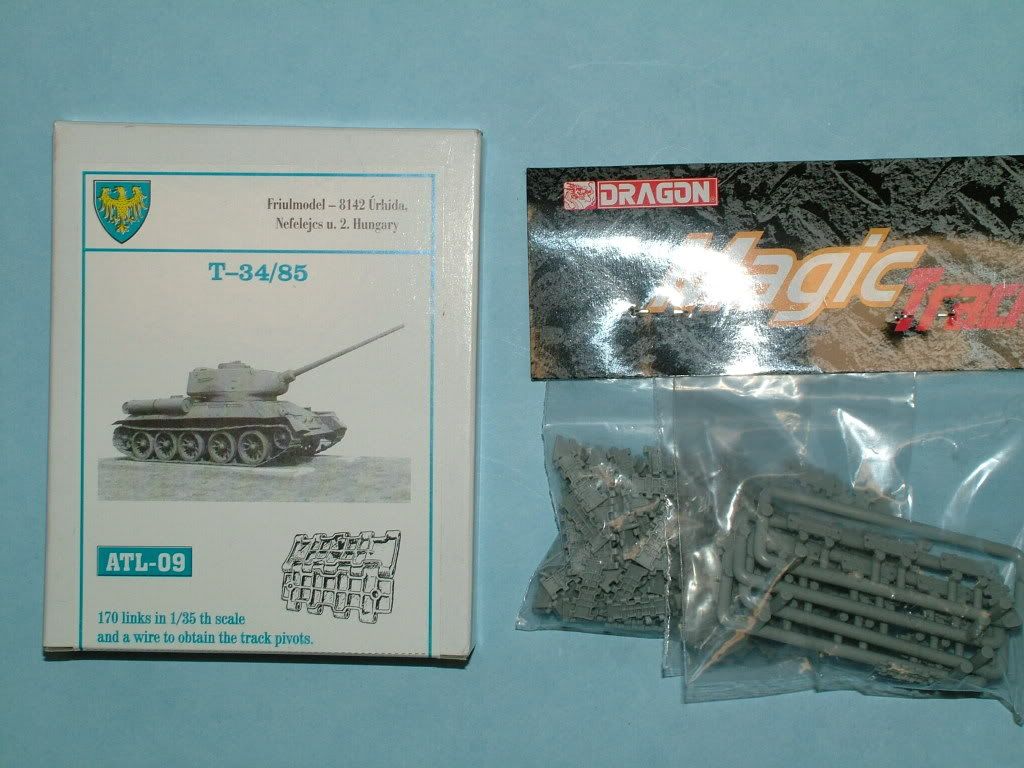
Sprues etc: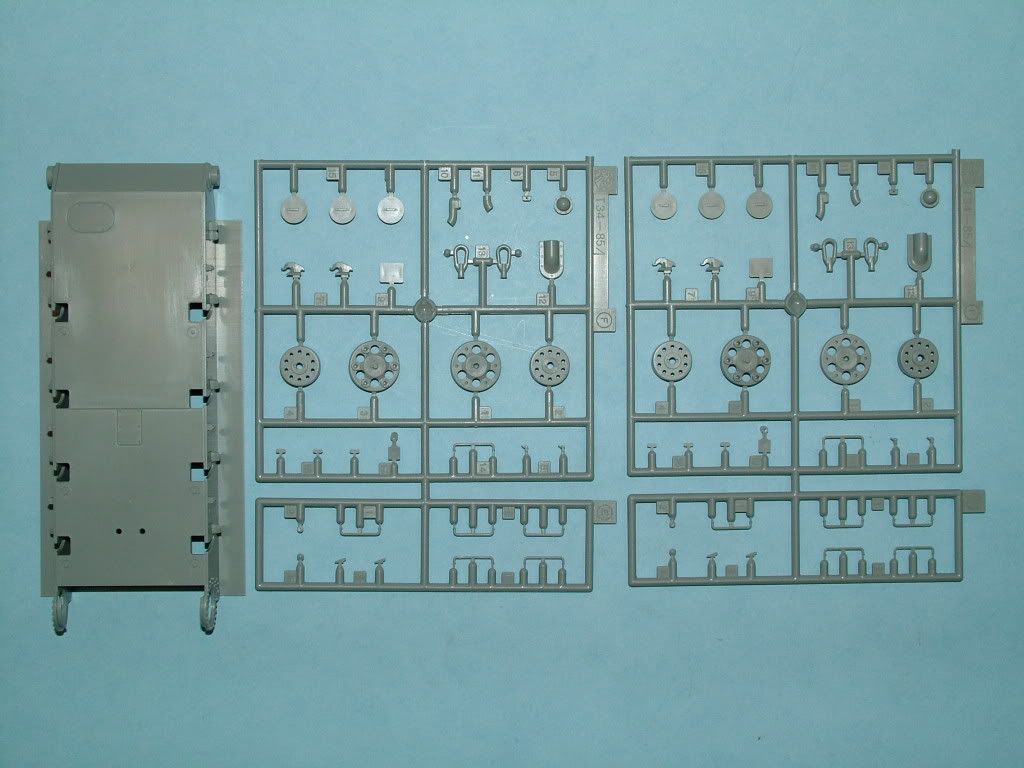
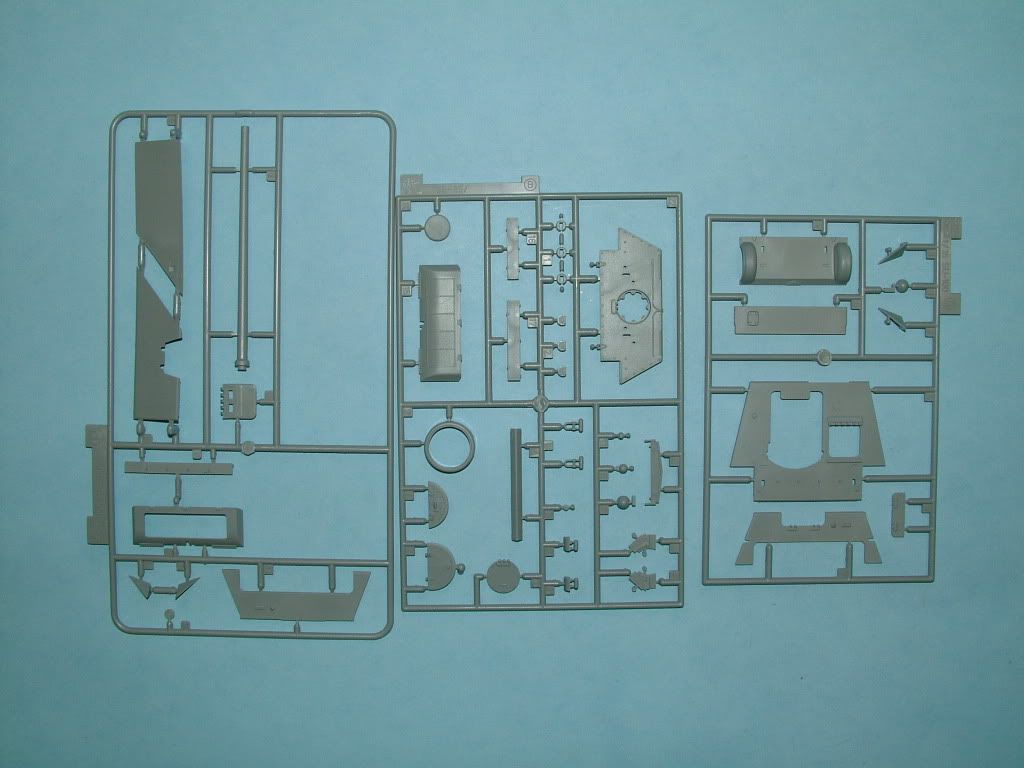
Very nice detail set, extremely complete, hope the fit will be great, never used Jaguar as an aftermarket parts company.
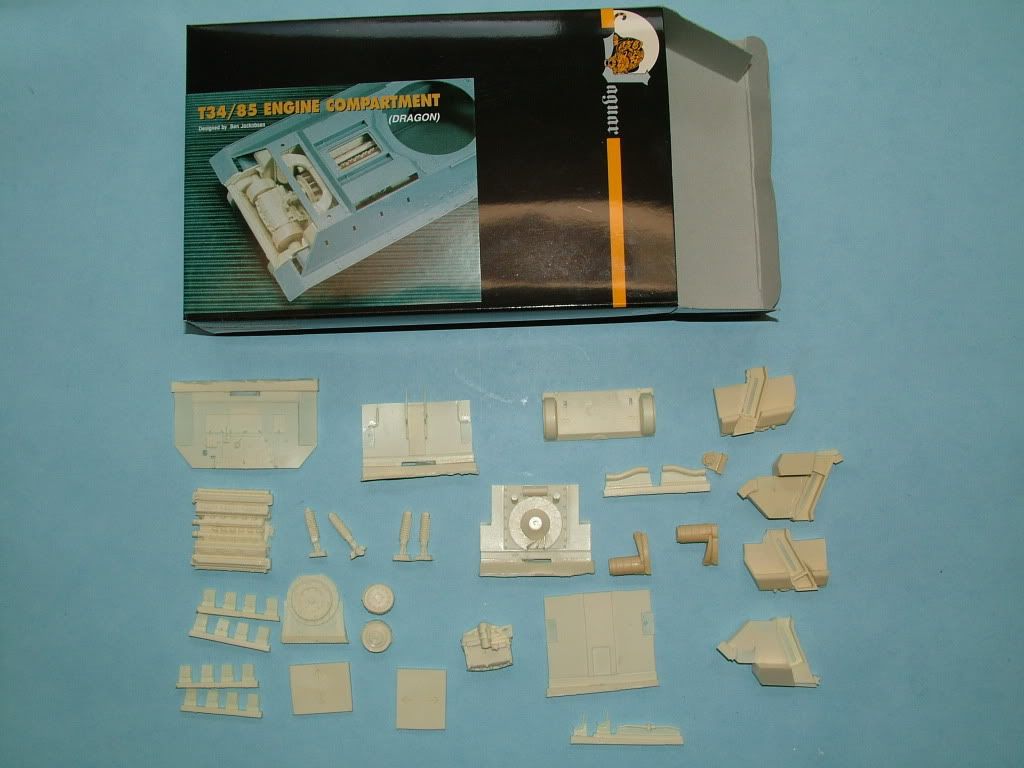
Great looking resin detail: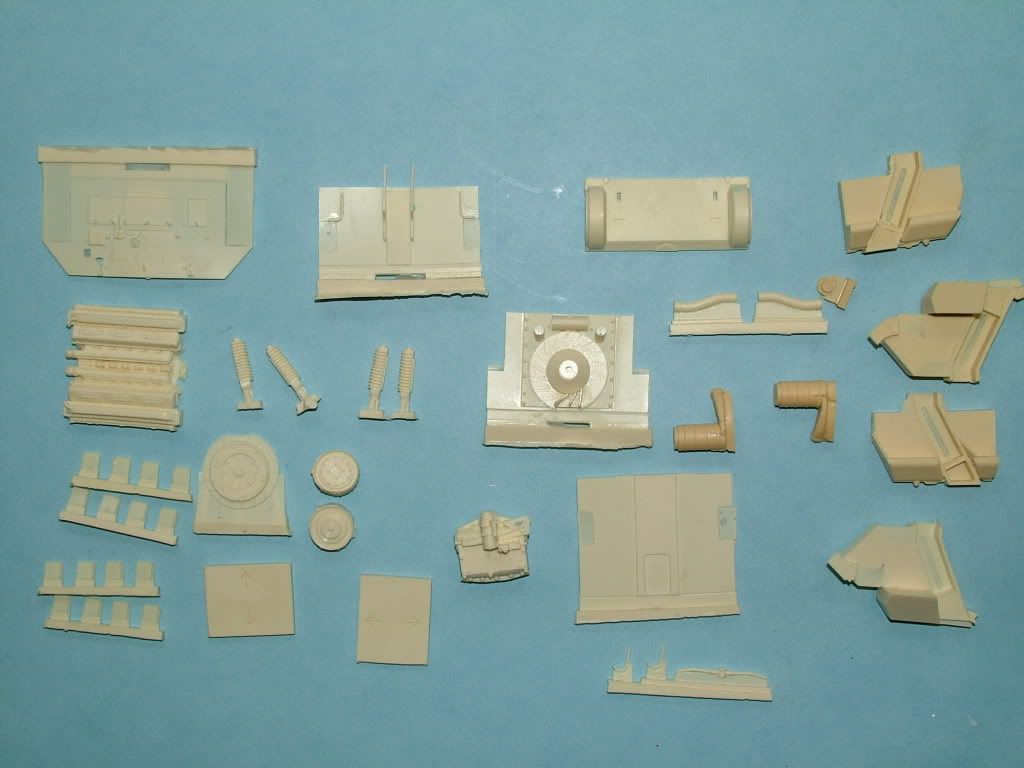
A little digging on the Internet resulted in some interesting reference pictures as well: - Worked on cleaning off the resin castings, lot's of dry-fitting, then gluing with super glue.
The included instructions are pretty "rough" so taking my time and fitting twice before committing to any glue.
The black and white pictures in the instructions are so faded they are pretty much junk, so the reference pictures I found in the prior post and the "box art" are the ones to go with.
First step is to glue on the rear bottom replacement and the transmission compartment floor.
Pretty thin and off course I ended up breaking it, you can see the crack running through the bottom, the lucky thing is , a little Mr Surfacer and paint there is no way you will see it.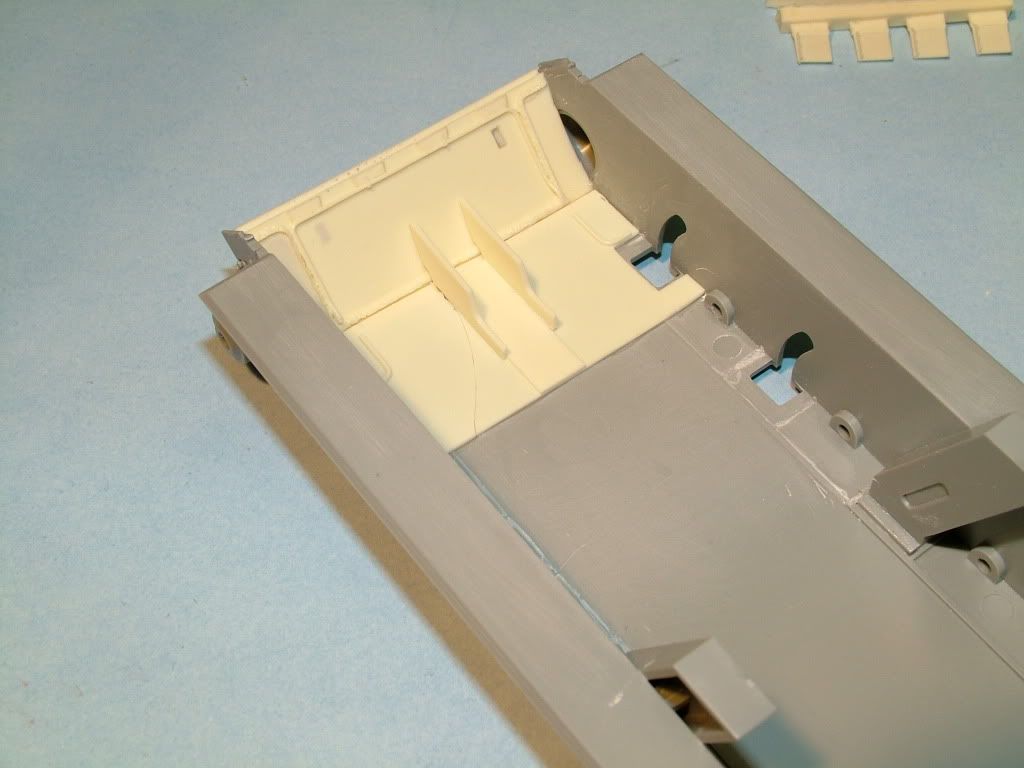
Next up was to build the replacement housings for the springs, pretty simple, clean off the casting blocks on the spring, a little sanding/fitting/sanding and they are ready for installation: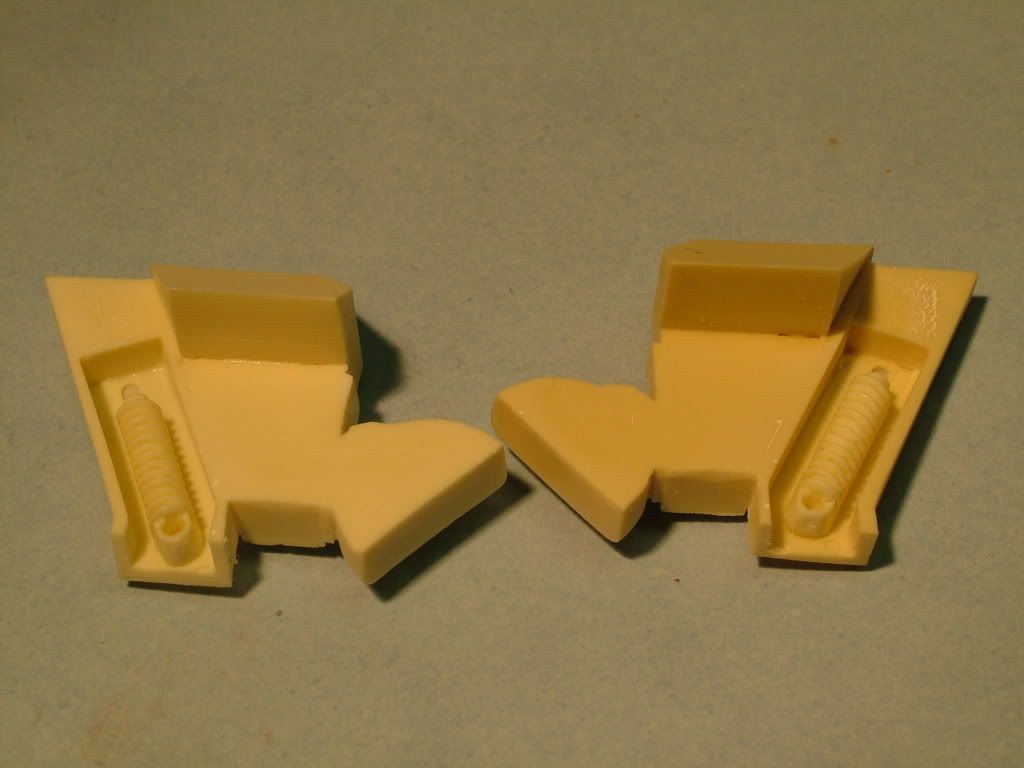
And glued in place: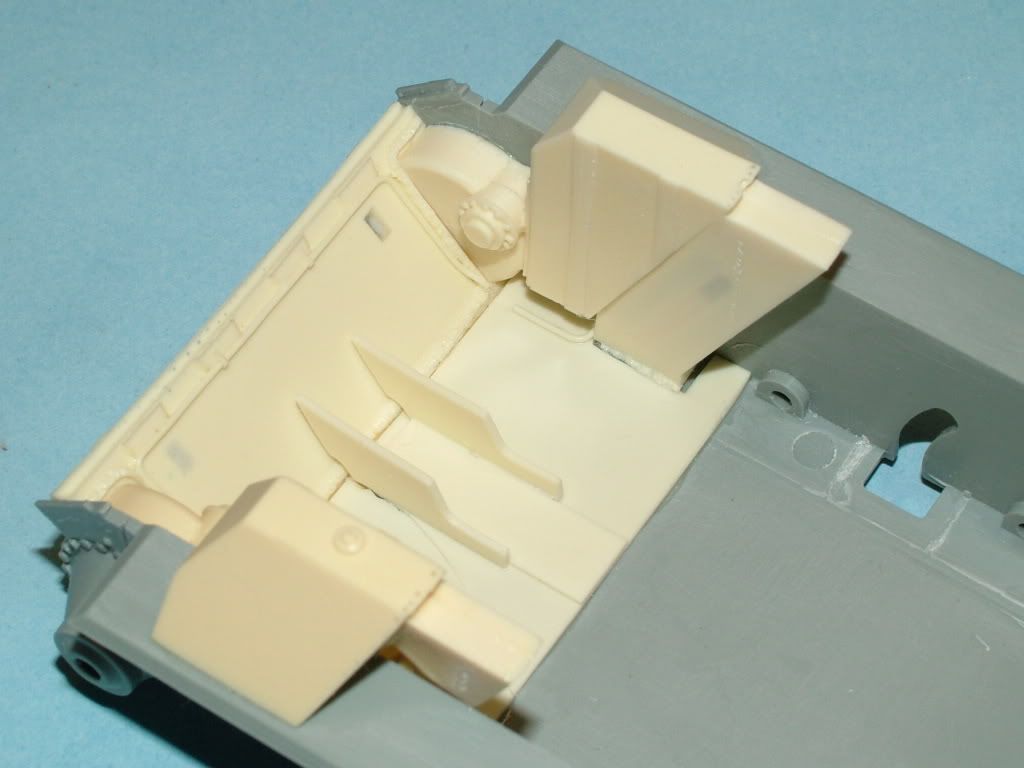
Then I build the transmission, all you had to do was to glue the two "wheels" that drive the rear main wheels to the transmission housing. Do a little trimming on the "engine bottom floor (looks like I will need a little filler here and there). Nothing to major though.
Then build two more new housings for the heavy springs. Then glue in place. These are pretty much all the very large pieces dry fitted in place, and shows how nicely it dresses up the "rear" of the tank. Very neat detail of the hip tanks and all its plumbing etc.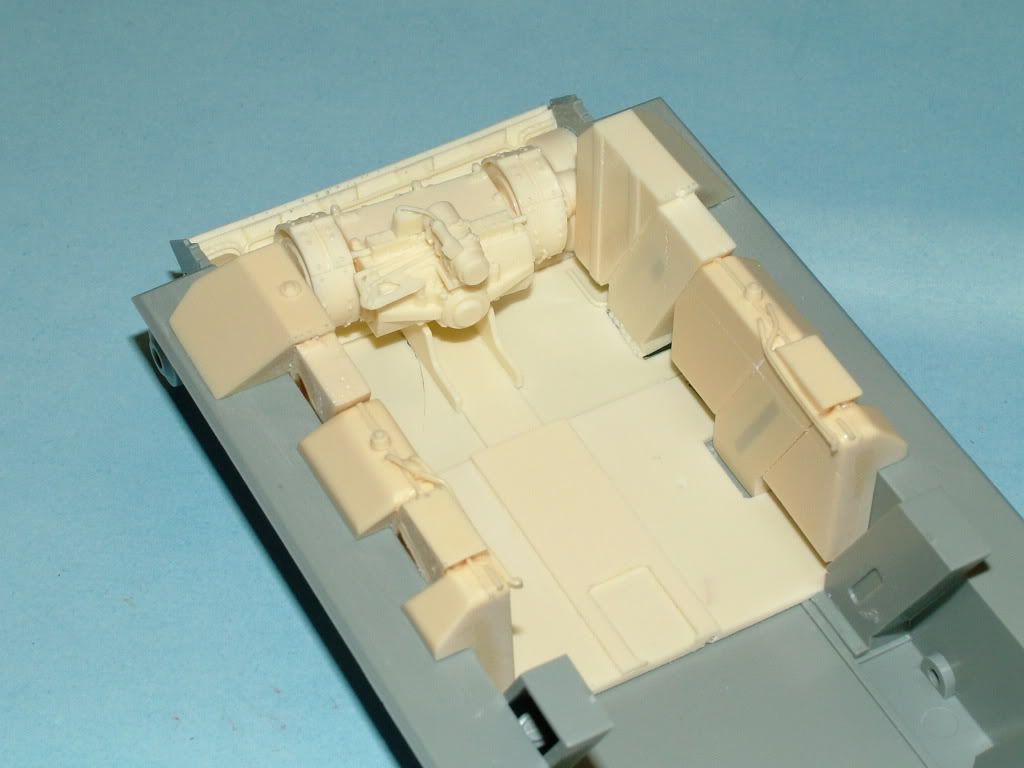
Another angle with the transmission housing just dry fitted in approximate place: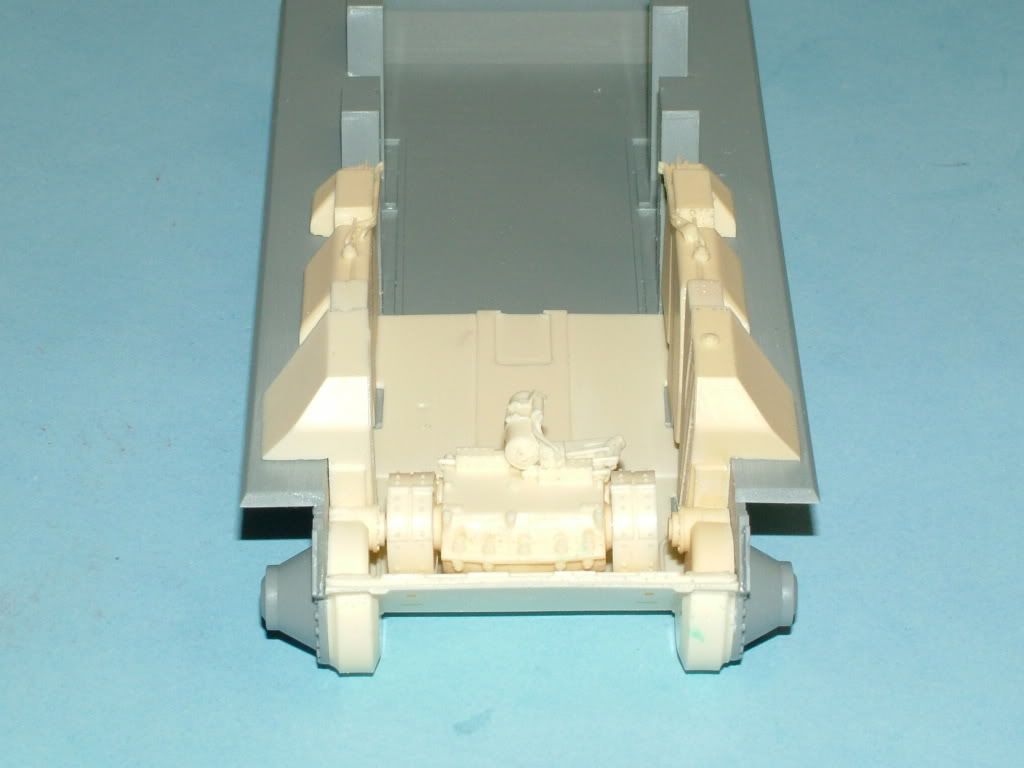
-
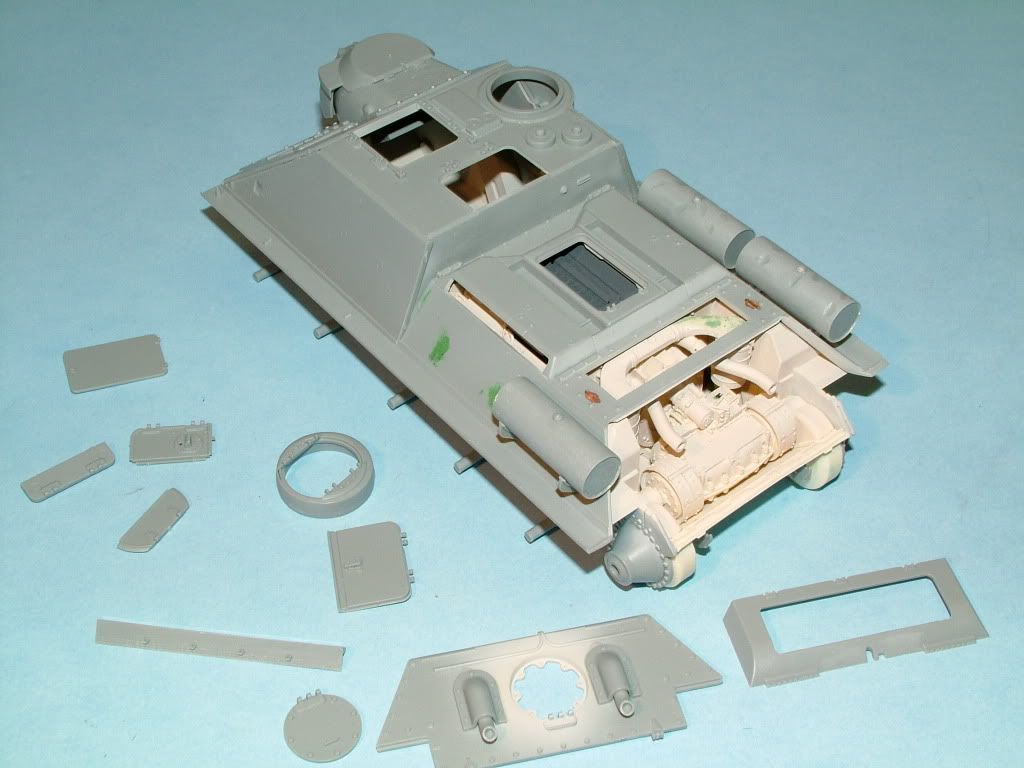
Hmmm, before I can start working on wheels in earnest, I must keep my focus on the engine bay detail of the SU 100.
As such some small progress whilescratching my headwhat to do with all that resin and just a Box Picture to go by:
Figured out how to build the Fan Blades and the Fan unit: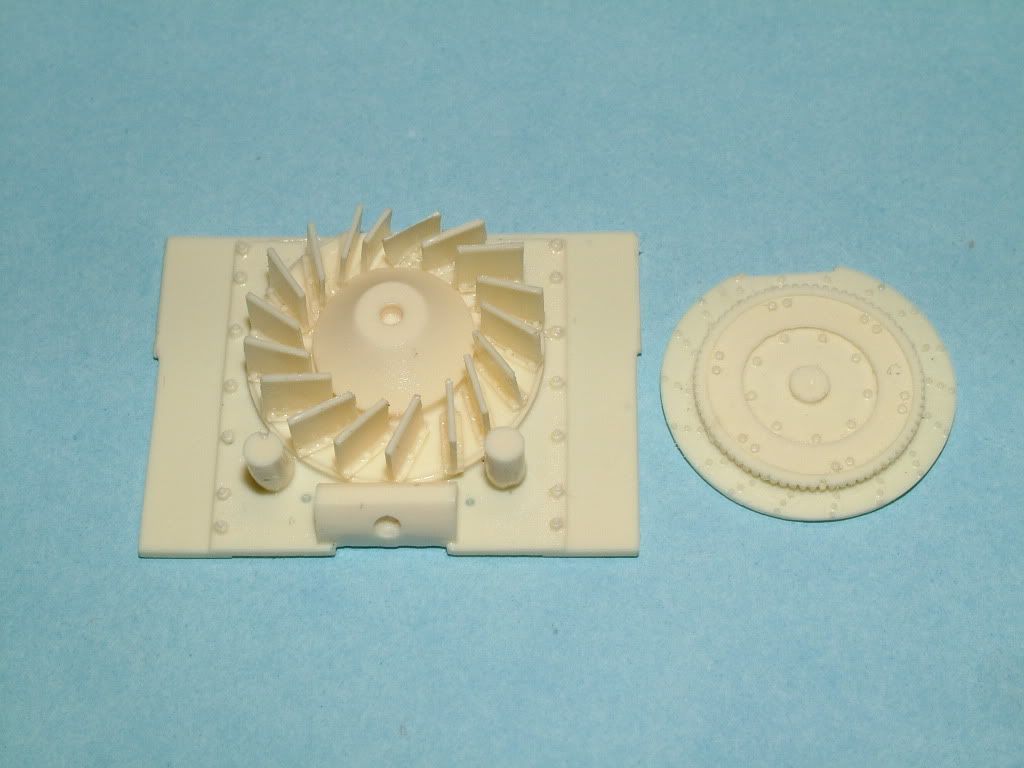
Completed Fan assembly:
Then another dry fit with the two bulk heads in place: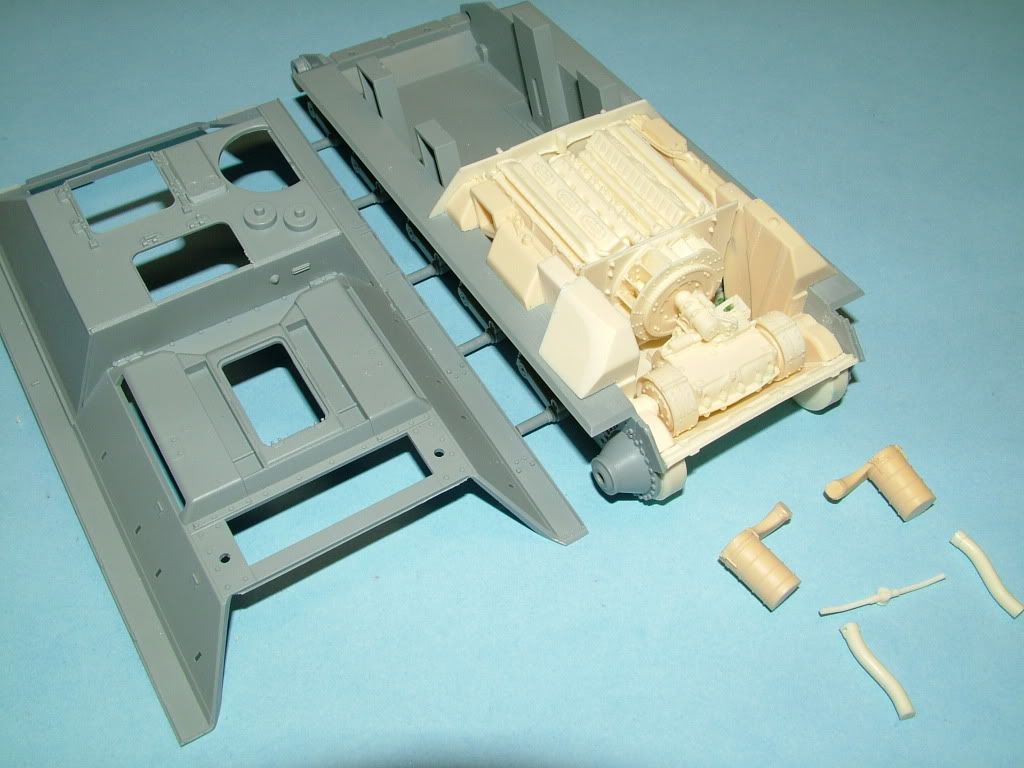
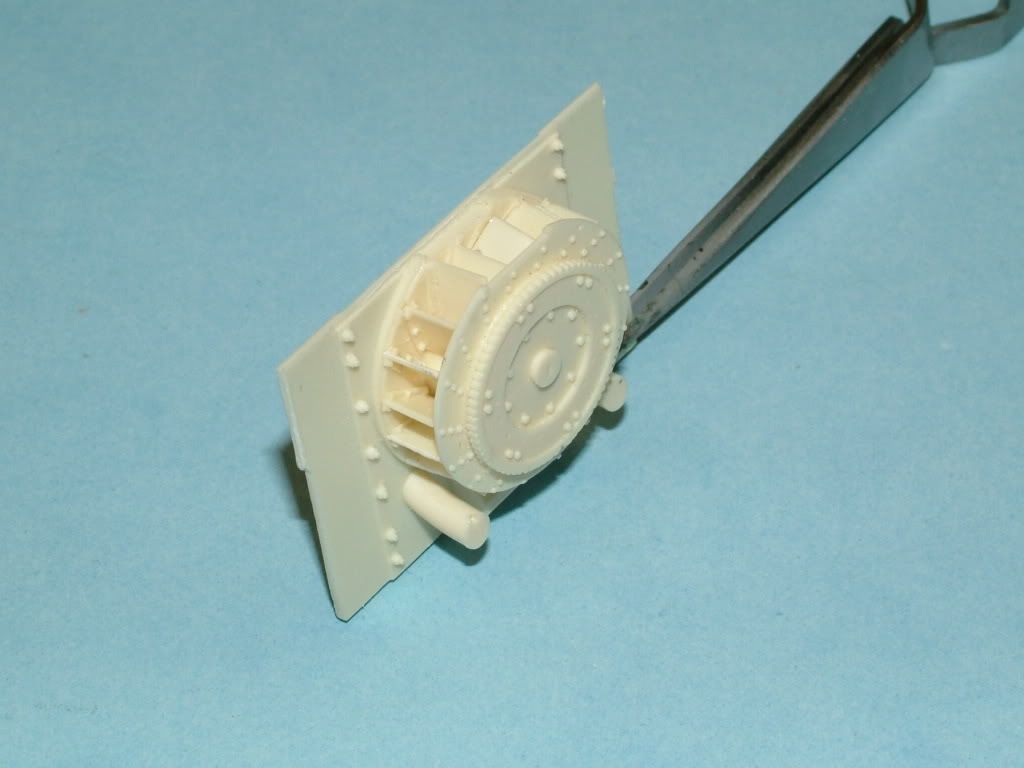
Just realized that in this picture I have the fan unit sitting upside down , hence the importance of the "dry fit" and checking yourself ten times before you commit to super glue
Looks like we have a Go for Paint and final glue....
A final Dry fit check with the top shell in place, following again some Box Art pictures, had to remove some plastic at the rear end.
Alsohave cut off the plastic rear fenders that will be replaced by PE fenders: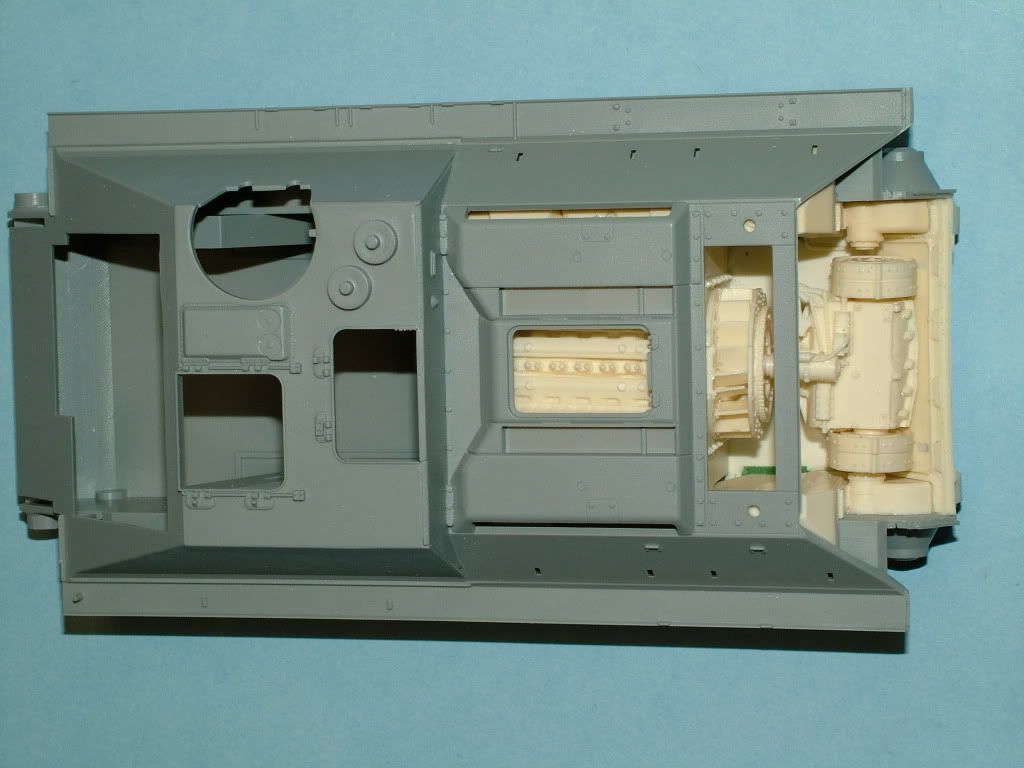
Completed the build of all the engine compartment pieces, bulkheads in place, Transmission needed some small parts of sprue added to make the connection from the transmission casing to the drive wheels, lot's of dry fitting and testing to make it all line up and fit within a very cramped space....much like the "real thing"
Primed the Engine Compartment and the Transmission with Tamiya Flat Buff XF-57 and Flat White XF-2:
Reference pictures I have show a dirty kind of white interior, 
hope this is a good base to work from once I start weathering with the washes and various soot scuffs oil drips etc.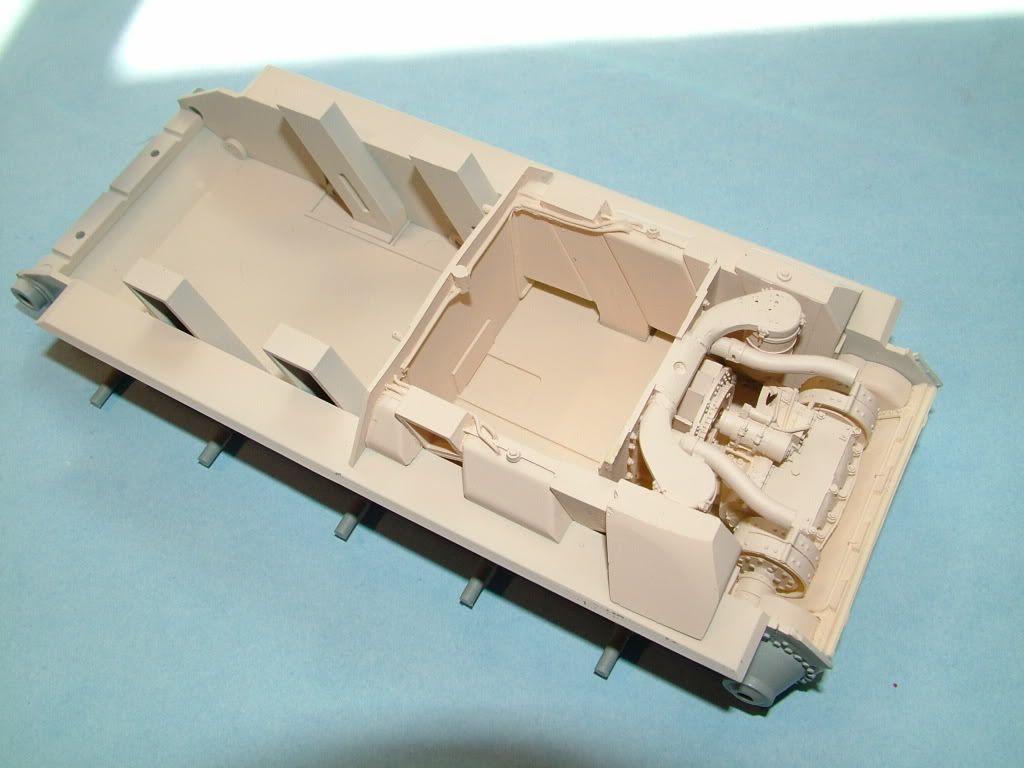
Another angle, showing off the exhaust pipes connected to the mufflers?:
Remaining paint in the Airbrush was used to start the primer job on the inside top hull:
To keep making some progress while the innards are drying, started on building all the wheels, clean up the sprue connector marks, a little tricky as these type of wheels are the solid style wheels with hard rubber running surface which shows a "join ridge" the sprue attachments where right at the ridge .. where else  . Also a little tricky to get rid of the center mold line in between all those little ridges. So just sanded lightly and hope for all the dust, mud etc to cover it up some.
This should look familiar: Base coat of Tamiya XF-1 Flat Black: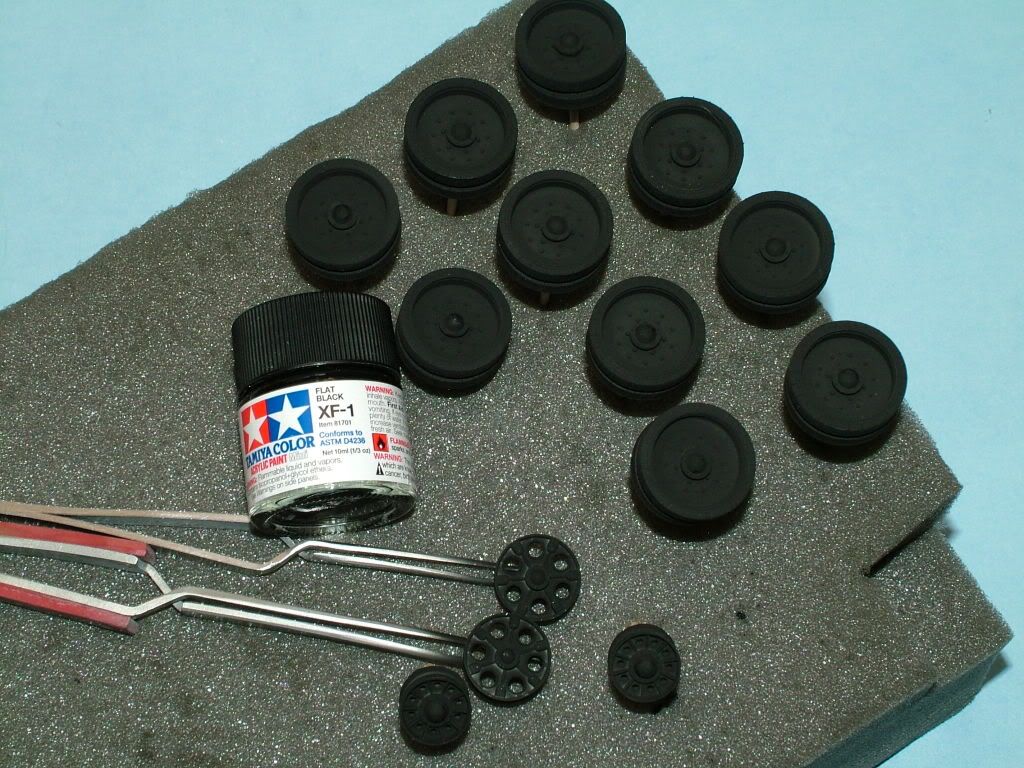
Rubber Road Wheels simulated with a mix of Flat Black XF-1and Sky Grey XF-19: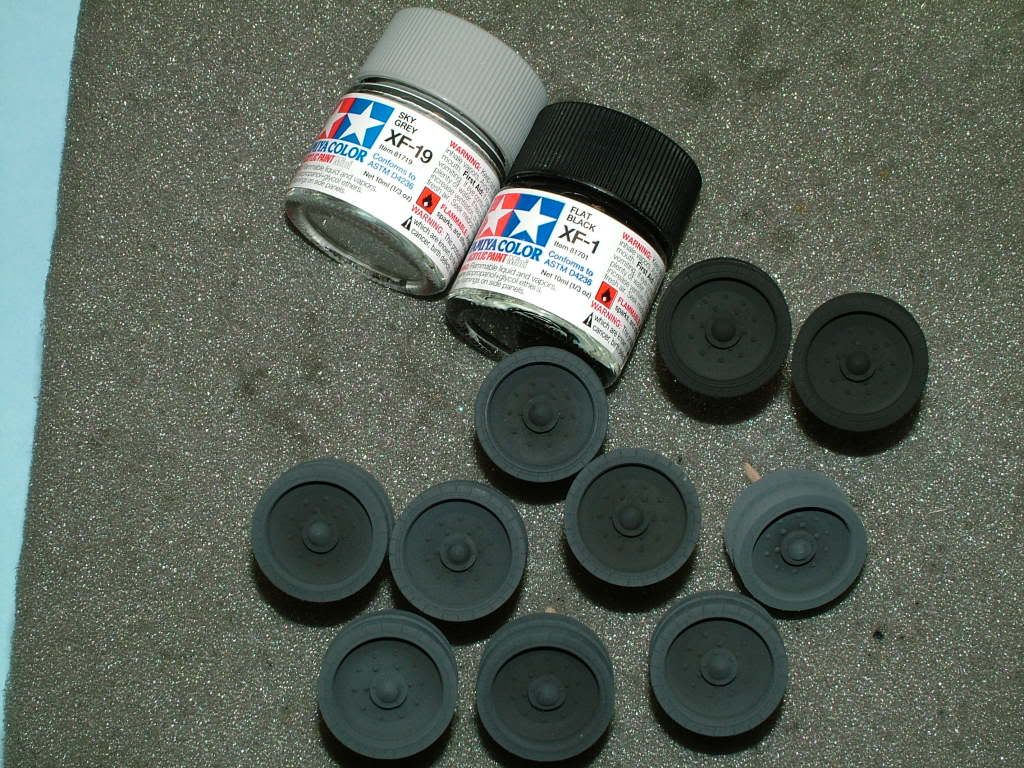
So more progress on small sub builds resulted in the following progress shots of Sunday's efforts.
Painted the engine block with Tamiya Black XF-1 as a primer then Tamiya Dark Grey XF-24 as an over all color to detail out on: Then dry fitted to see how she turns out.
Installed the rear tow hooks on the bottom armored plate.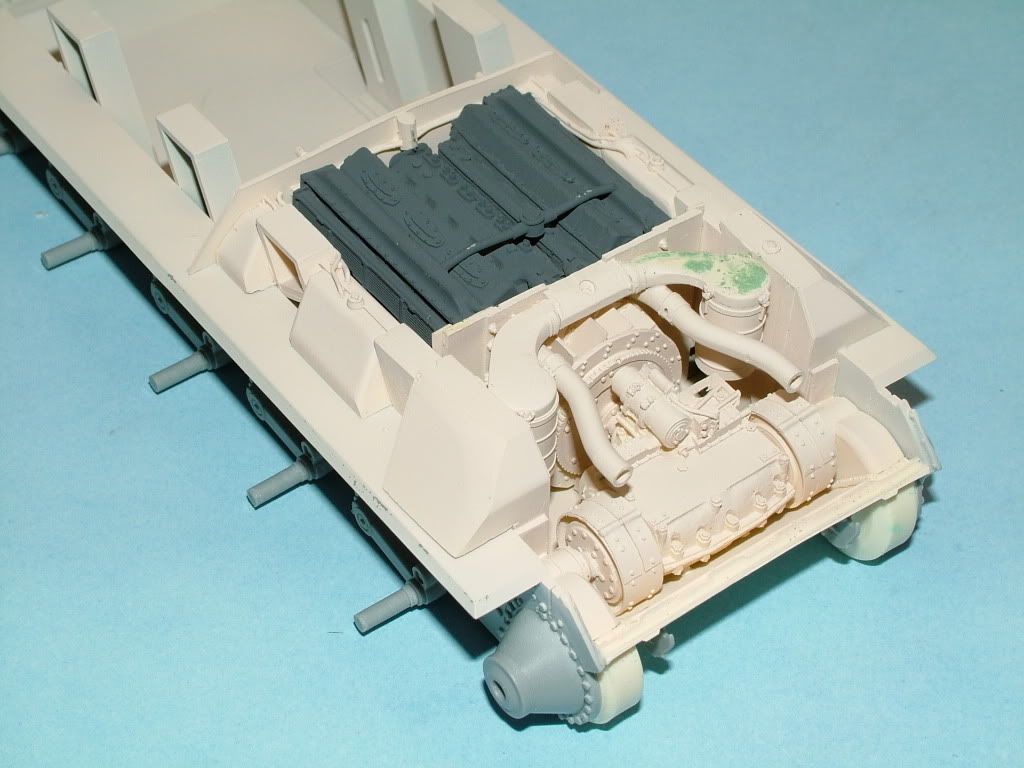
Build the sub assembly for the Gun Mount, installed the rear deck Armour platting and the two additional Armour plates, then build up the side cupola, installed some small PE parts for the rear engine deck: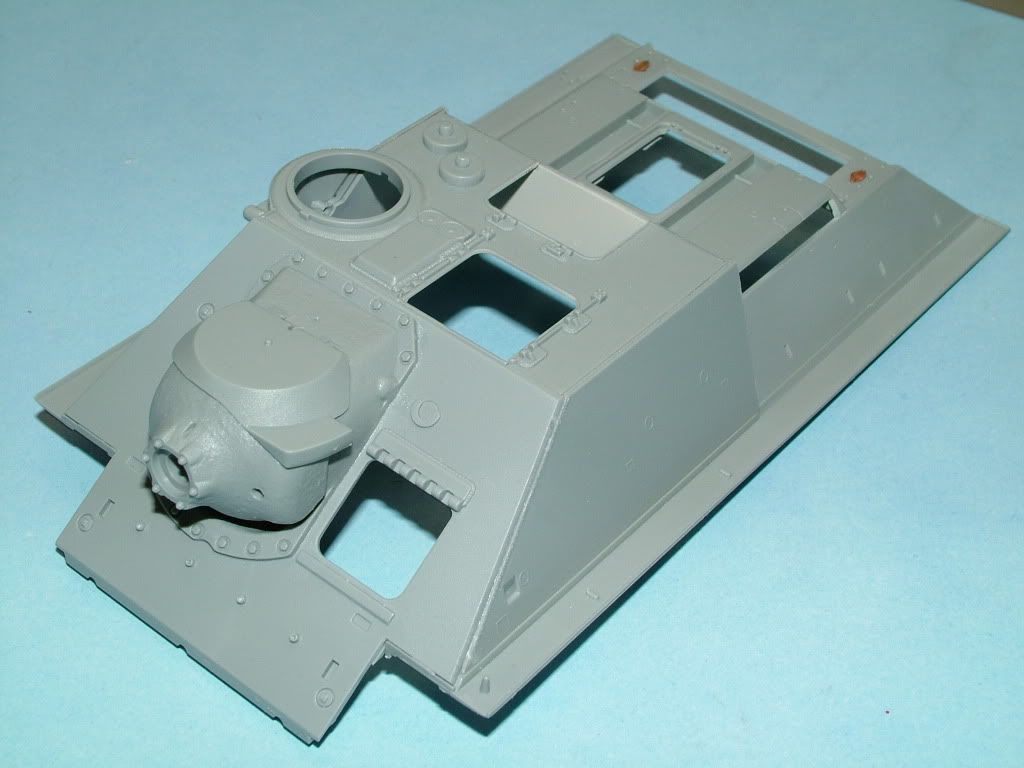
Cleaned up all the various hatches and build the rear engine armored plate, installed the exhaust pipes, and the armored covers. Made sure the exhaust pipes of the engine interior lined up. Filled in the interior rear plate of all sink holes.
Build two "dented" tanks and one "replaced new" tank, filled the holes for the "fourth" tank, just to give this one my own individuality. Had to sand off the molded on detail for the hand holds on the ends of the spare tanks and the molded on detail for the metal straps, these will all be replaced with PE parts.
All is just "posed on" nothing glued yet, but gives a great view of what this one is going to look like: 
Parting shot of the day: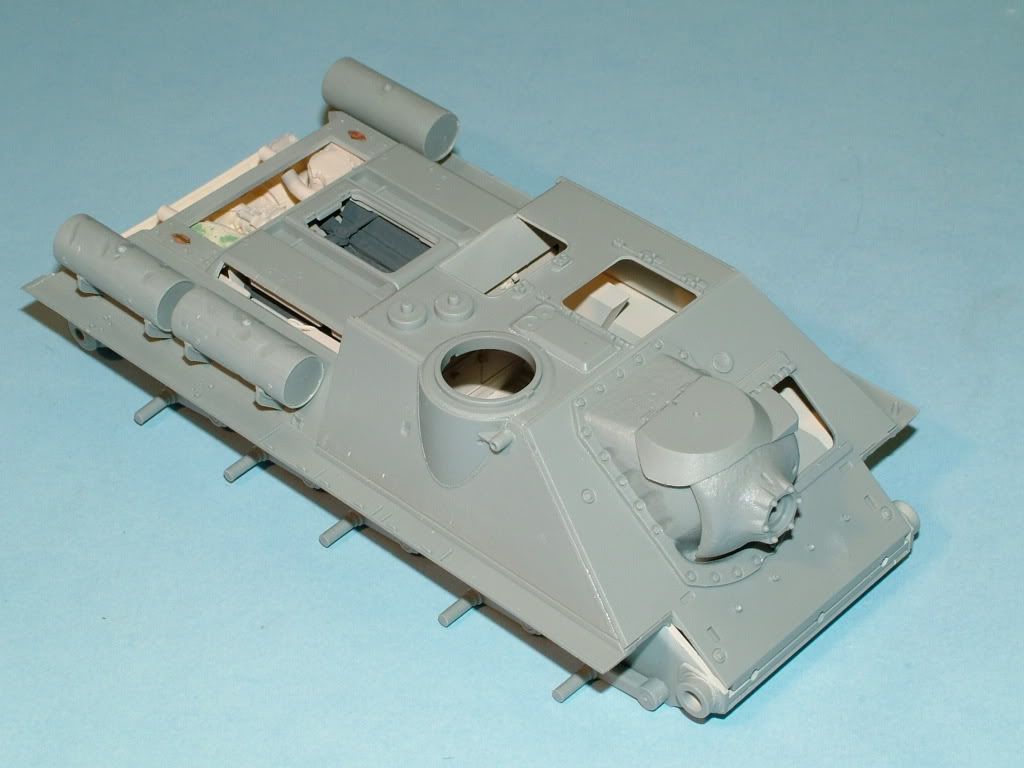
Well it has been pretty crazy at work. Finally found a little room to make some progress.
Time to complete the Friul Metal Tracks utilizing the "Blacken It Solution":
Instructions: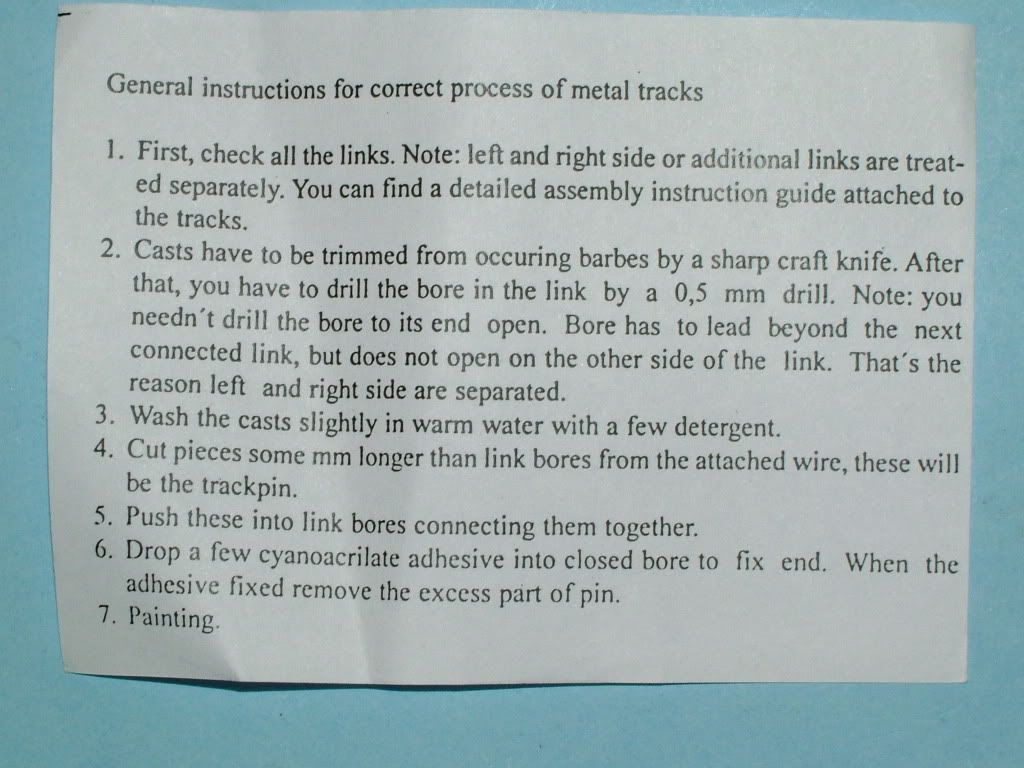
Package Contents: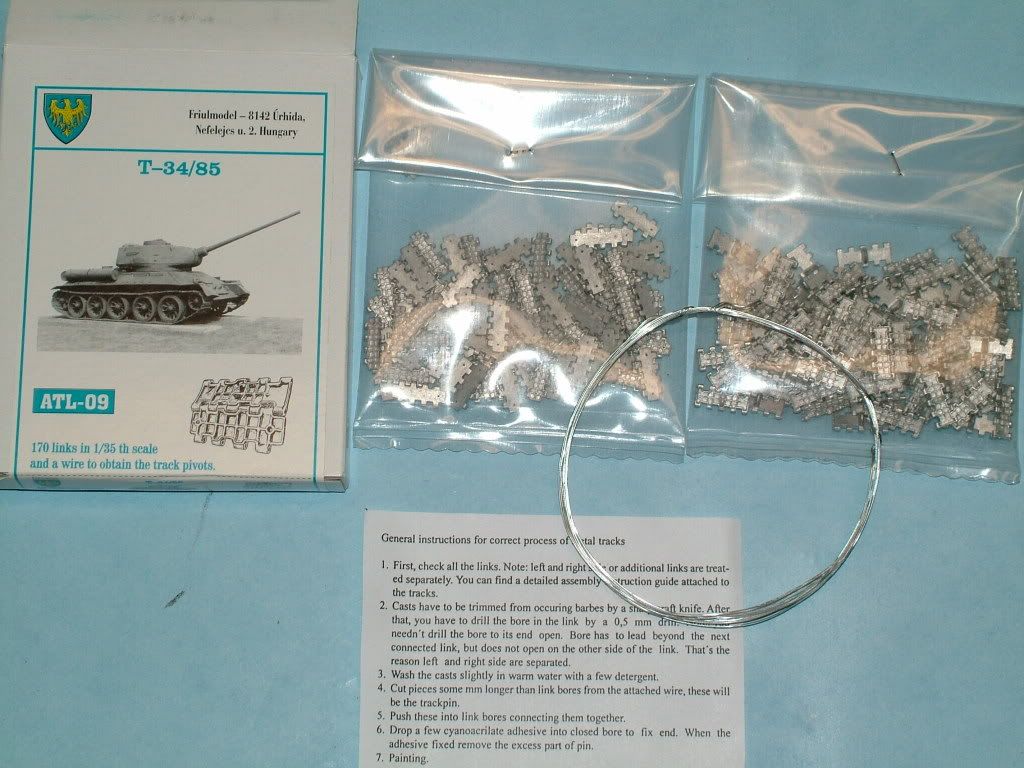
First up is to make a bunch of track "pins" out of the included roll of wire. I placed one end of the wire in a metal clamp. Then unrolled it completely, then grabbed the other end with a pair of pliers and gently put some tension on the whole wire. This method gives you nice straight wire, and removes all kinks etc.
Used a sprue cutter and cut the pins to the required length and stored them into the plastic container: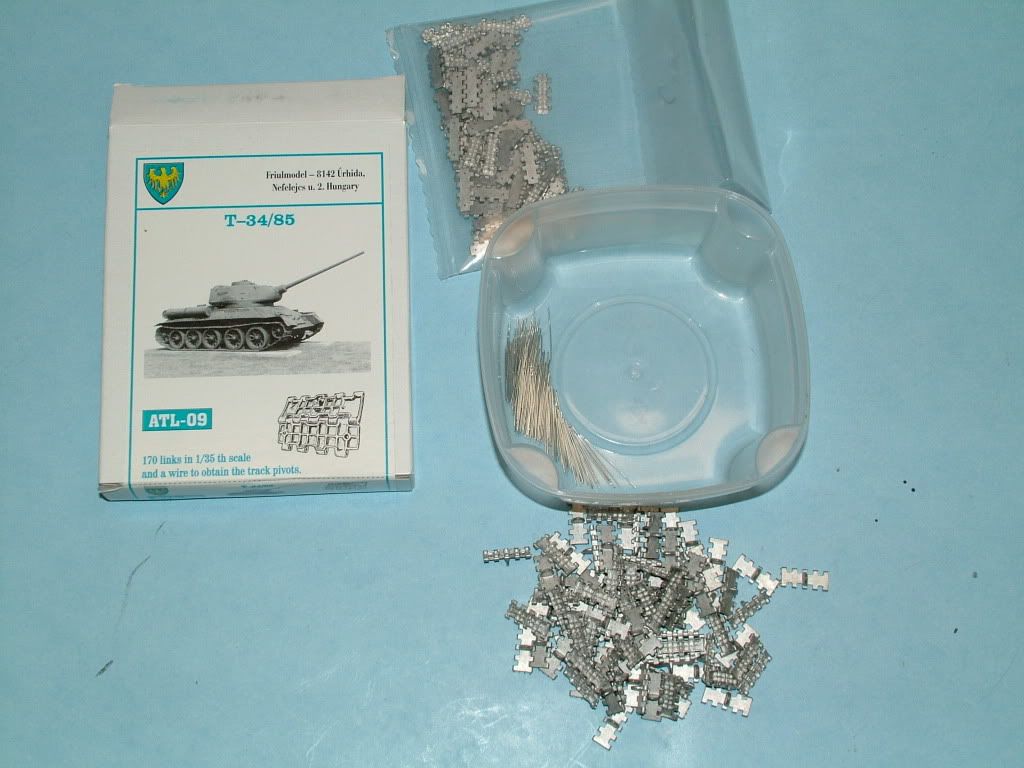
Two lengths of track completed and a piece of spare track to place on the Glacis: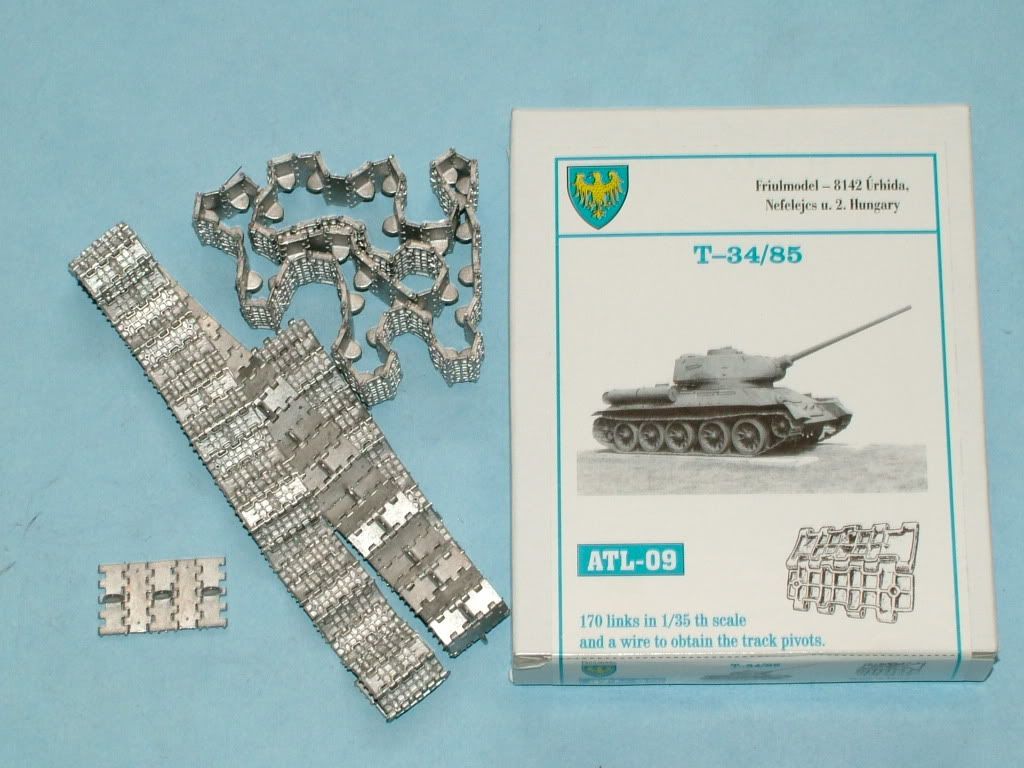
Time for the Blacken It solution: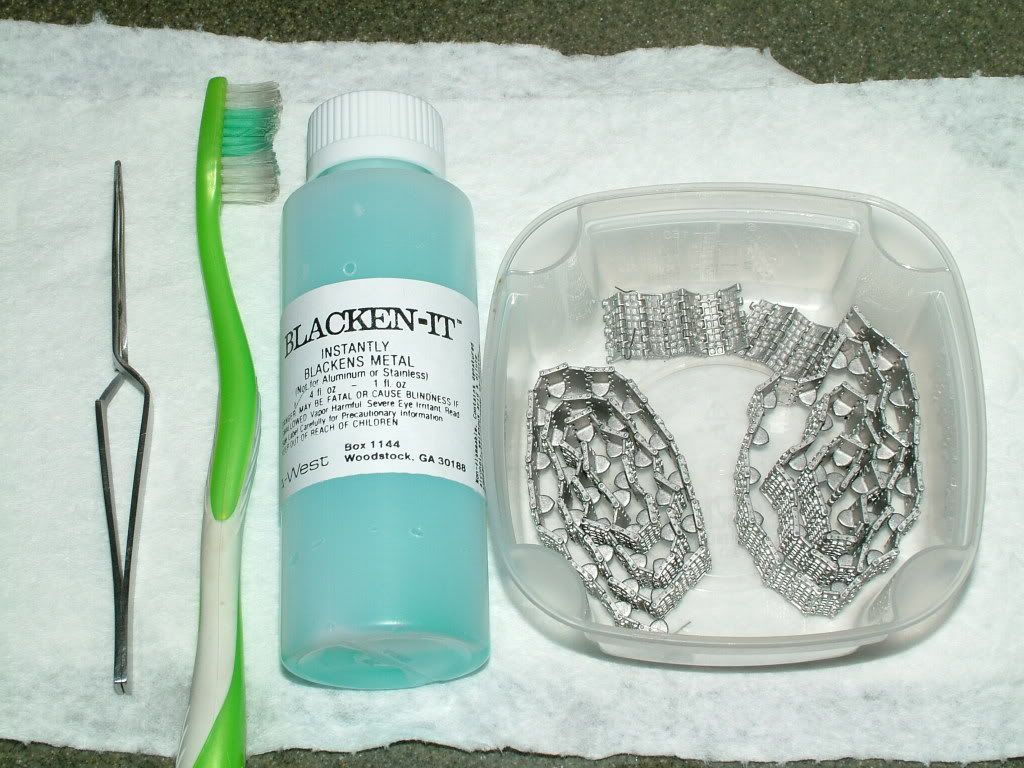
I washed the track in White vinegar as suggested and brushed it with an old tooth brush to get in between all the nooks and crannies:
Placed them into the plastic container, filled it up with the solution and within a few minutes you get this rusty soup: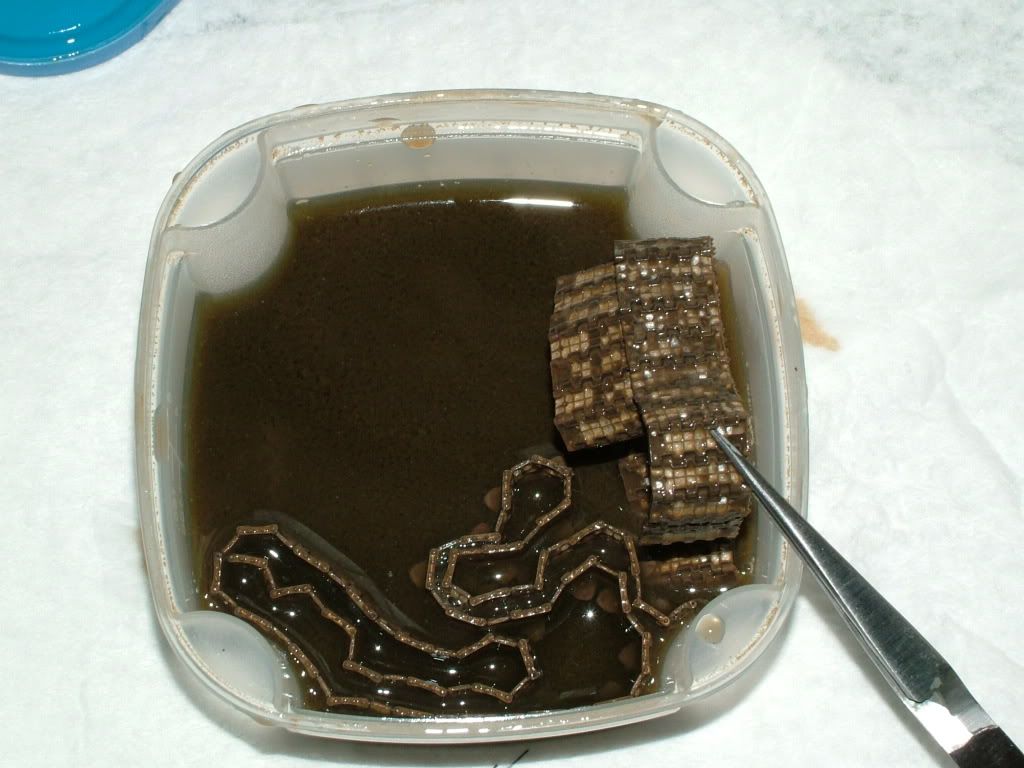
Here are the tracks "just removed" from the solution and still drying out: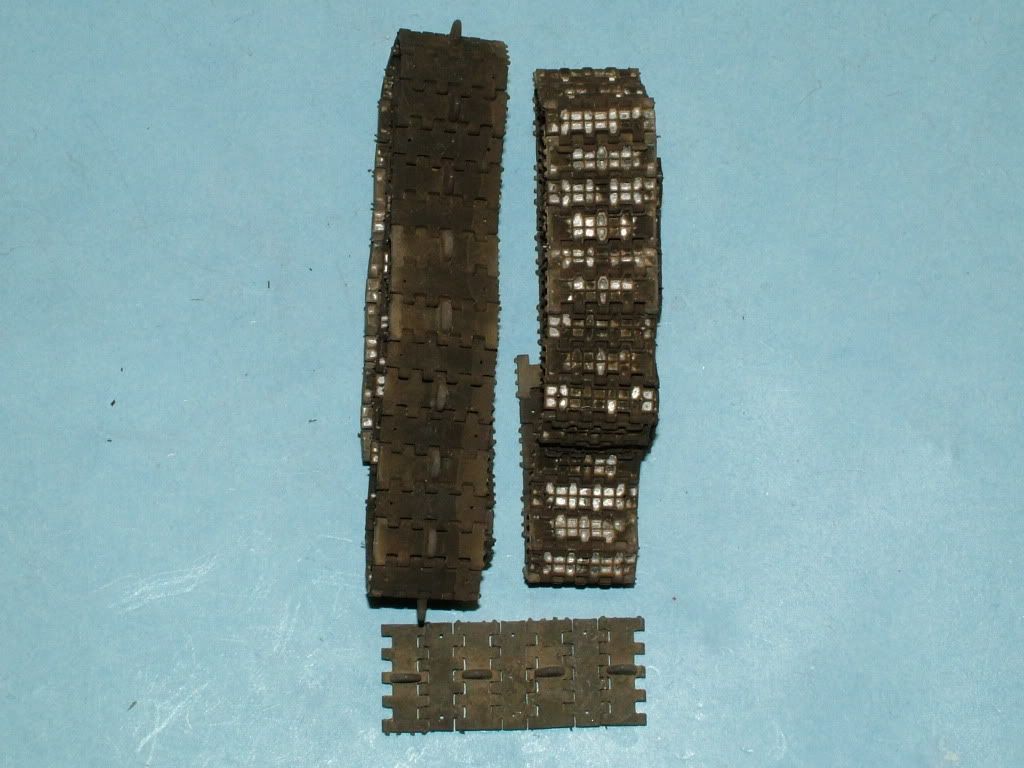
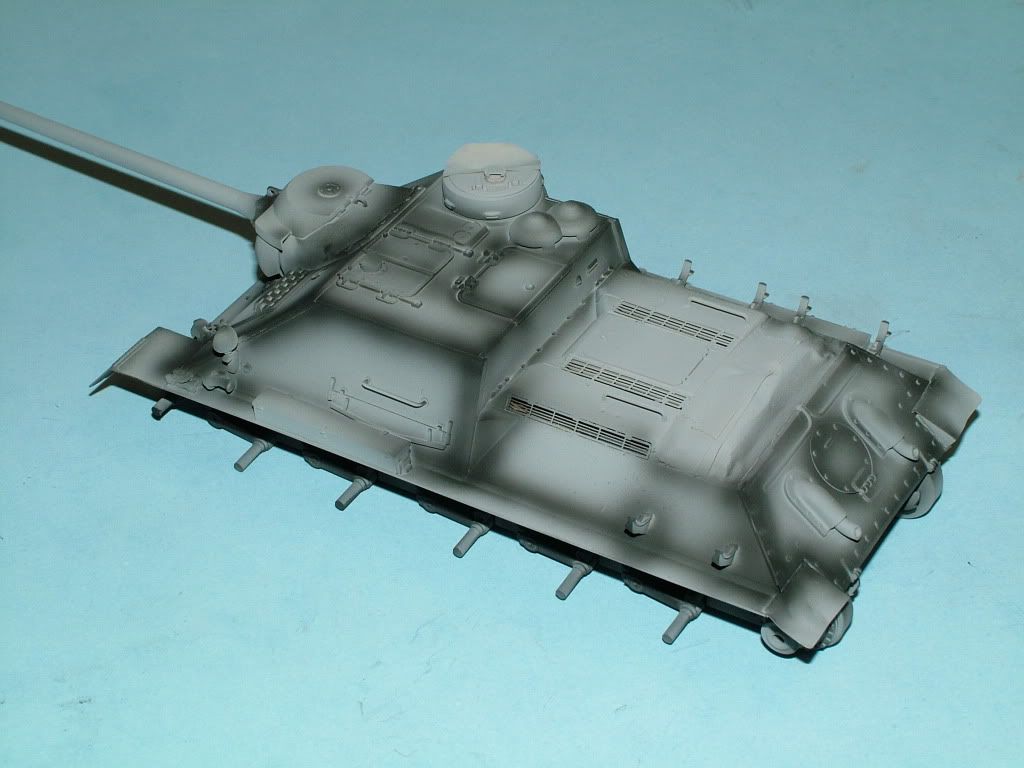
Also made some headway with completing the painting of the road wheels and have pretty much all the Plastic construction taken care off: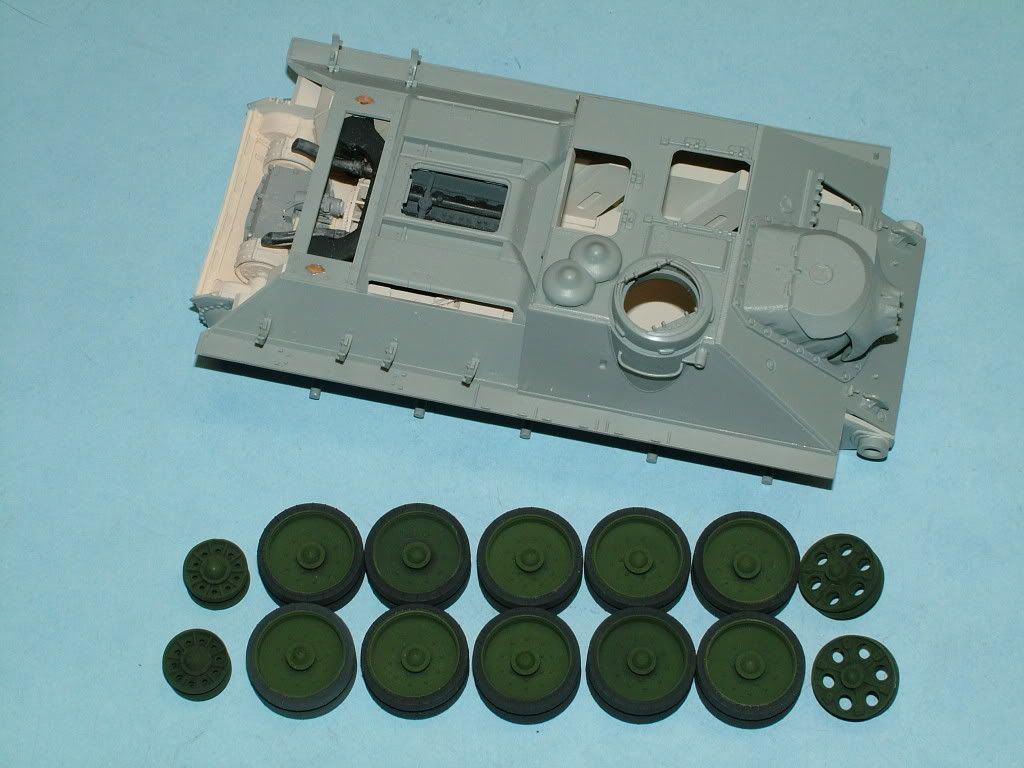
Had to fill in some pin holes on the inside of the front fenders. Used Squadron Green Putty and let it dry overnight. Then sanded smooth.
The "bumps and Lumps" you see are the dents on the outside of the fender. Might still "bash one side up, as I am thinking the "monstrosity" will Hit the Building 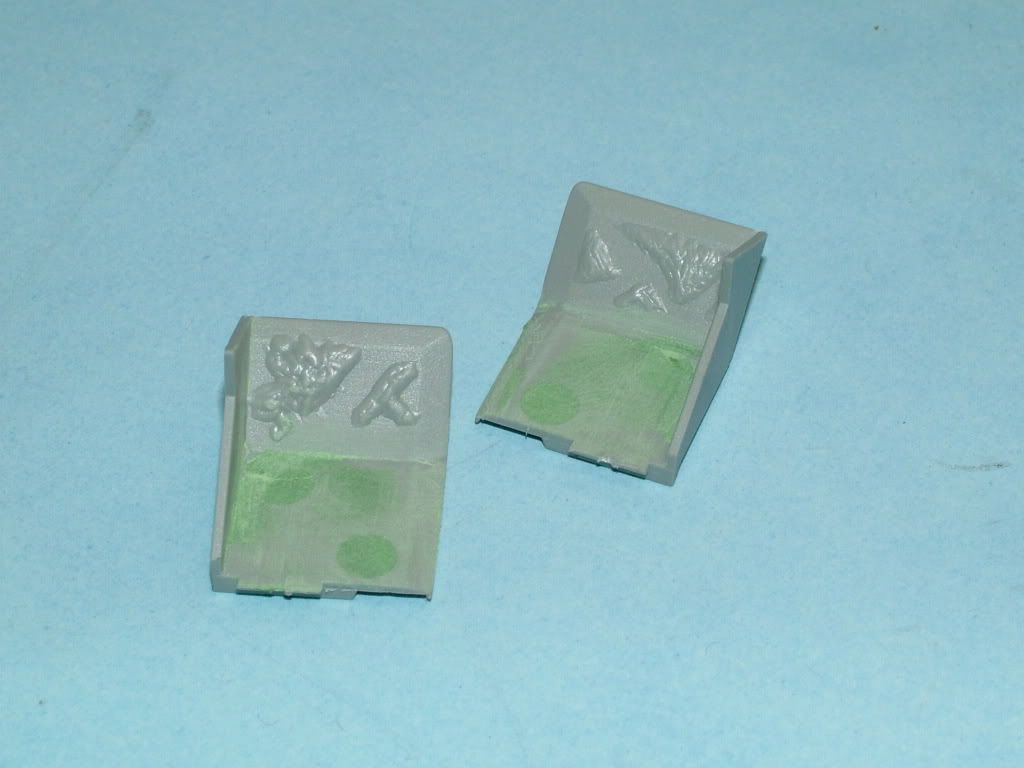
On to the rear engine cover and photo etch grill:
First the Screen: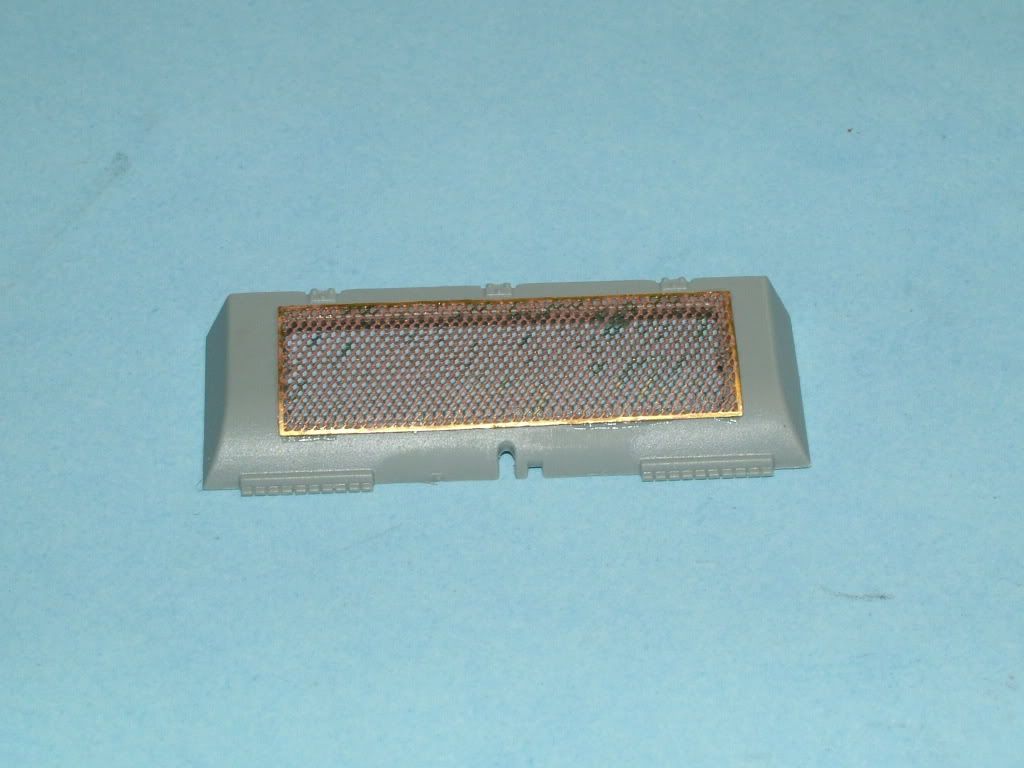
Then the armored weld iron surrounding the screen: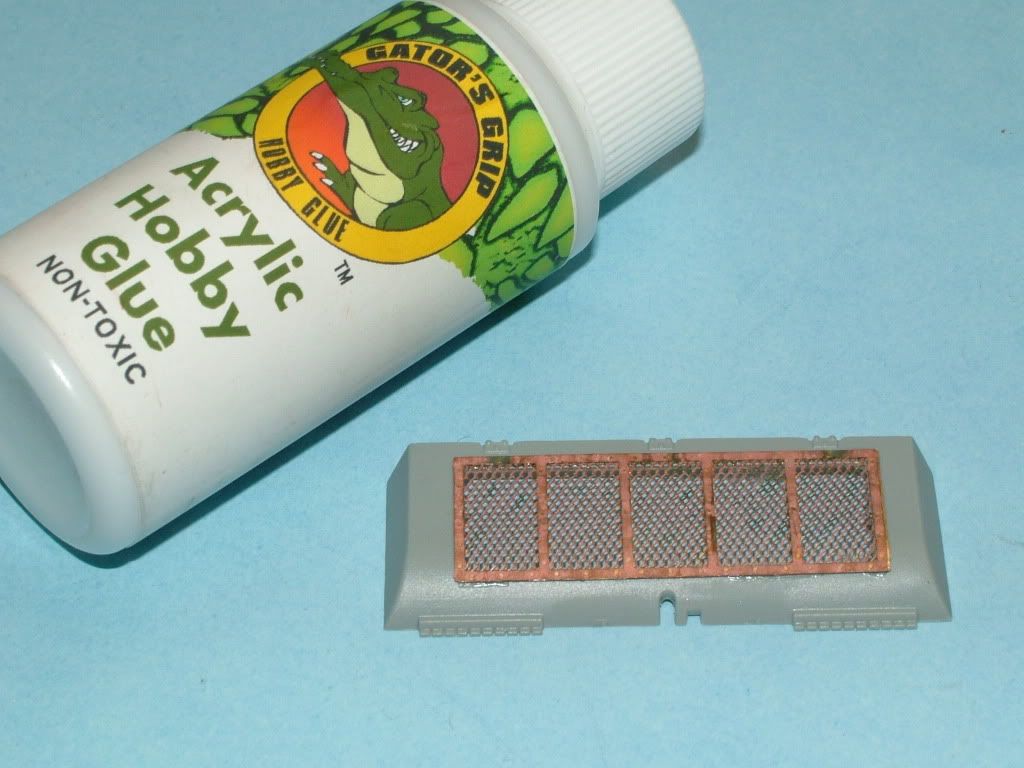
Used my NOW favorite glue ... GATOR GLUE... I don't know how I have done without it. If you have not tried this stuff get some..this is truly making the work with PE parts a dream. It glues just great, has excellent holding power and cleans up like a charm.
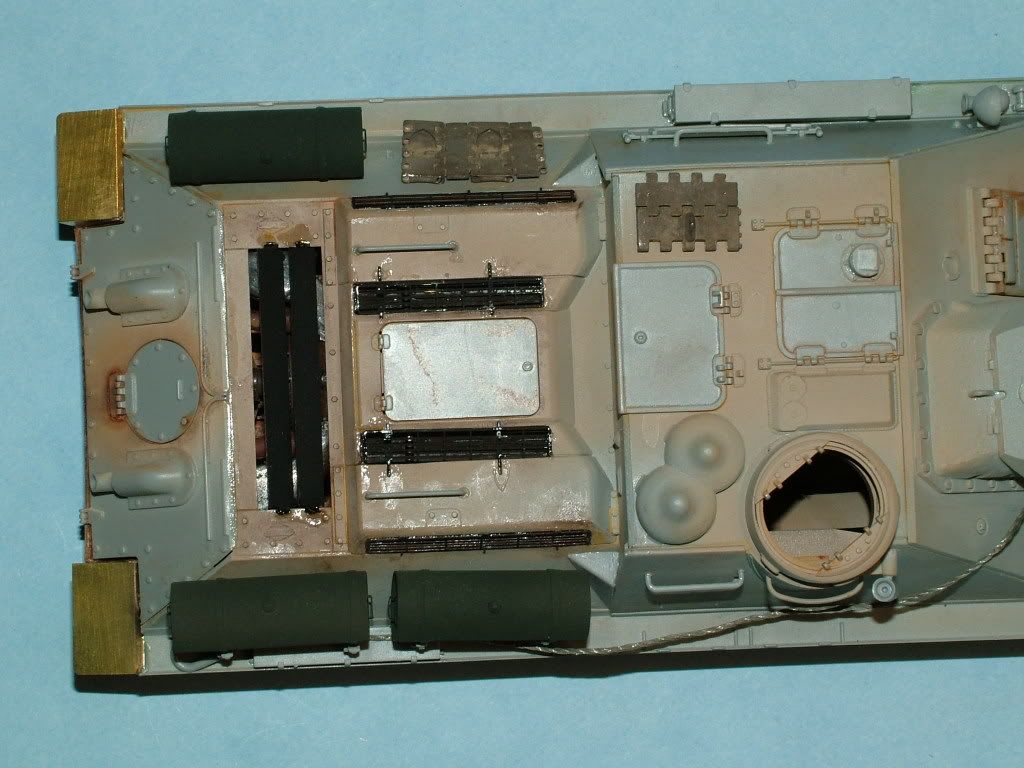
Time to open up all the "plastic" so we can see that beautiful engine detail through all the PE screens 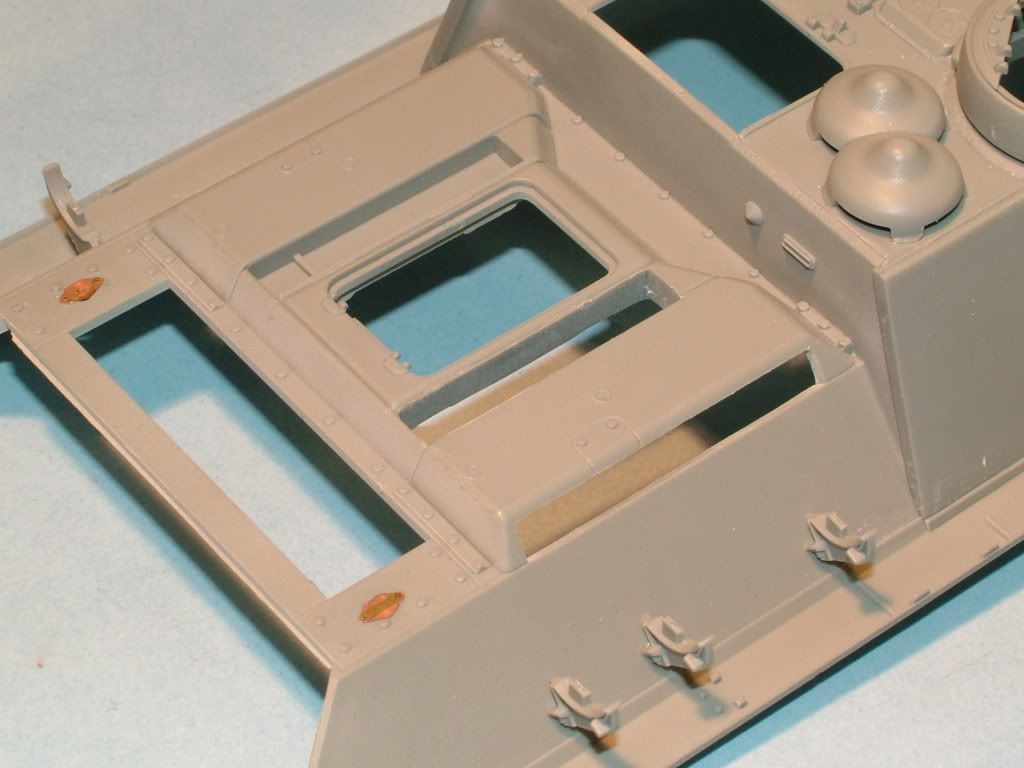
Quite a bit of work to open up the side engine cooling vents and top ones were super thick plastic.
Also cut off some interior plastic so you can look down into where the airflow would naturally go.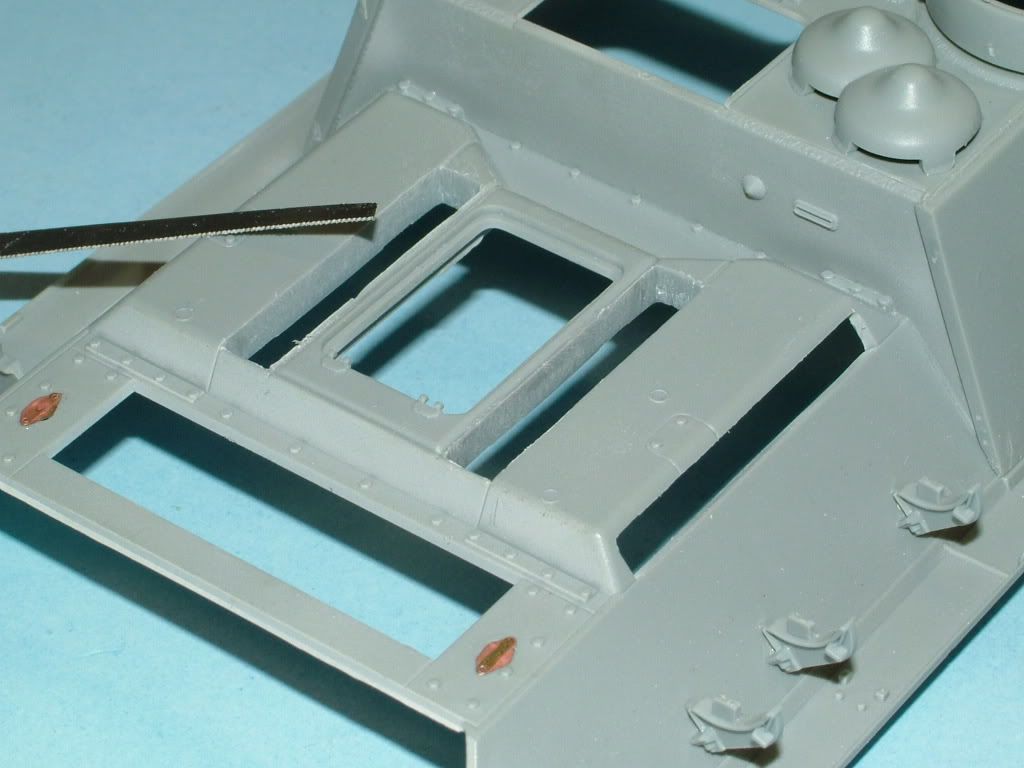
Cleaned up all the little hatch parts, glued on the periscopes and other tiny detail and sprayed the interior color, and build the tow cable.
Next step was to spray a thinned smoke all over to get somewhat of that "dirty white/yellowish hue:
Also you can see the interior of the Friul Track has a great tone depth to it now.
It was then back to working the wheels.
The wheel set was given a Future Coat last week and had a chance to dry for 5 days  due to my trips.
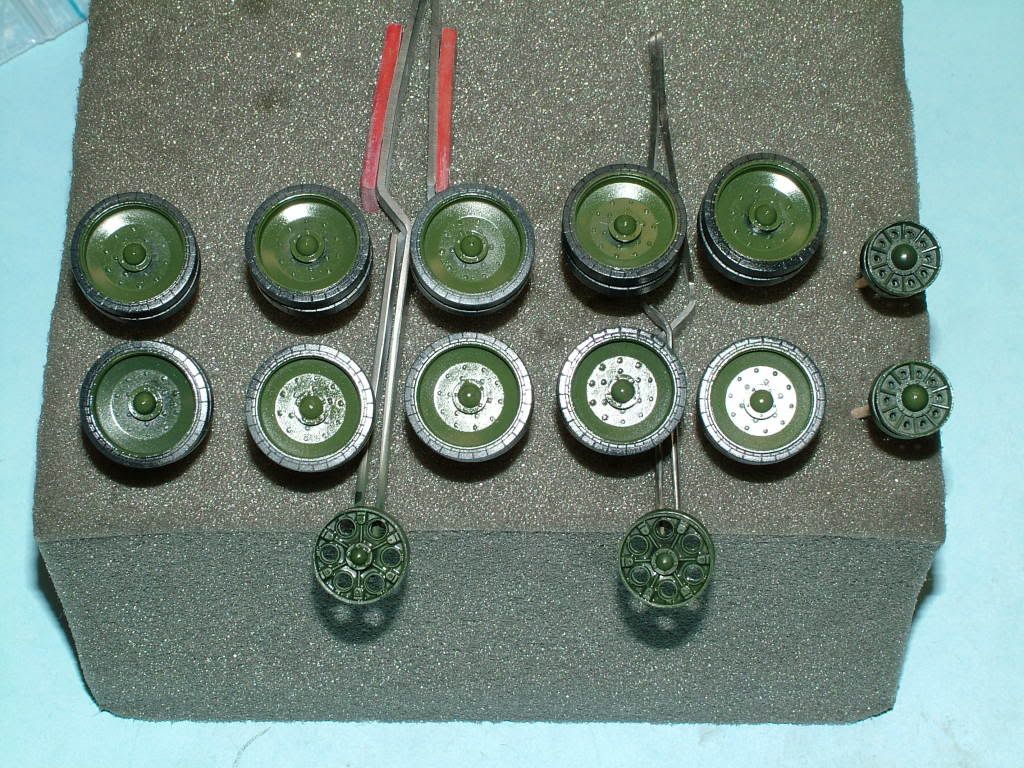
Then placed a thin wash of Van Dyke Brown overall: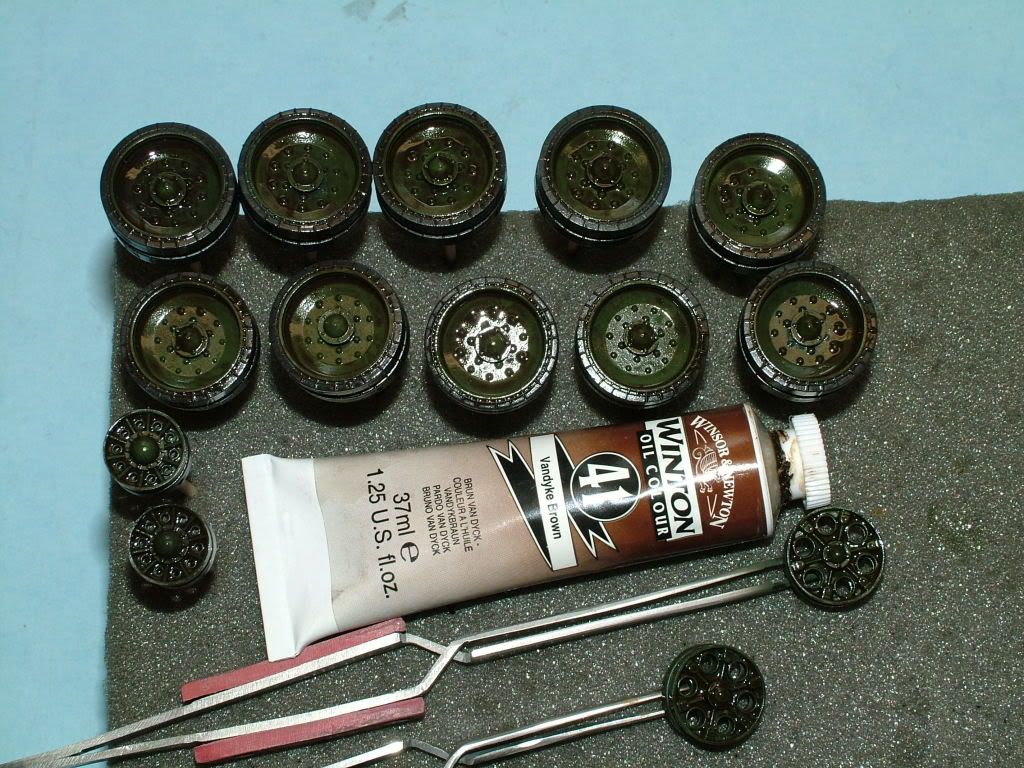
This will dry overnight and then planning to place another wash over it with Burnt Sienna and hope to achieve some various shades of dirt accumulations and overall depth.
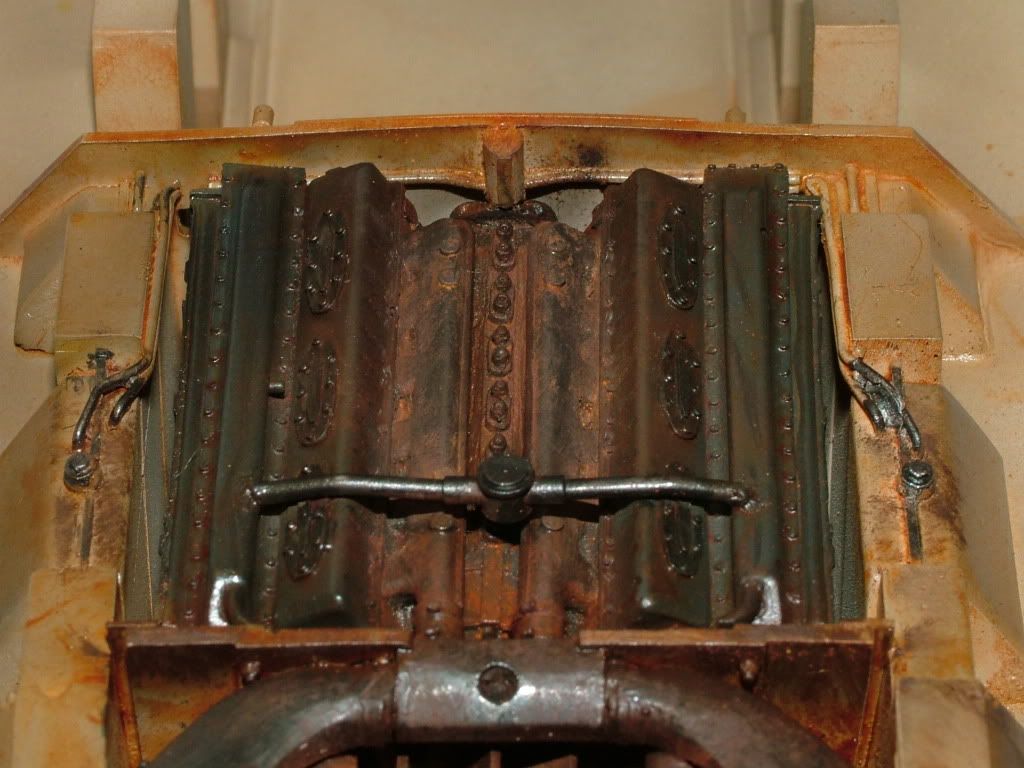
Made some more progress in the Engine compartment too, she is coming together nicely now. Washes of Tamiya Smoke and Van Dyke, Yellow Ochre and Burnt Sienna are starting to show depth. This picture was taken while the washes are still wet. Once dried it will no longer have a gloss look.
The plan is to then start the heavy rusting effects as prior done on my T/34/85 Armour Build and use various Mig Pigments to truly soot it up, make some oil drips and fuel spillage with various gloss and flat.
Rusting out yea old bucket:
Various Mig Pigments, and from http://www.bragdonent.com, Oil Drips-Fuel spills, made from glossy varnish mixed with black paint.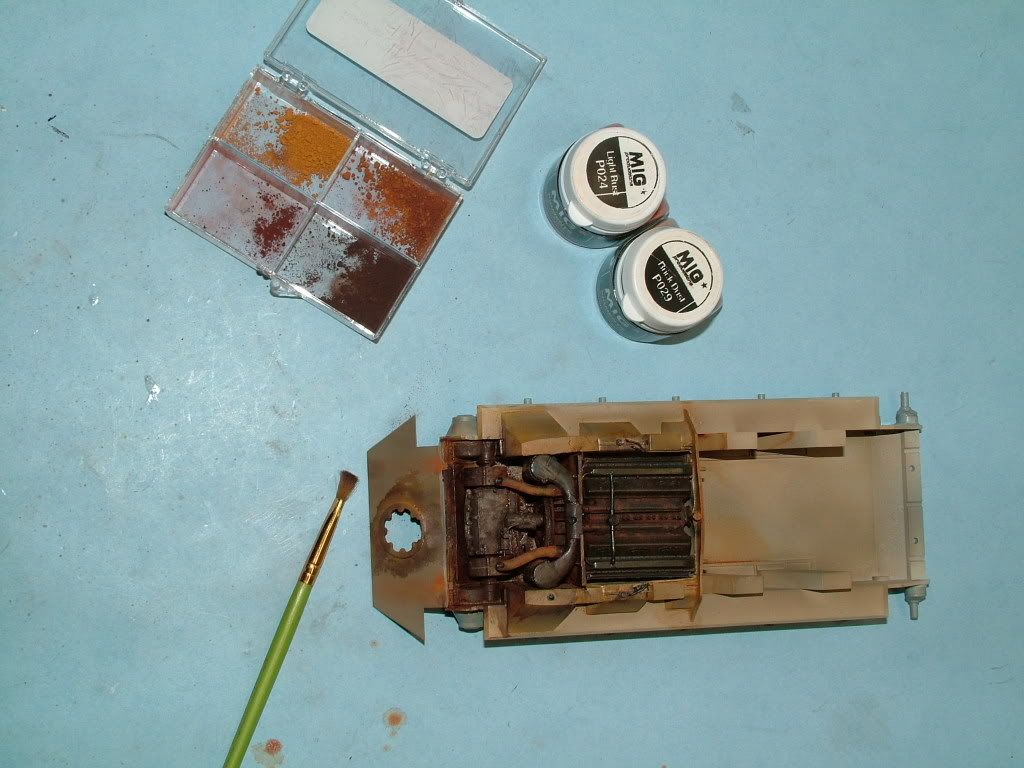
Rear Bulk Head as seen from the drivers compartment: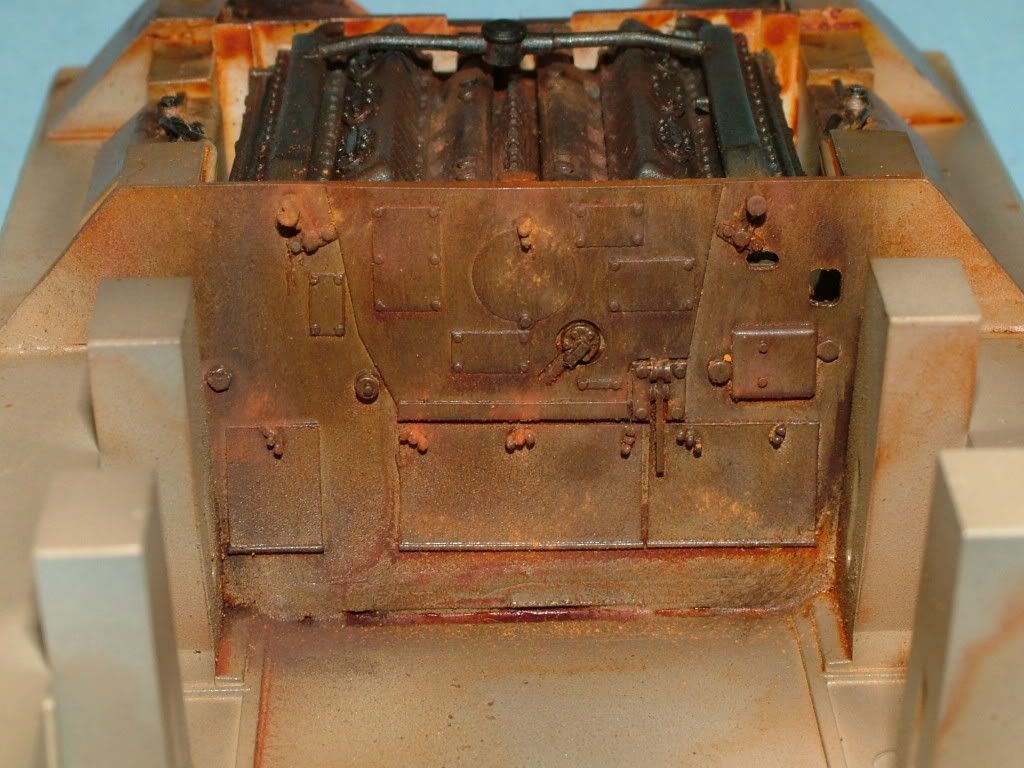
Got the Hull mated up and glued together and the front fenders installed: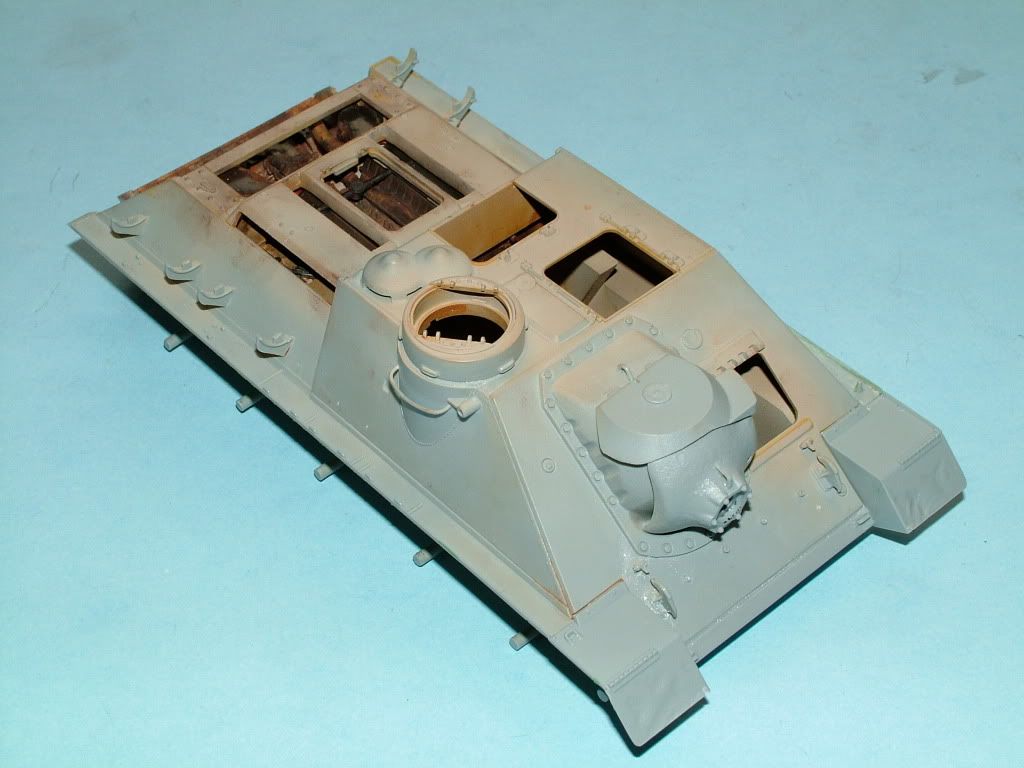
Here is where it got a little testy on the nerves, the mating of the under surface needed quite a bit of Squadron Green Putty: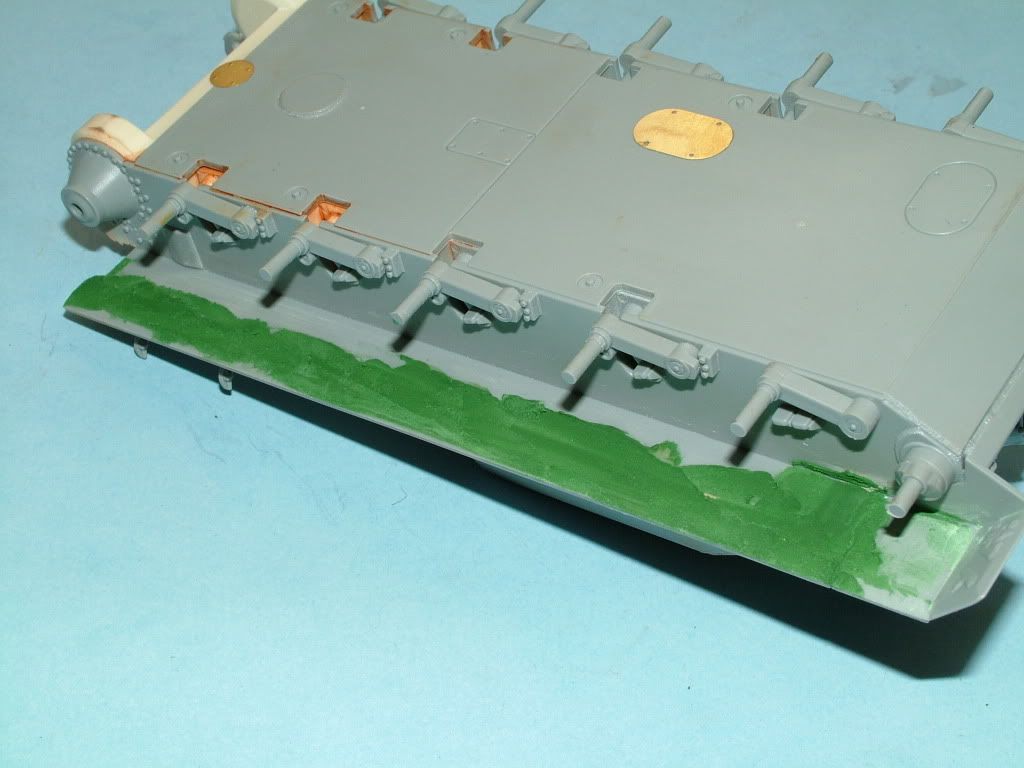
Opposite side: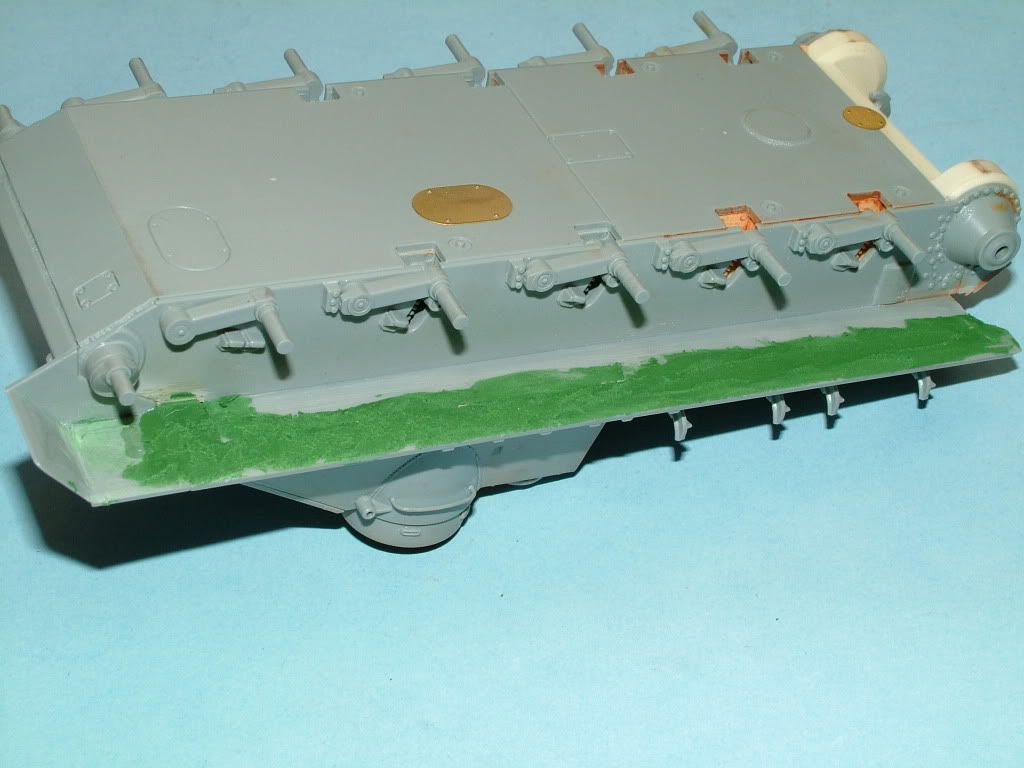
After a couple hrs of drying time and some serious sanding with various grits, placed another thin layer of Mr Surfacer 1000 to smooth everything out:
Some more anxious playing the waiting game!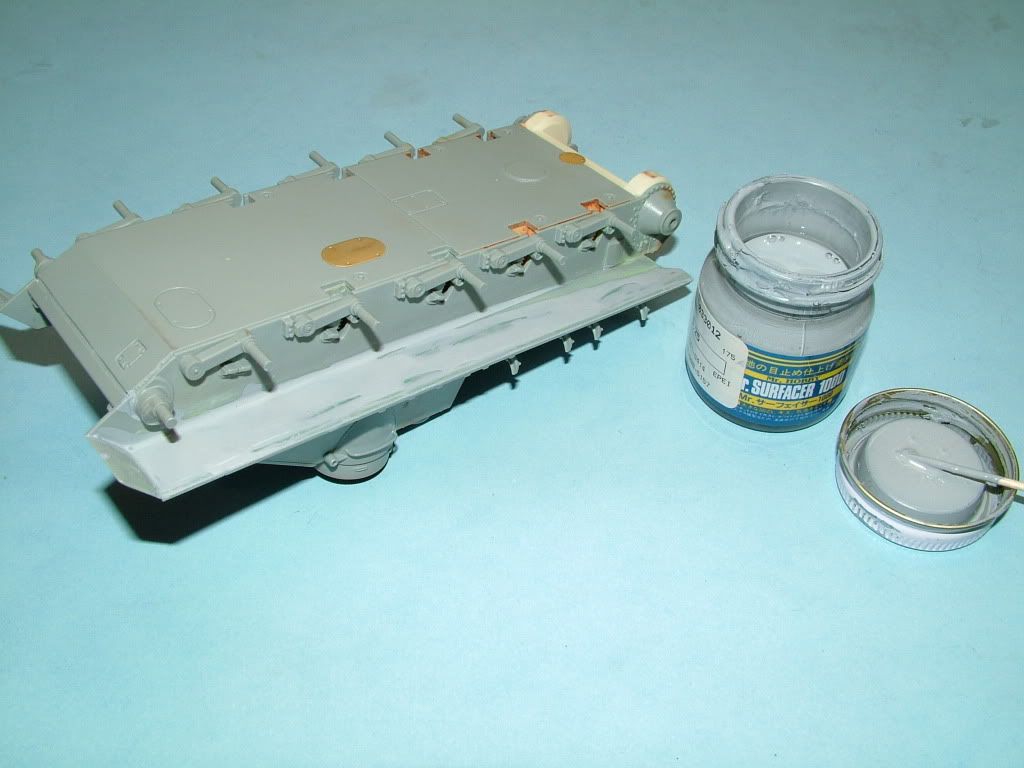
Opposite Side: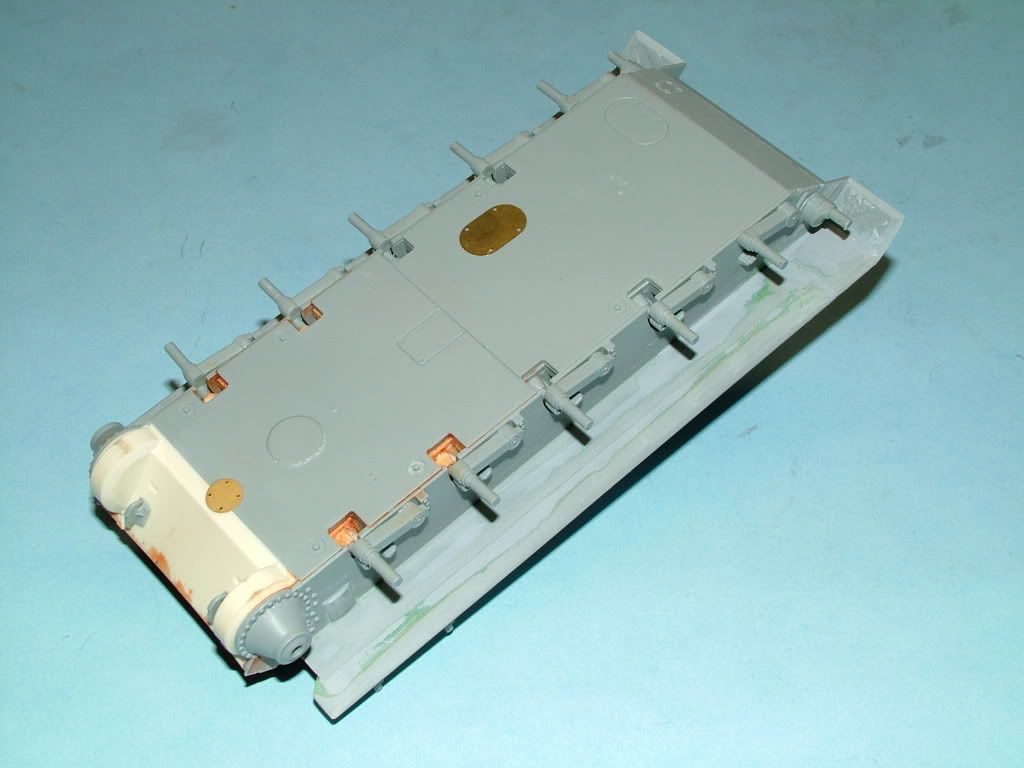
Sanded that with some finer grits and shot a heavy coat of Tamiya Dark Grey and see how we made out: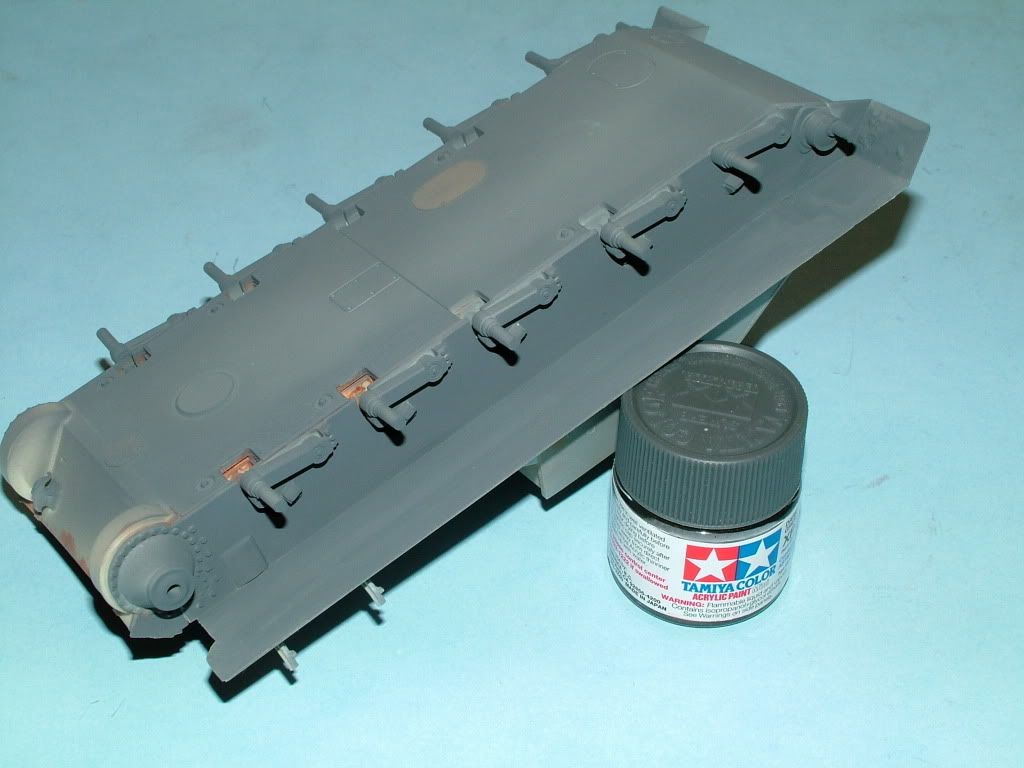
Some over all shots, all the bits and pieces are just posed on, but got all the PE parts glued on, the engine cooling screens, louvers are in place now.
Glued in the metal barrel, finalized the rear PE fenders, playing around with posing some spare track pieces, hatches will remain removable. Just got to figure out how to keep them in place and tight (perhaps some blue tack) while I spray the main colors on.
The saw, the light and the two tool boxes are completed and glued on as well as the bull horn and all the grab handles.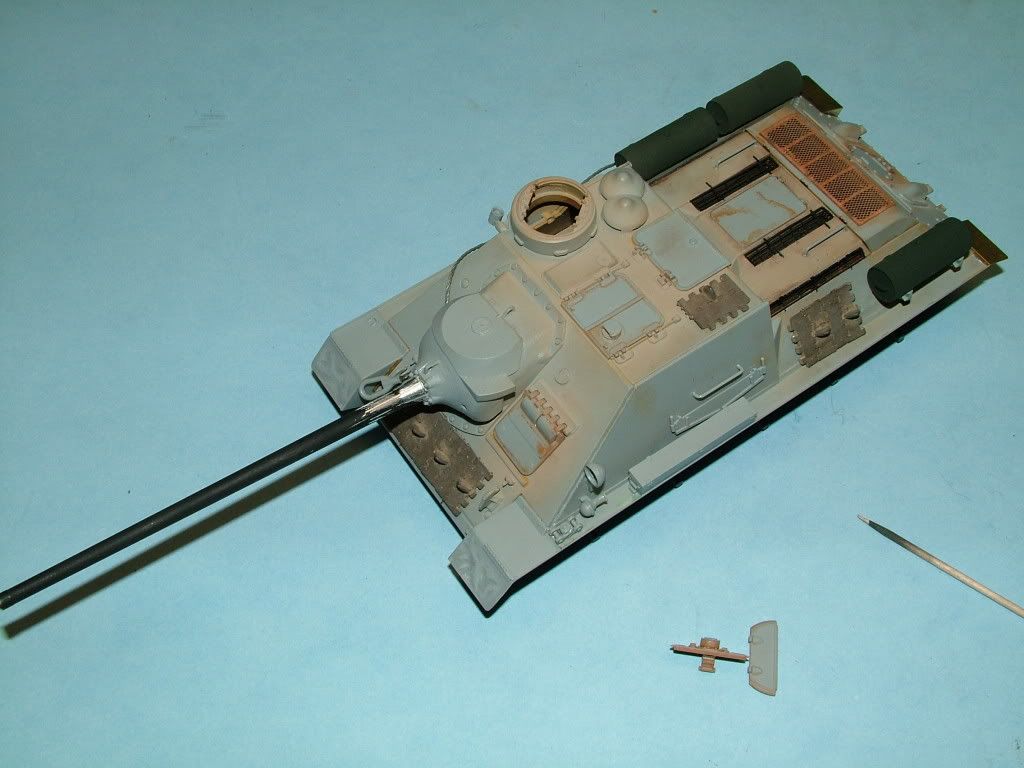
Another shot: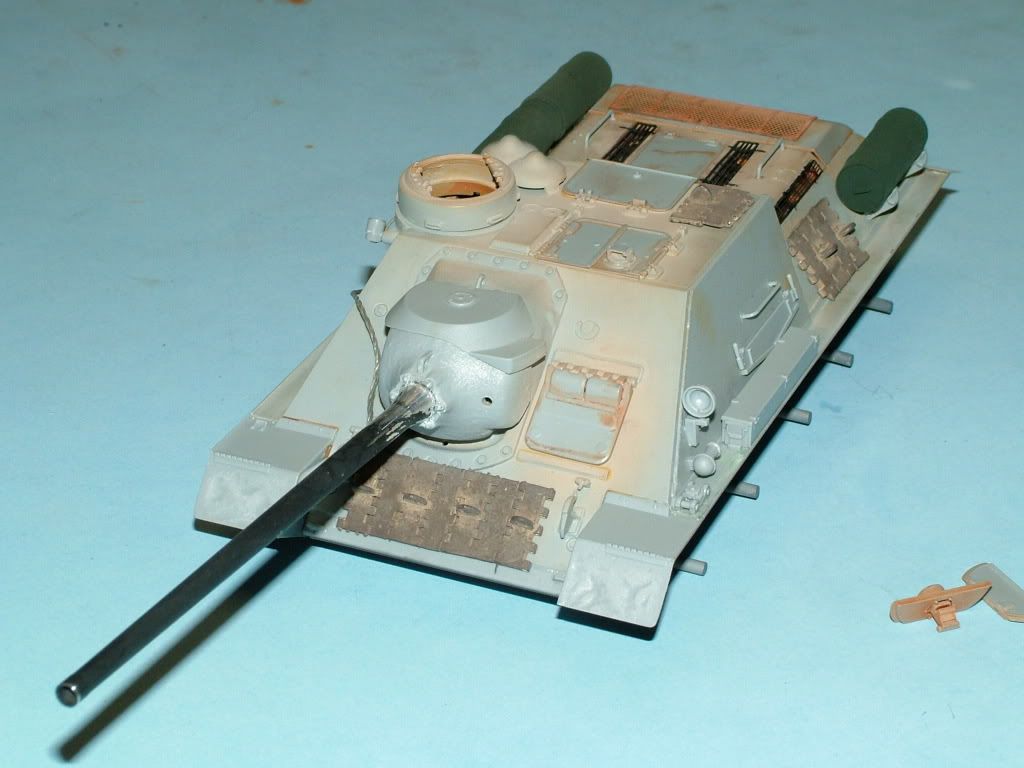
More detail shots: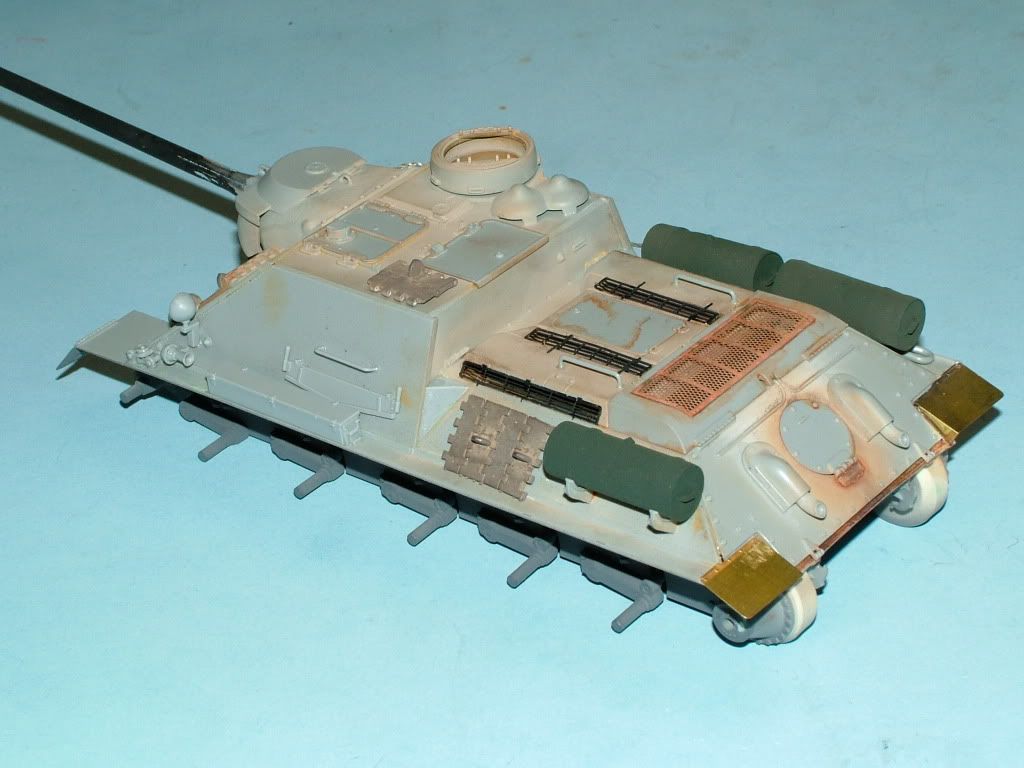
Finalized the weathering of the wheels and a flat seal coat: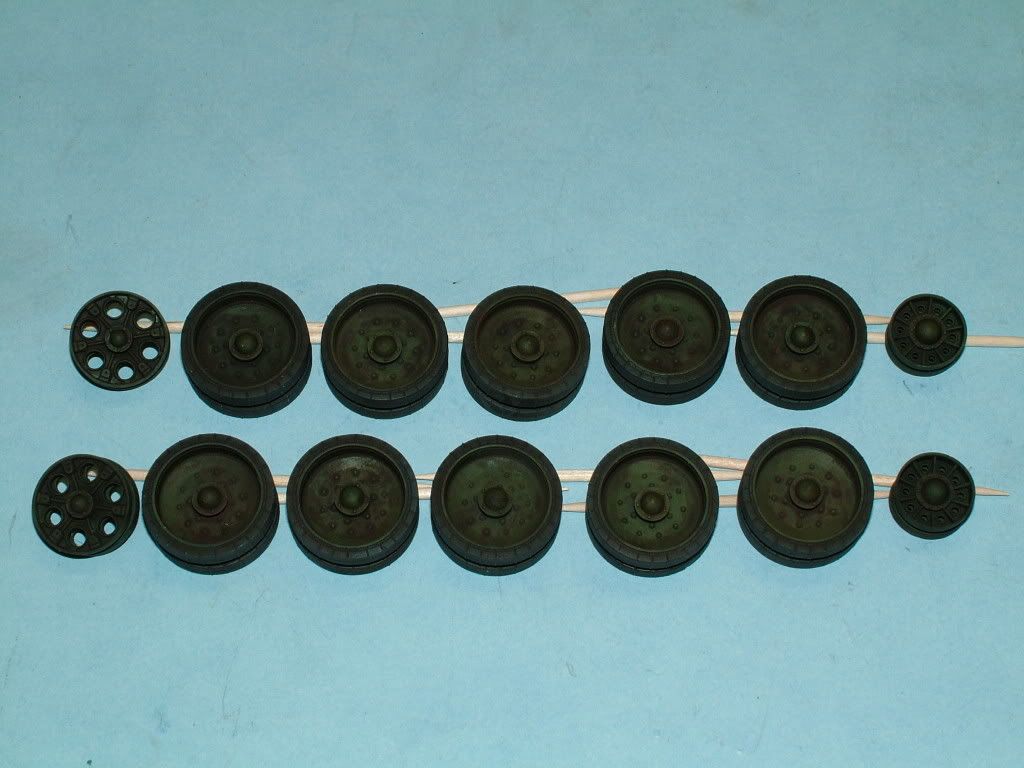
Not so sure these pics do them justice,
I ended up with some very pleasing effects of rusty browns and various dry / wet spots making it look like axle grease is coming out of the joints: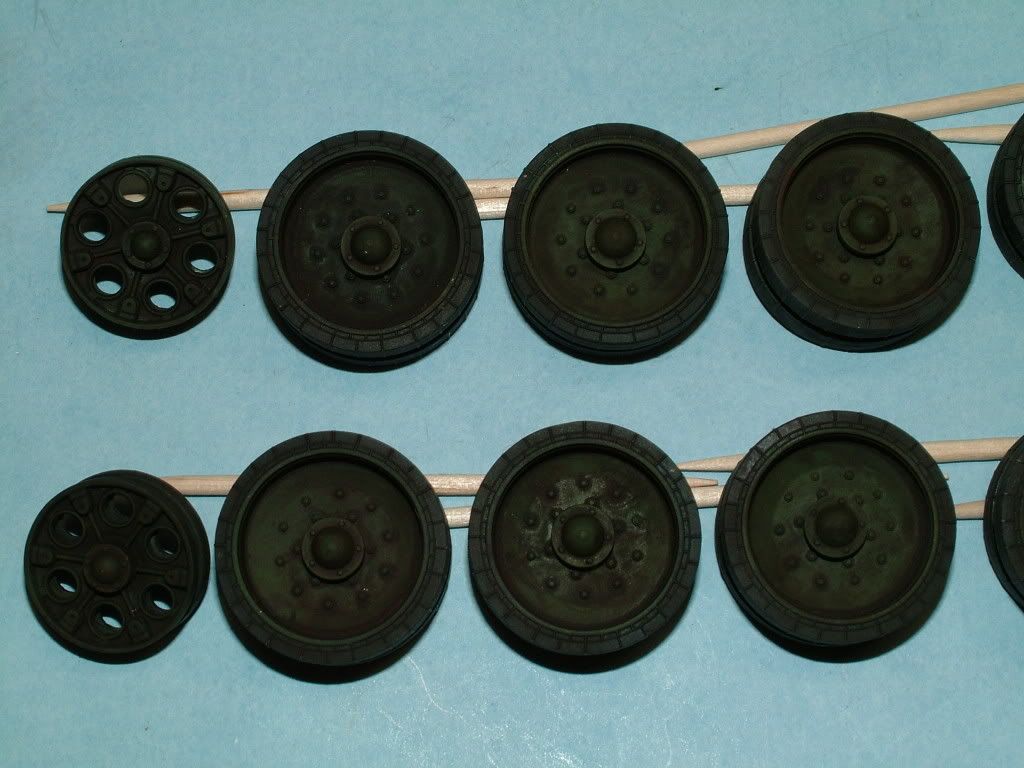
This one might be the best overall telling of what I am describing: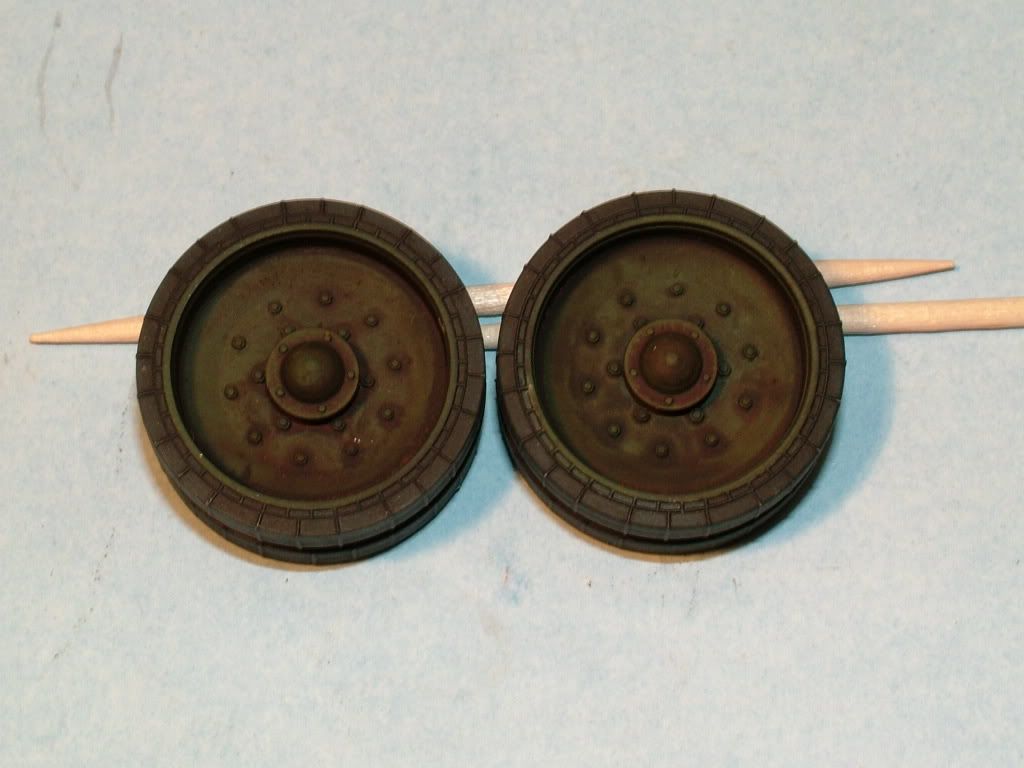
Finished up some very small bits and pieces, like the pistol port plugs, shackles and one more grab handle.
Cleaned up the rear end and matched it up with the hull, a little green putty and some Mr Surfacer 1000 again made quick work of it to get to the below first shot.
First up checking to see how all the joins are coming along and checking filler spots: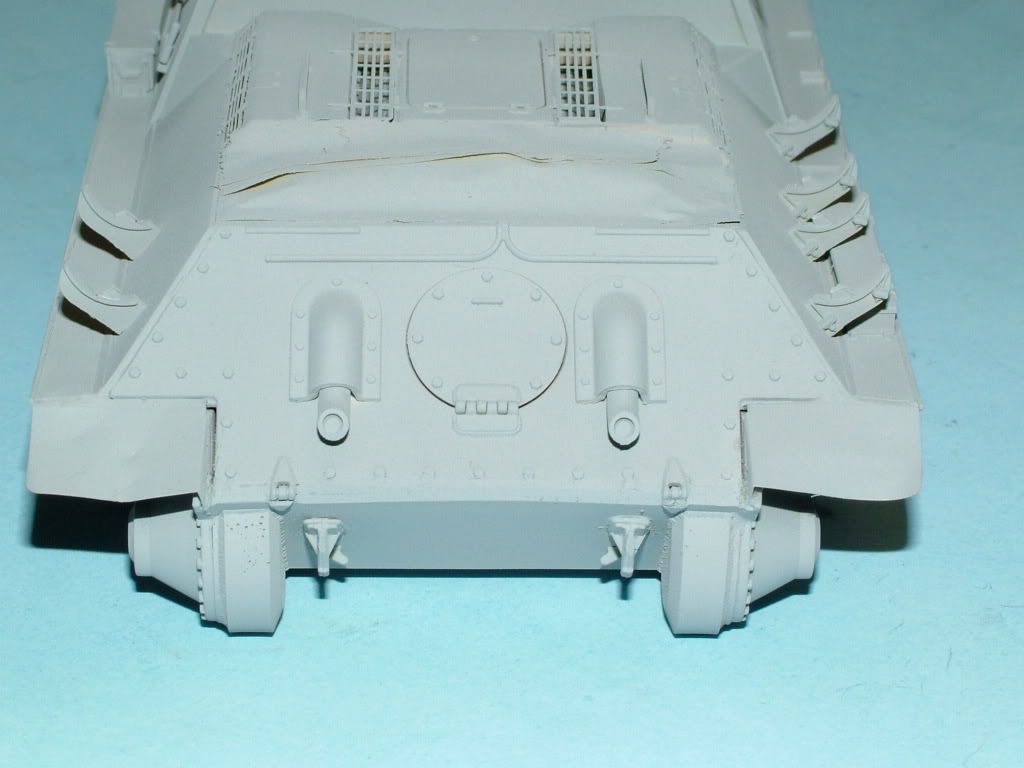
Also bashed up the rear fenders to show a little "damage" 
Overall Check done with Tamiya XF-19 Light Grey and will be used as my primer base coat: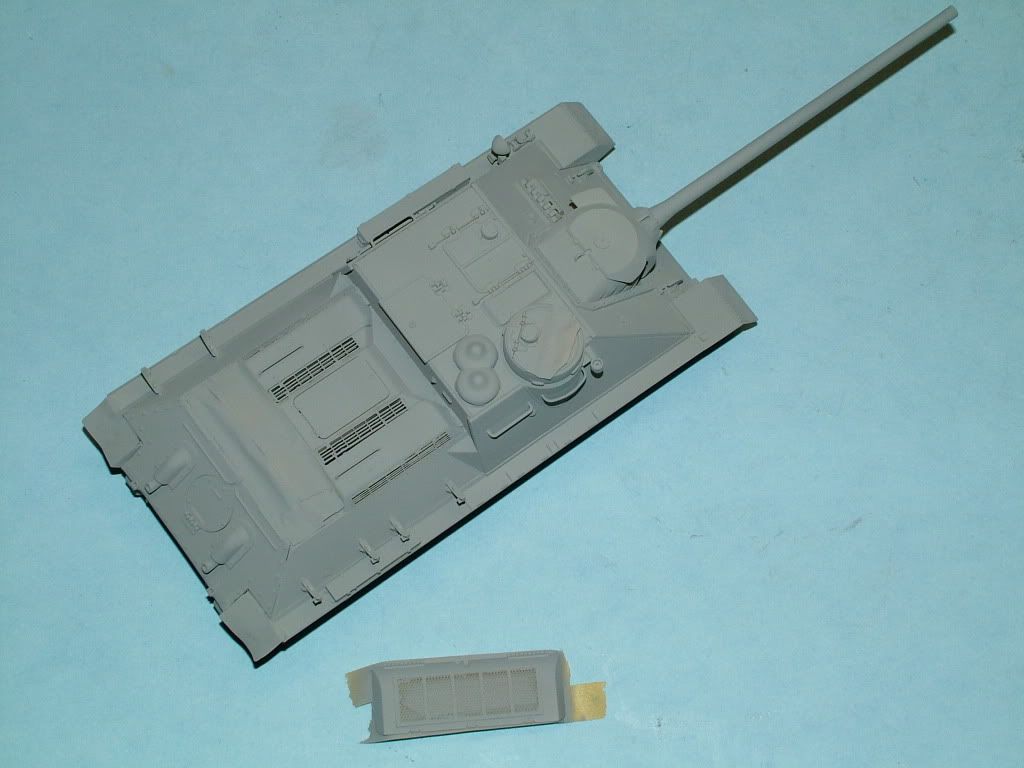
Pre-shading accomplished with a very thin mix 70% to 30% Paint of Tamiya XF-1 Flat Black and a hint of Light Grey: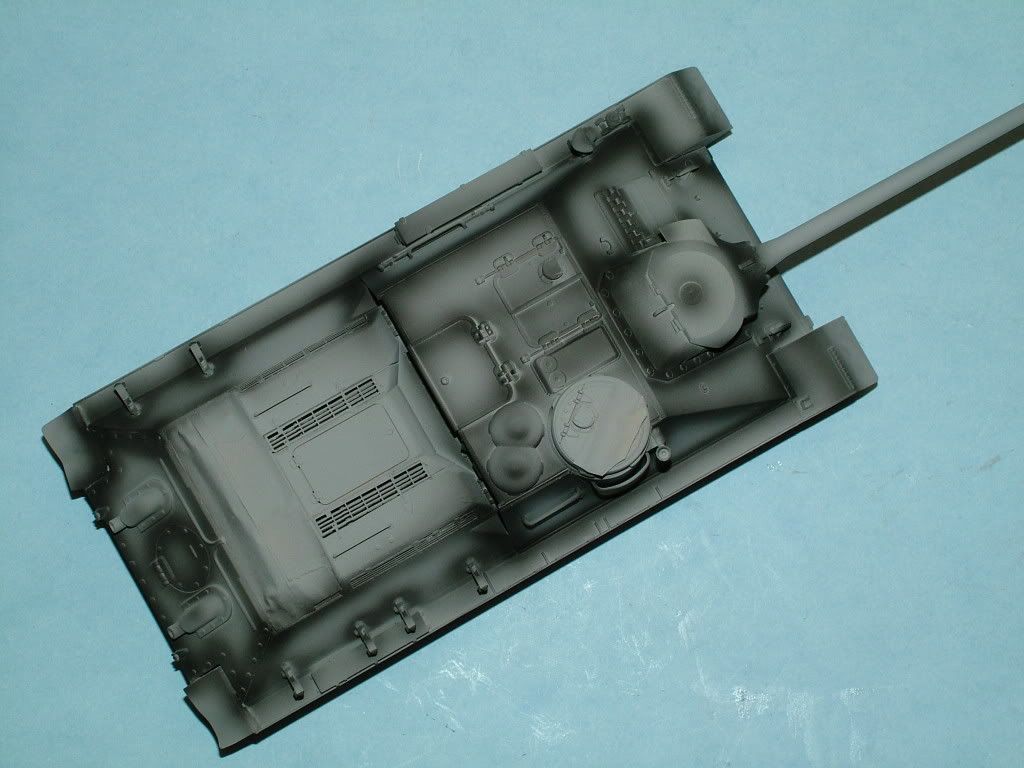
Another shot: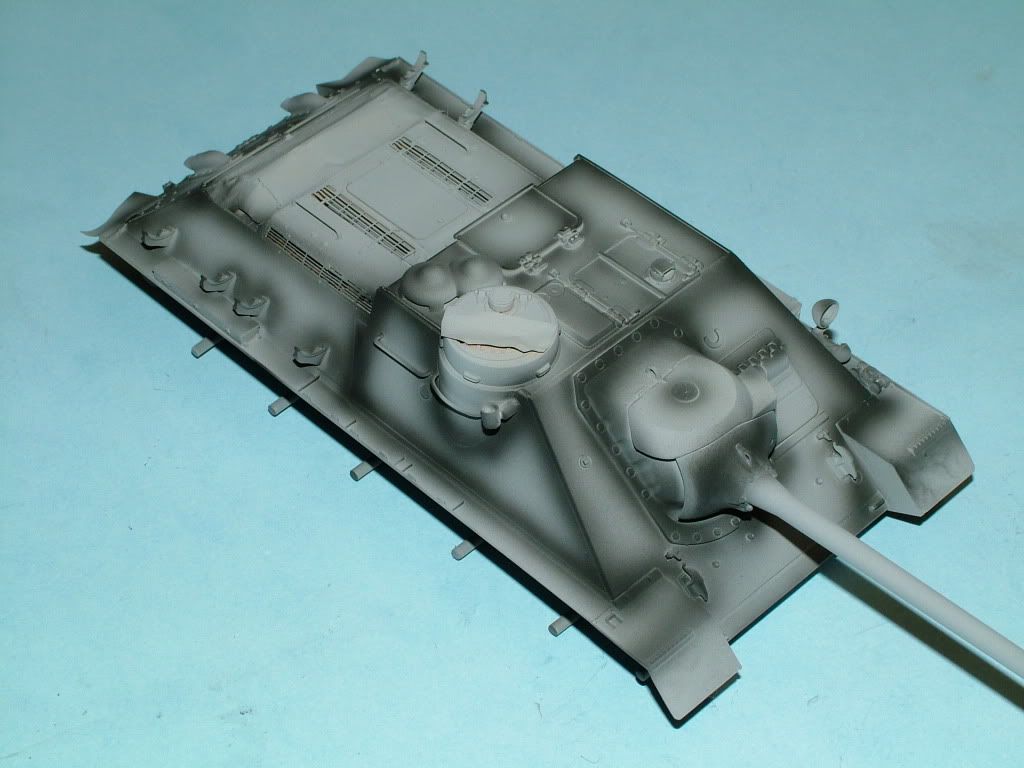
Front Angle: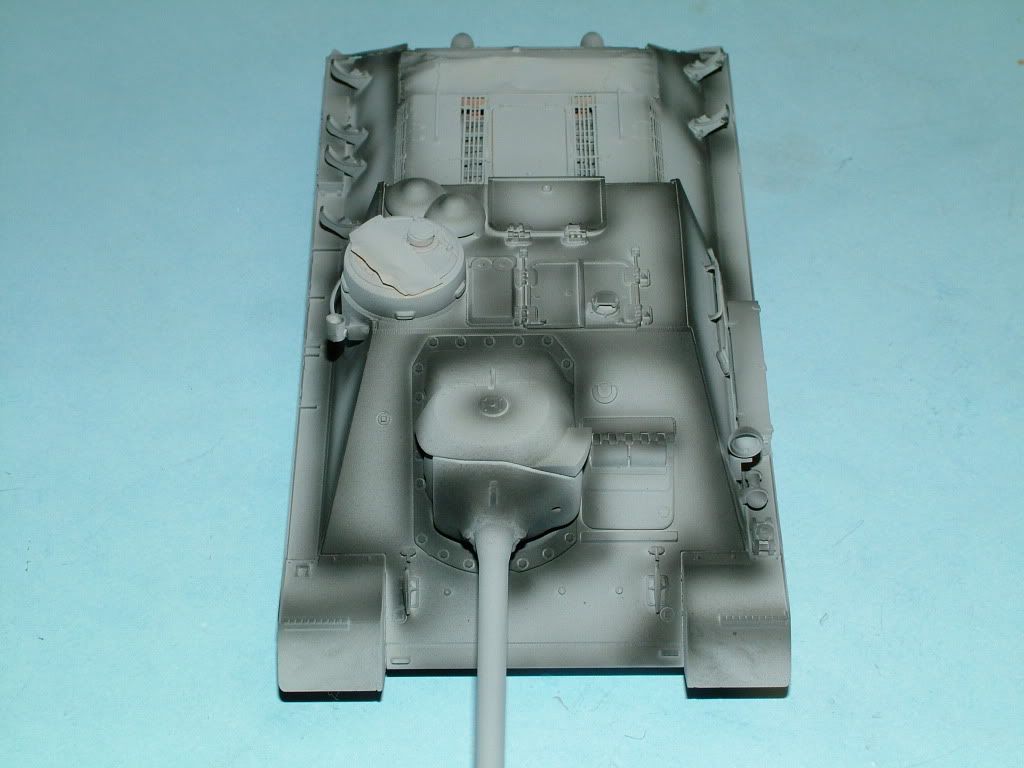
Then on to doing the highlighting with a very thin mix of 70% thinner to 30% paint ration of Tamiya XF-71 Cockpit Green: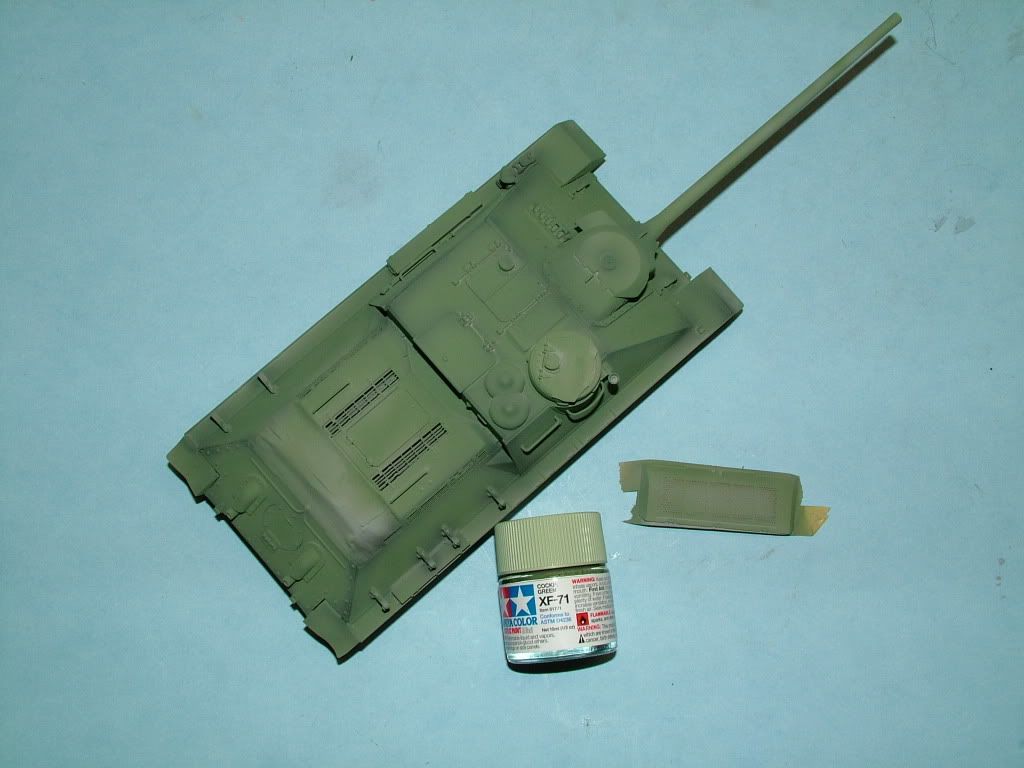
I believe she turned out all right through this experimental phase 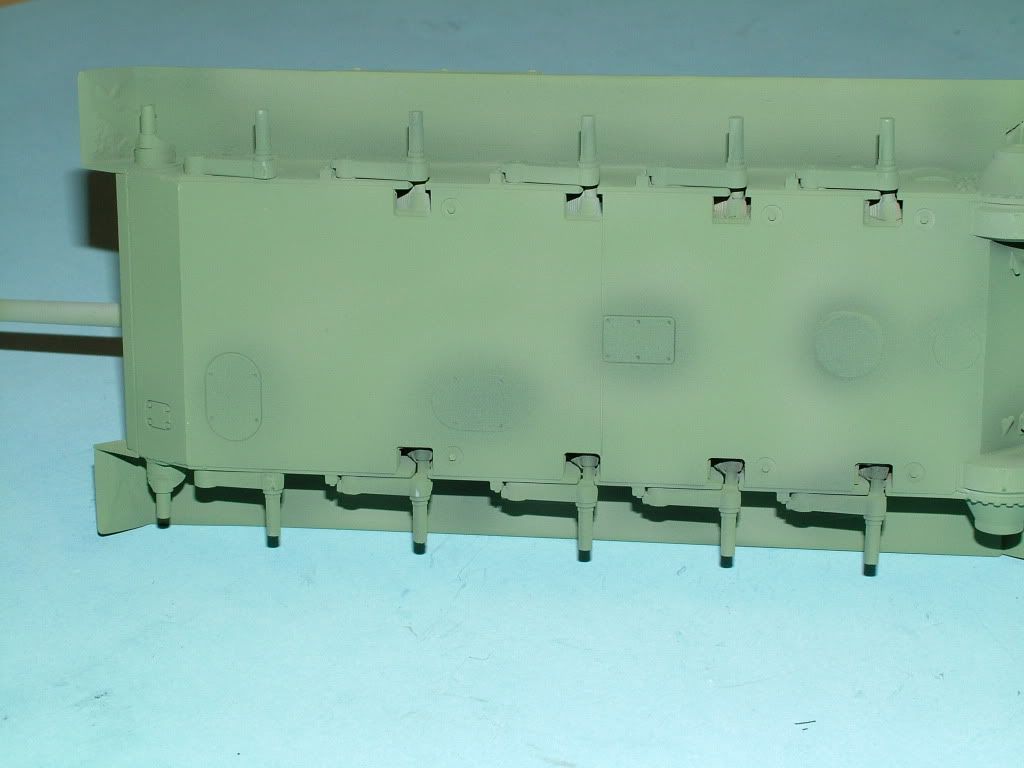
Used various shades of Green Tamiya and Smoke to blend it all in:![]()
Another Angle:![]()
Worked the Metal Barrel and wanted to show a similar wear that the pro builder did a few posts back (heat distortion on the paint)
I think it turned out all right:![]()
Managed to shoot a clear coat of Future as well:![]()
All righty,
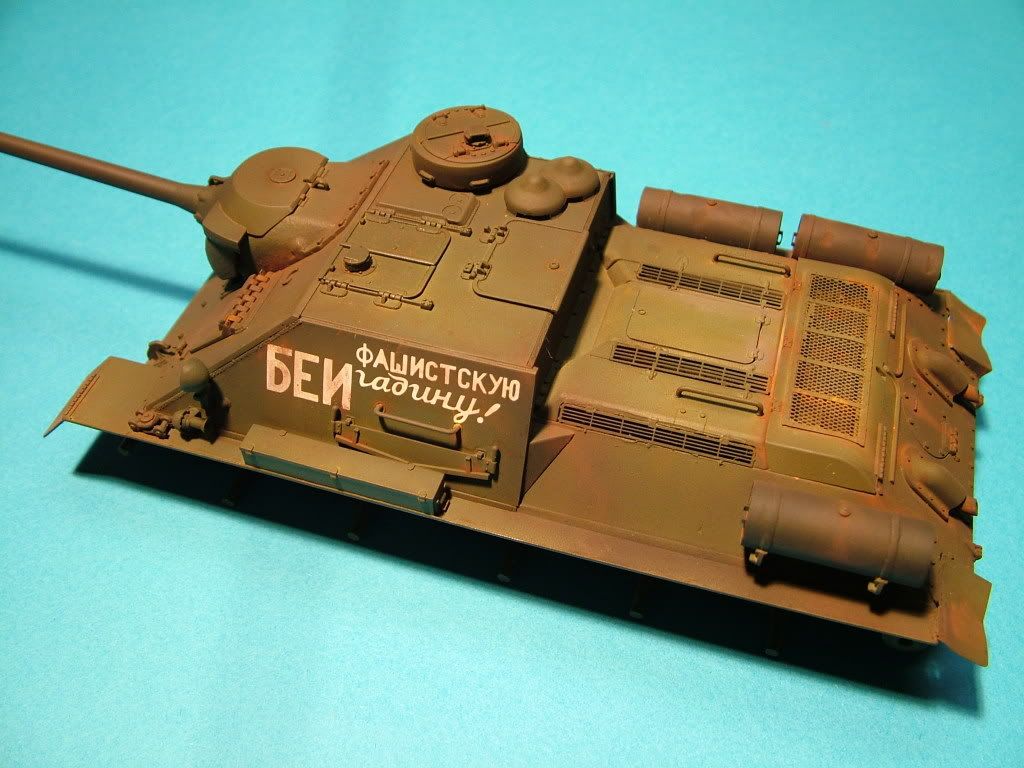
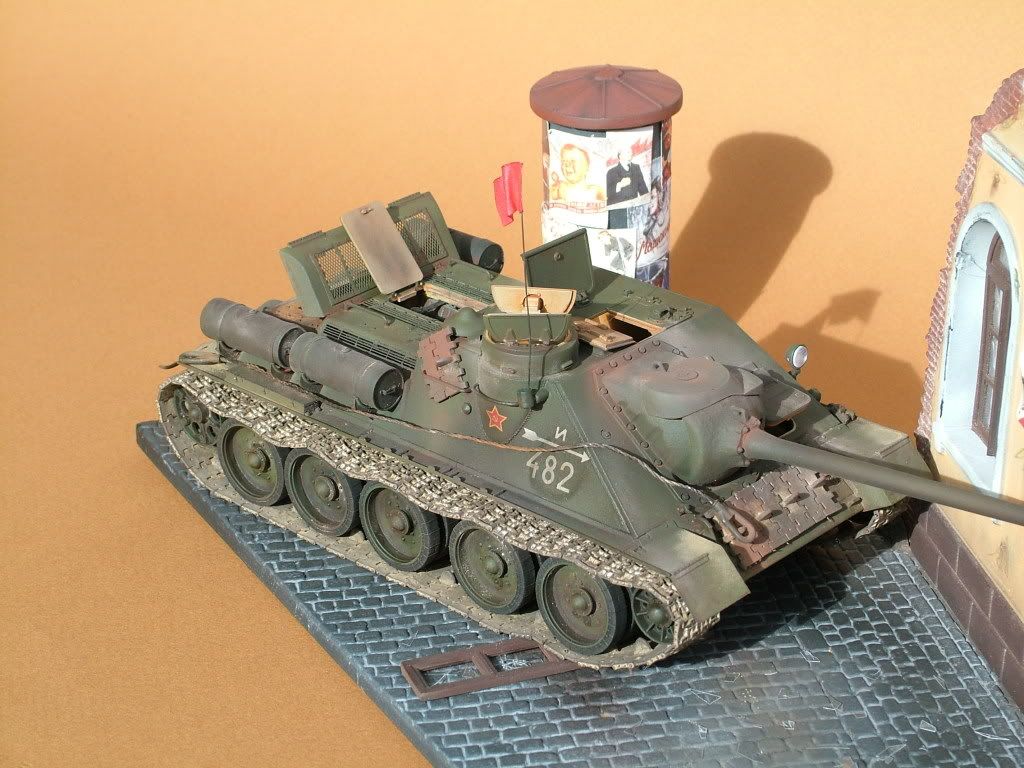
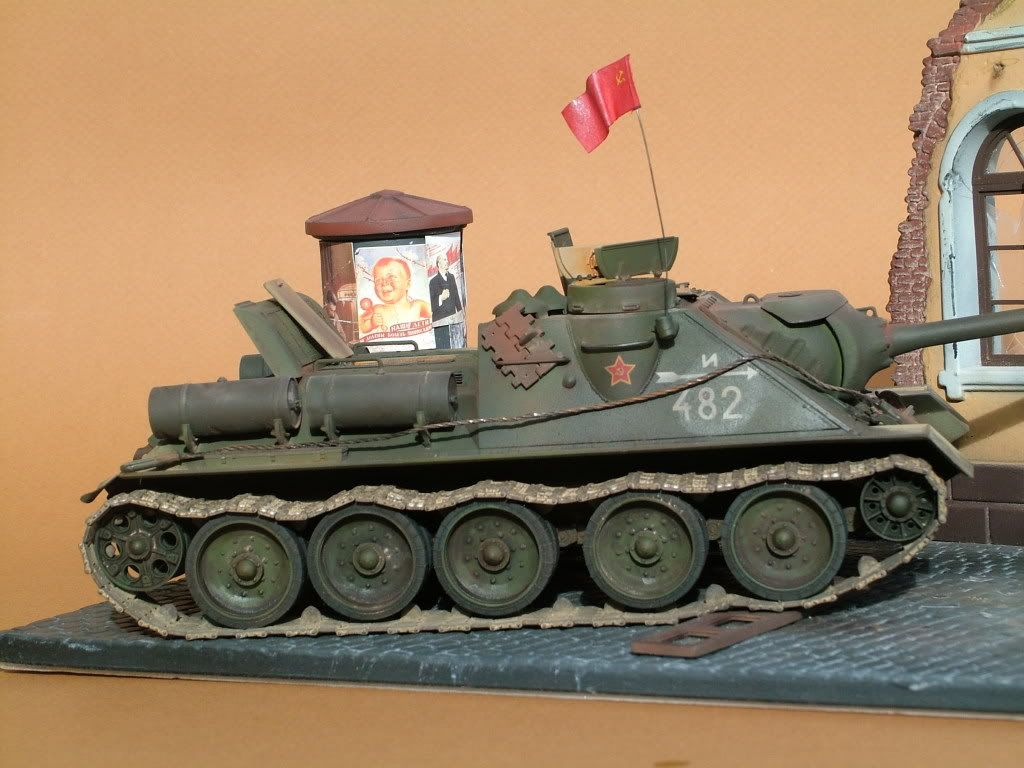
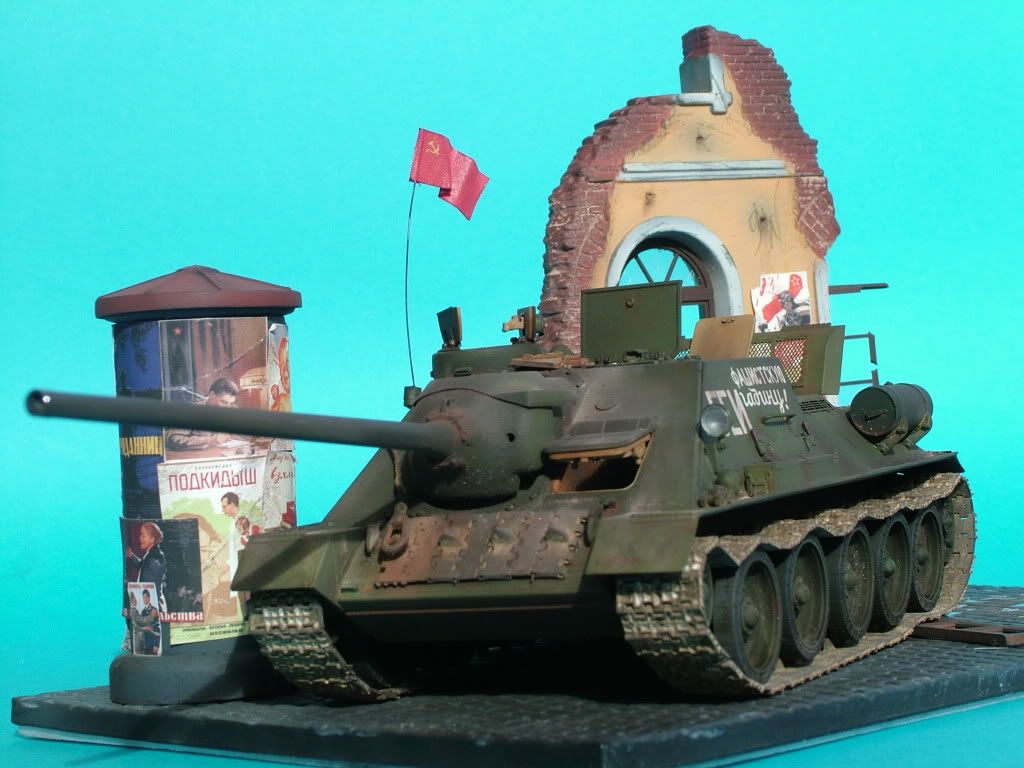
Got the Decals on and things are starting to take shape.
Getting exited to make the final push  through the Kursk Salient and crush the German Snakes~>
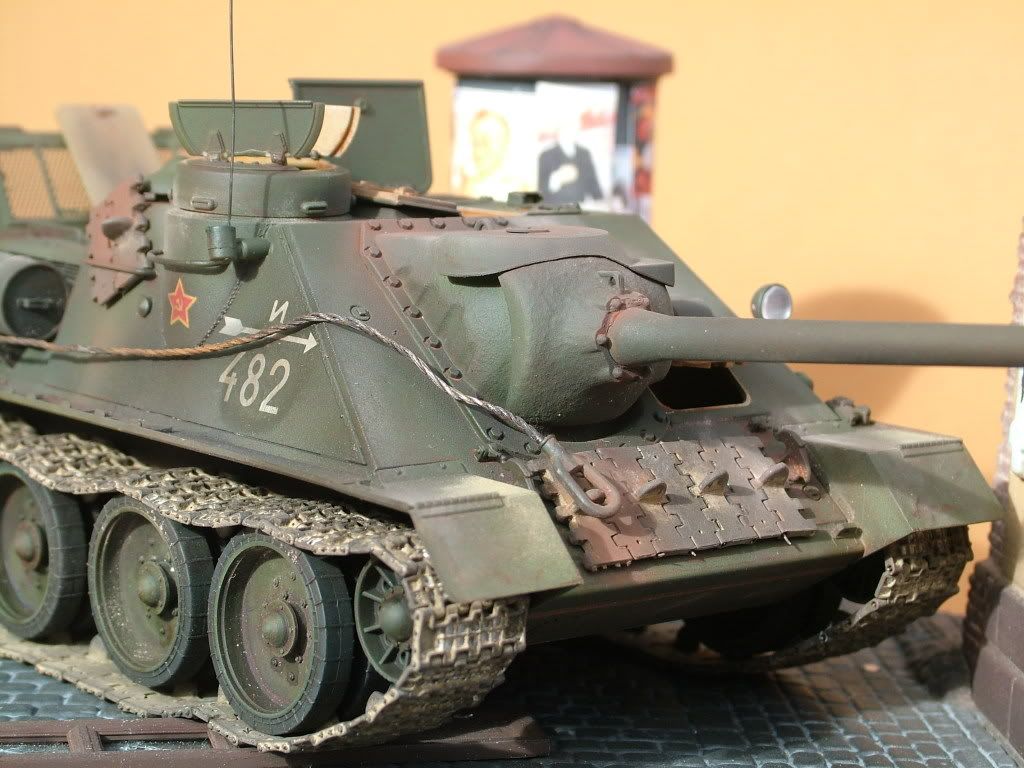
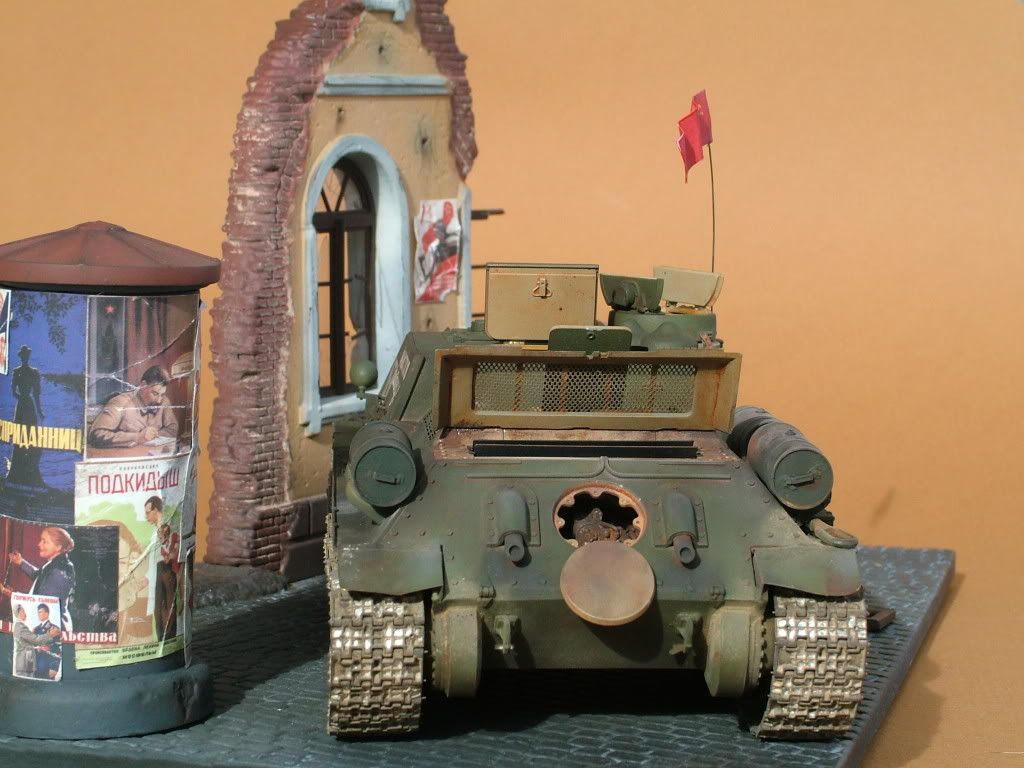
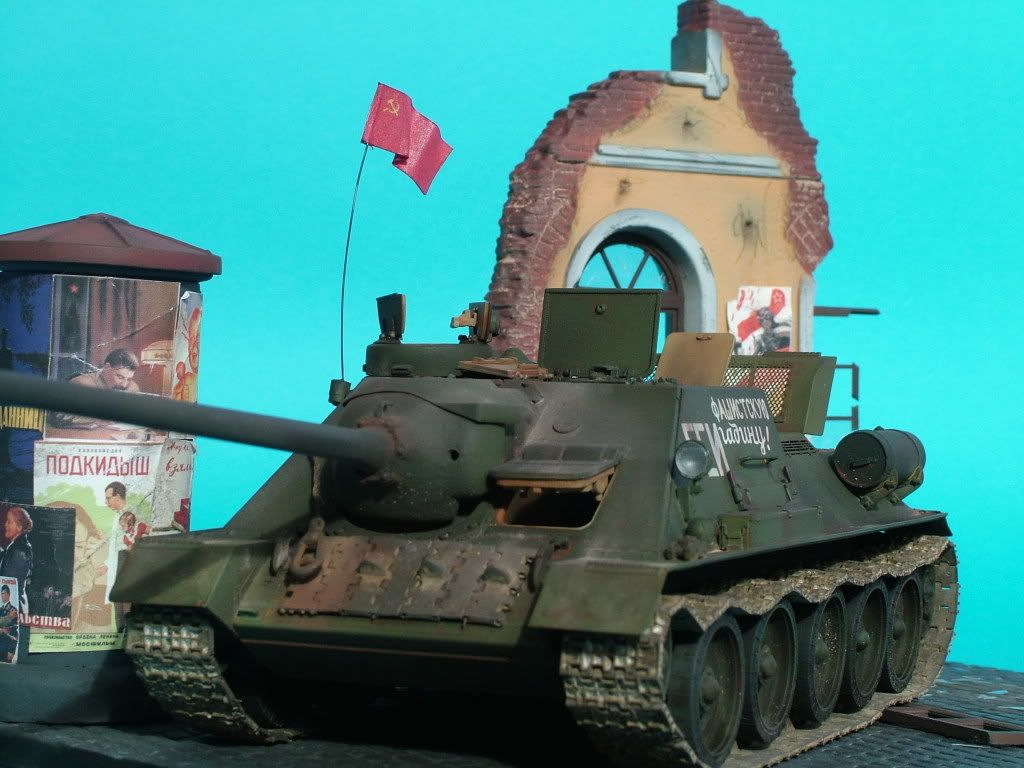
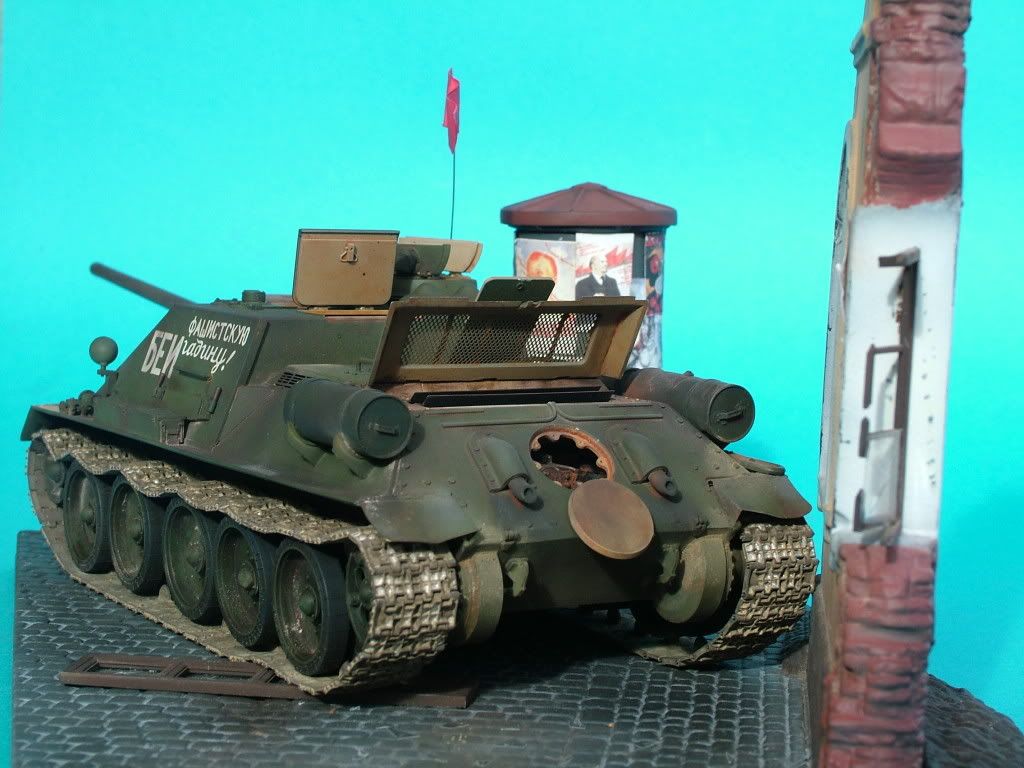
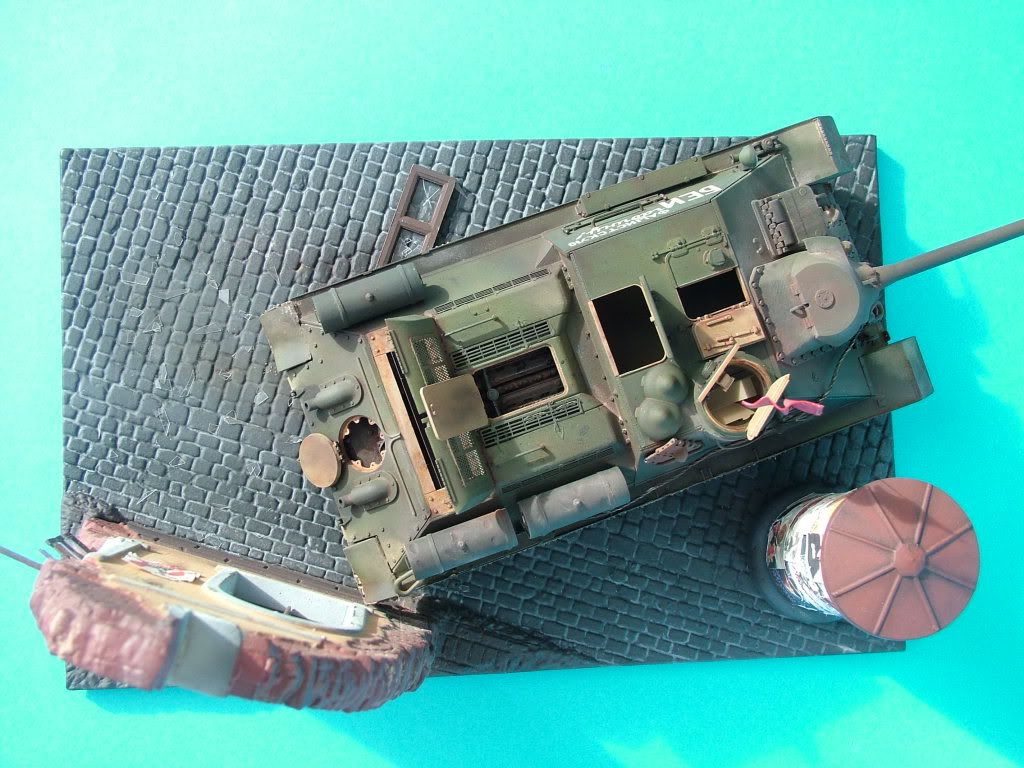
Comander's Coupola depicting regimental Code and Division, the Red Star with Hammer and Sickle indicate this is a Guards unit and Comander's vehicle:
Awaiting the final (2nd) clear coat of Future to seal in the decals...as you can see there is still a little silvering action going on.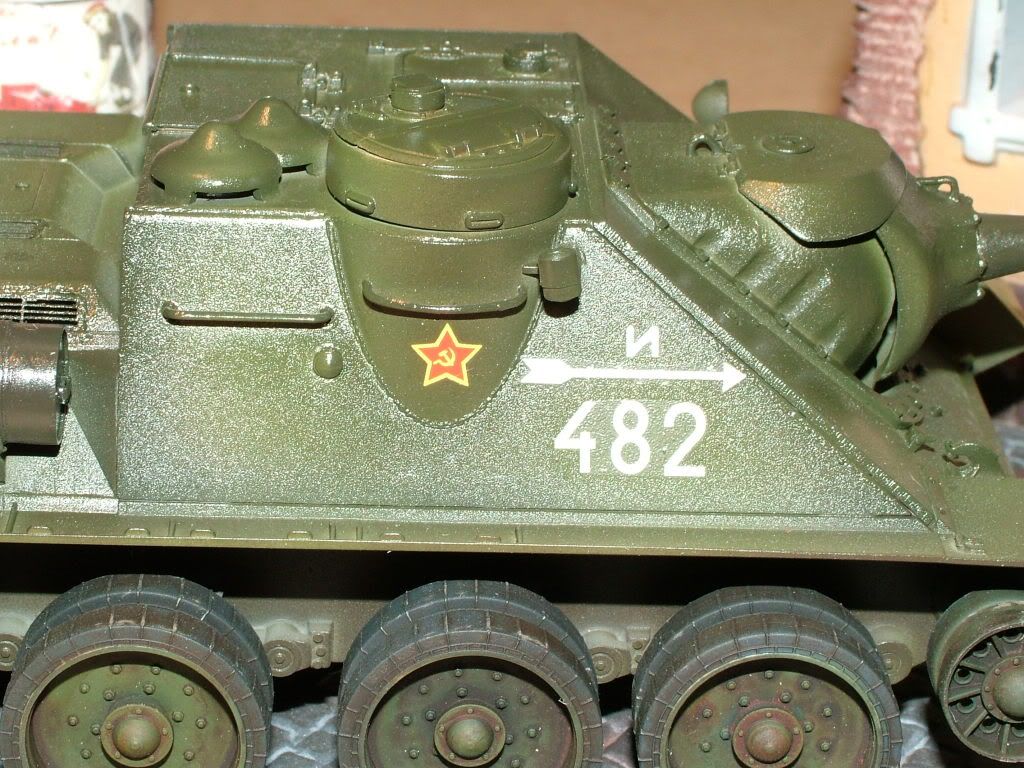
One of the things to point out is that you can realy see the great "rusting" effects on the road wheels (super happy with how those turned out) . The only thng left to do on those is to simulate some axle grease smears and drips which I will make with some glossy varnish and Tamiya Smoke.
Another Angle: The Hammer and Sickle Guards unit /Commander decal was taken from my remaining decals of the T-34/85 build I did a few months ago. Always SAVE your decals...never know when they get handy!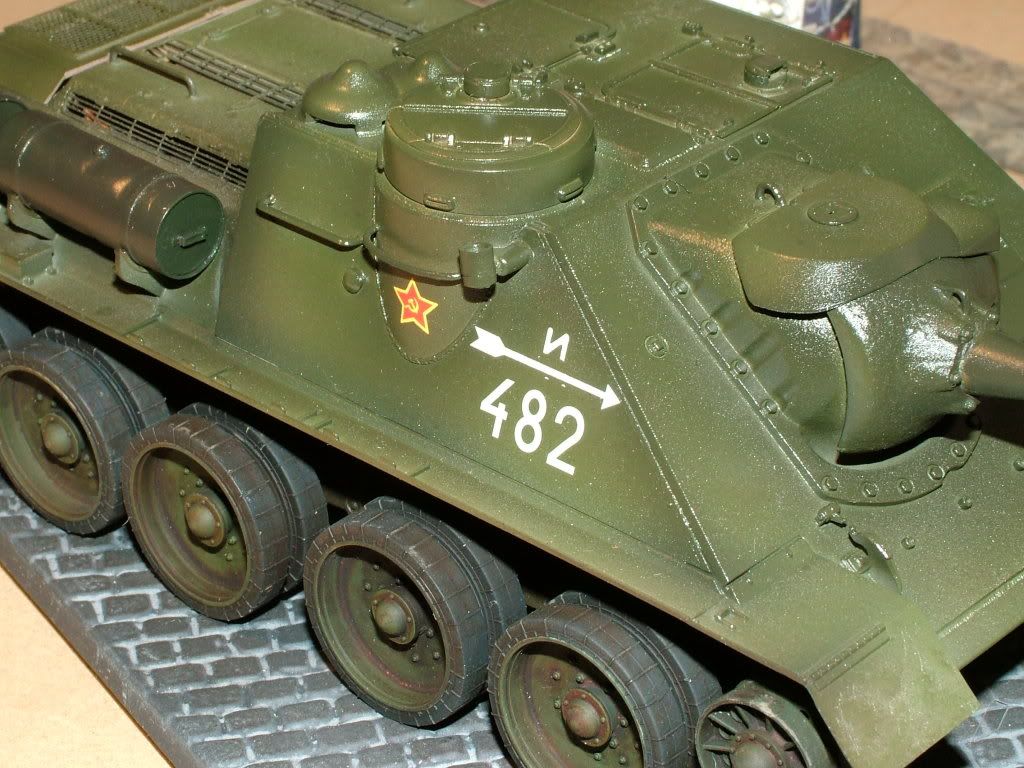
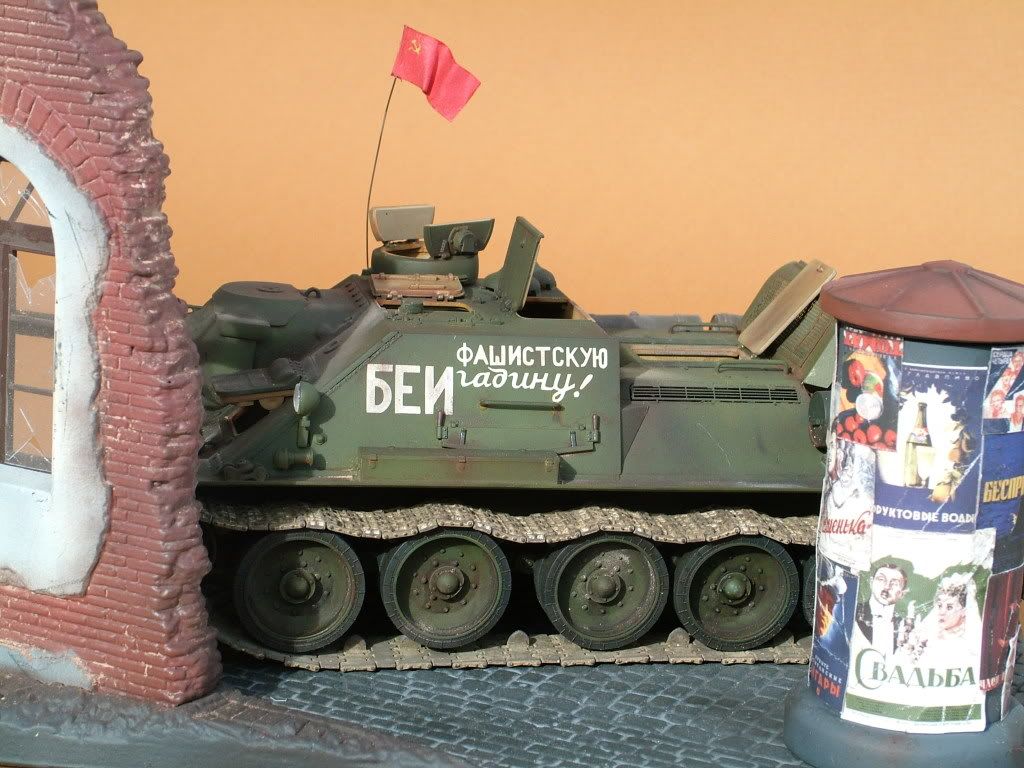
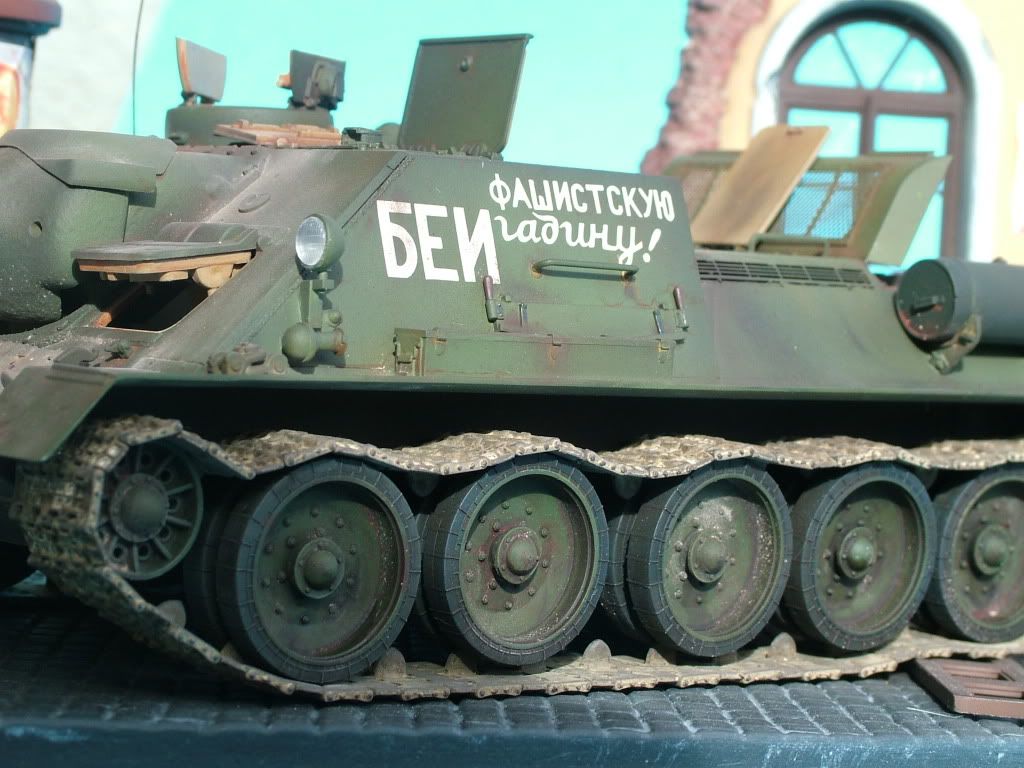
The left hand side Battle Slogan:
"Bey Fashistskuyu Gadinu!" (Fight the Fascist Reptiles!) these came from the spares box off a KV-2 Tank,realy like how it dresses the part on this one!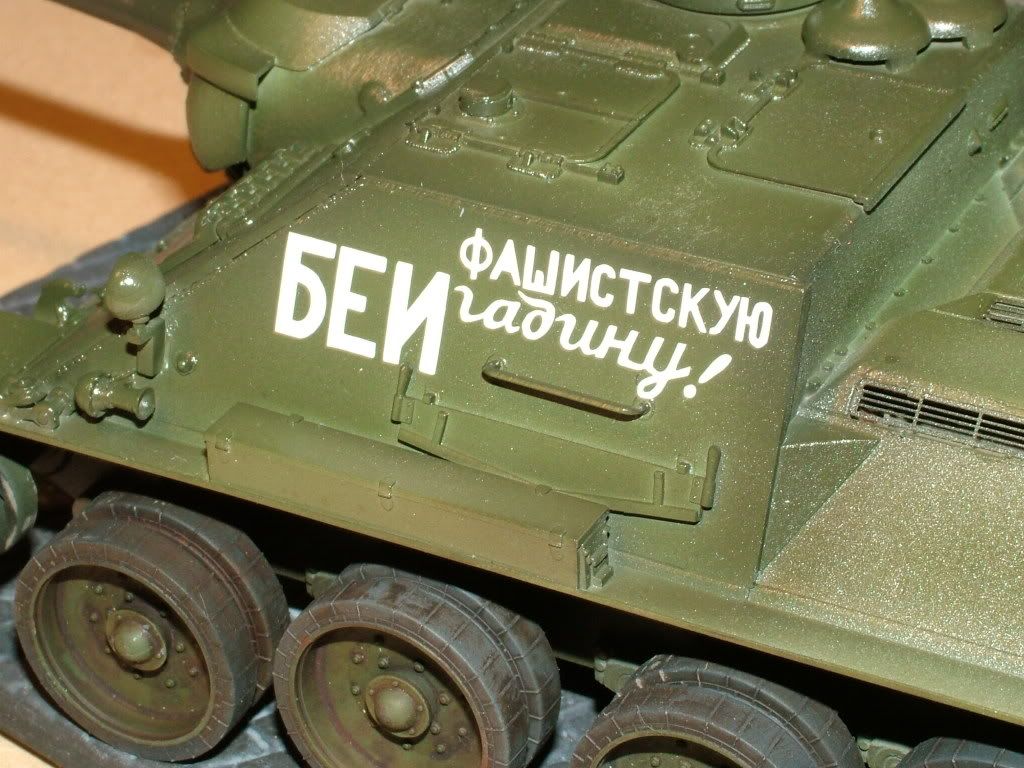
So we are into the home stretch faze,
We will be filtering the monochromatic Green, rust out, dirty up, soot up, oil drip etc.
Here are the ingredients: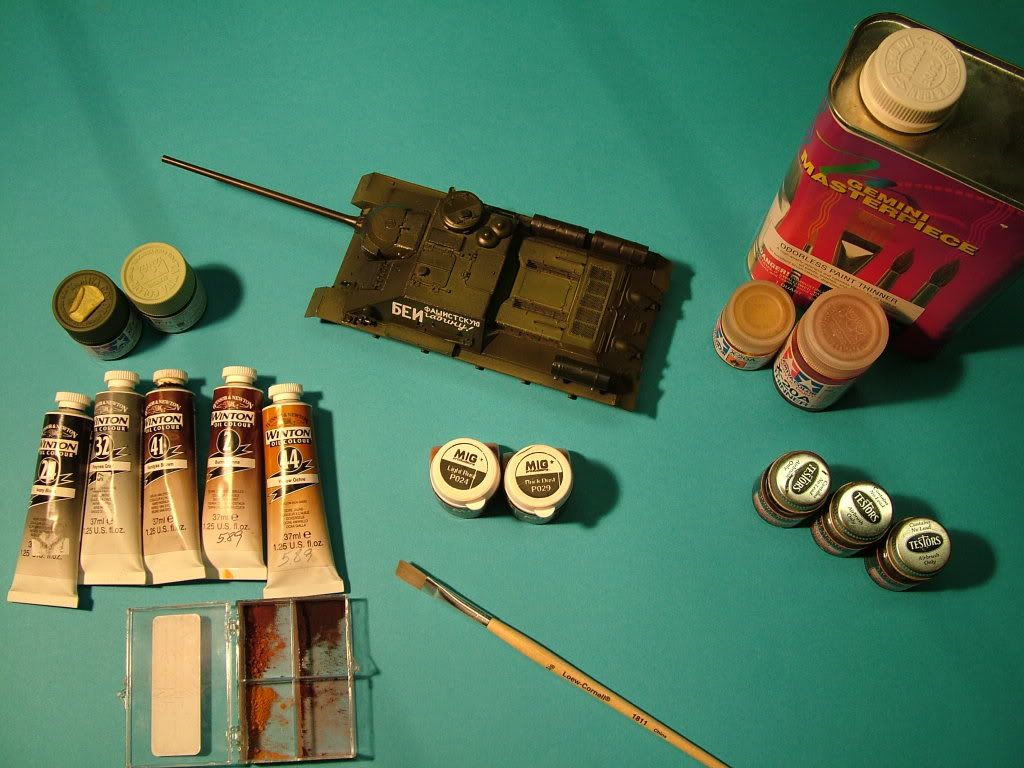
A detail shot of the variations of "Green" and the top/bottom shading: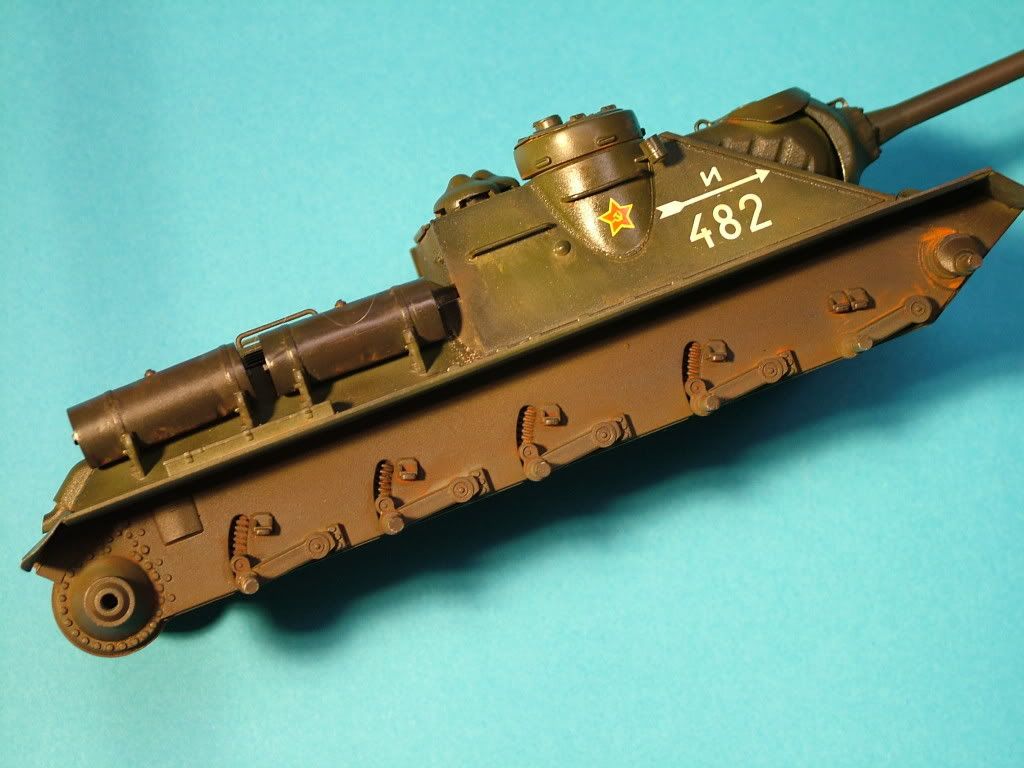
Some of the rusting has started: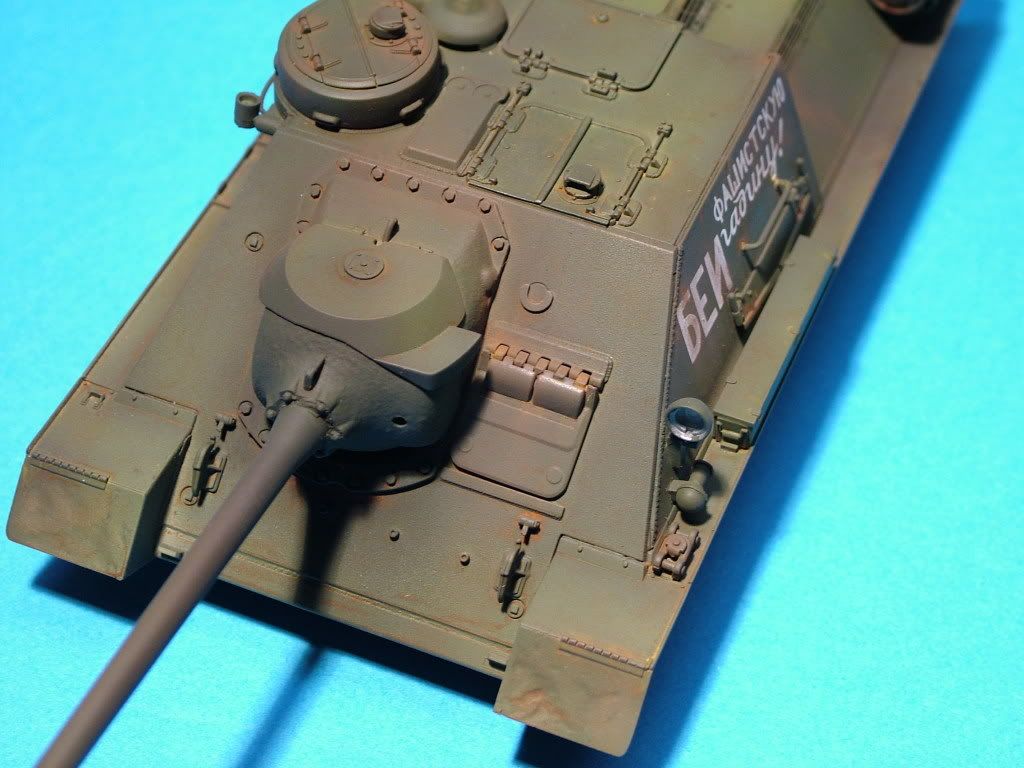
Dust and dirt around the drive chamber, using Mig Brick Dust: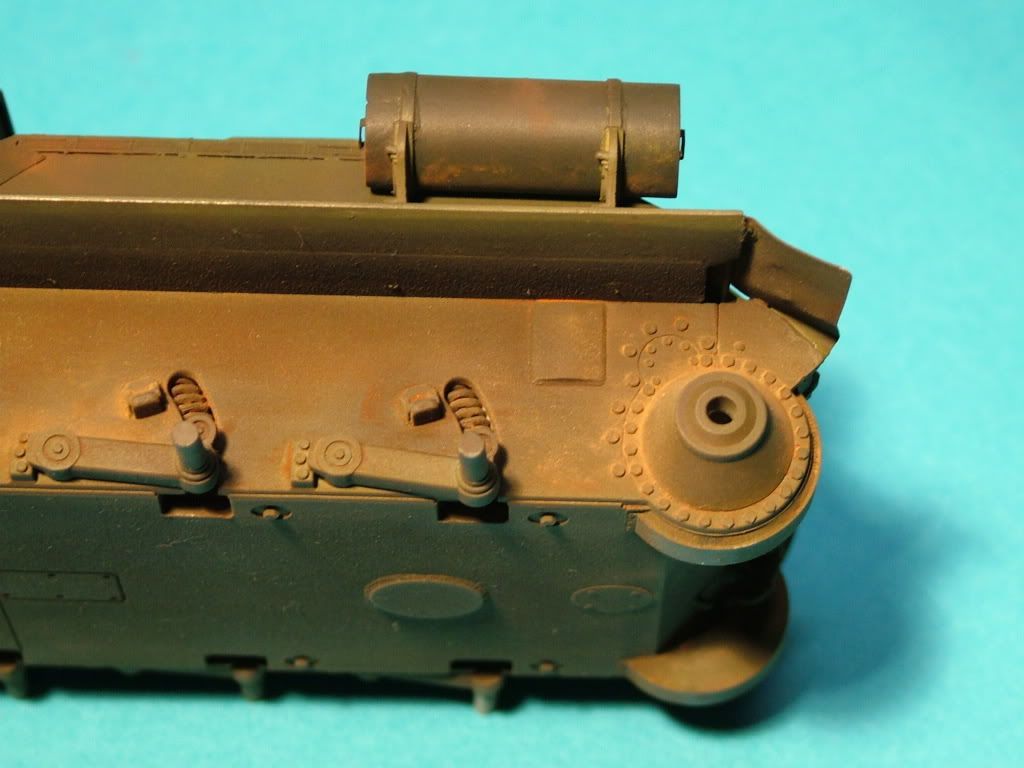
Engine Oil Drips and Spills: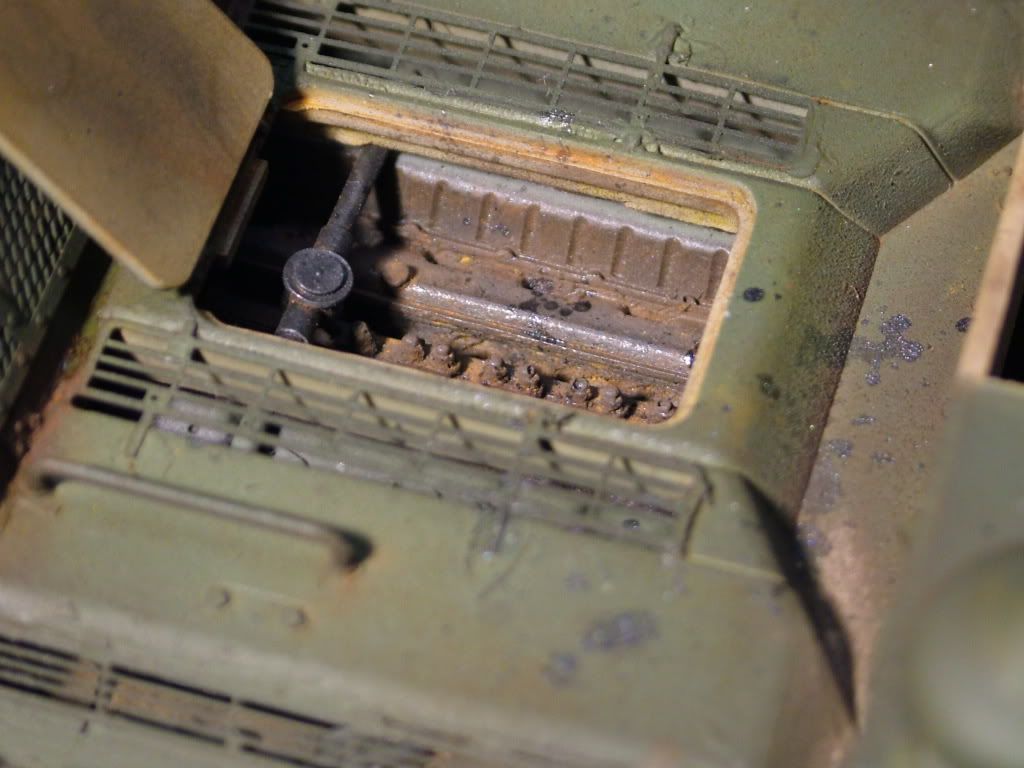
Surprises in store tomorrow 

 :
:
Axle Grease stains in the wheels: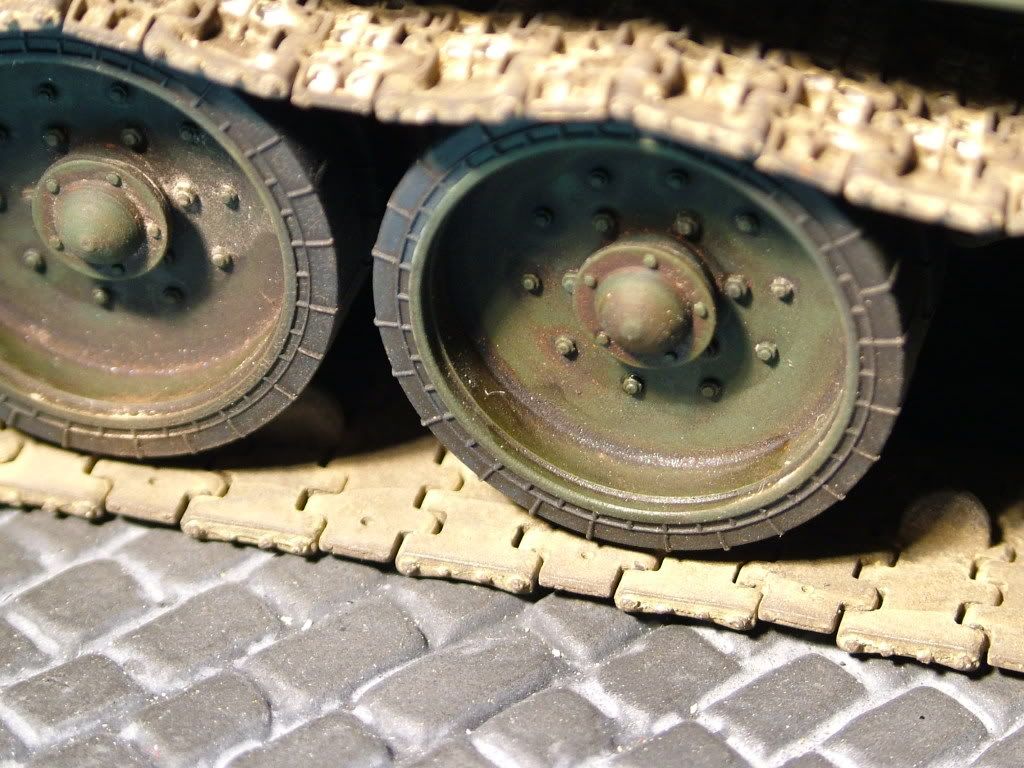
Lets hope the weather holds and sun is shining..............stay tuned .........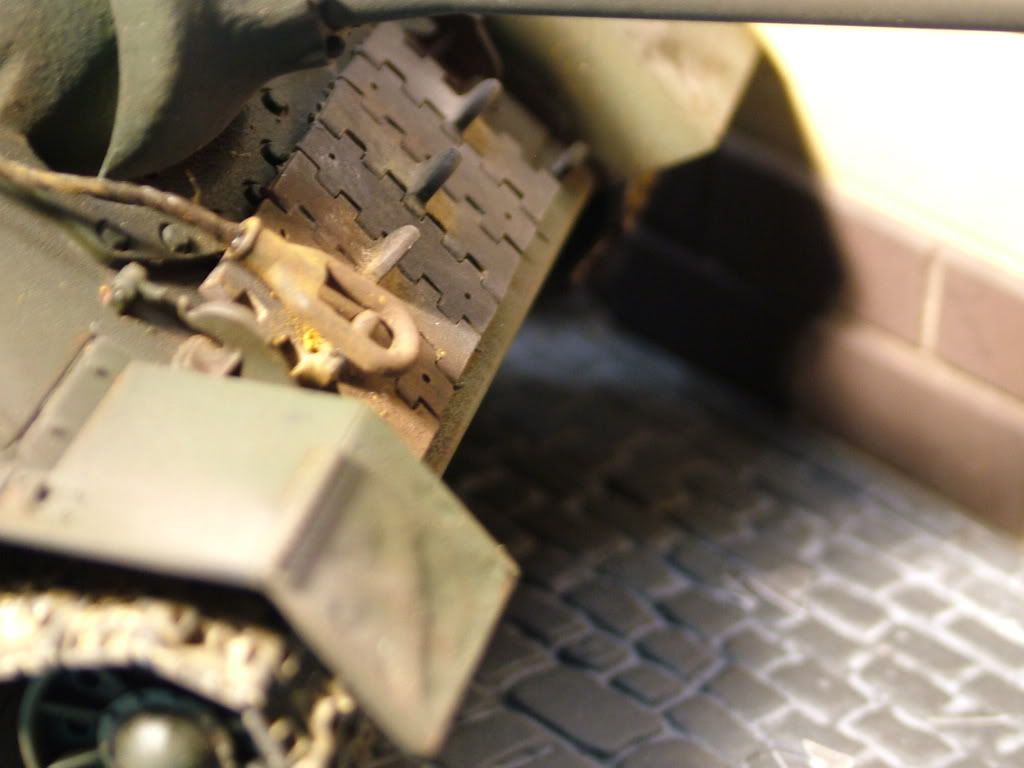


Special thanks to Hans